How to Replace Ignition Coil 1999-2010 Honda Odyssey
Created on: 2013-01-18
How to remove, install, repair, or replace your broken misfiring or damaged ignition coilon 1999-2004 Honda Odyssey models.
-
step 1 :Removing the Engine Covers
- Remove the four 10mm bolts from the upper engine cover
- Lift off the upper engine cover
- Loosen the two plastic clips on the lower engine cover with a flat blade screwdriver
- Lift off the lower engine cover
-
step 2 :Removing the Ignition Coil
- Disconnect the ignition coil wiring harness
- Remove the T40 Torx bolt from the ignition coil
- Pull the ignition coil up and out
-
step 3 :Installing the Ignition Coil
- Push the ignition coil into place
- Insert the T40 Torx bolt into the ignition coil
- Connect the ignition coil wiring harness
- Repeat Steps 2 through 3 for the remaining coils
-
step 4 :Installing the Engine Covers
- Push on the lower engine cover
- Tighten the lower engine cover clips with a flat blade screwdriver
- Push on the upper engine cover
- Insert the four 10mm bolts into the upper engine cover
Tools needed
-
Socket Extensions
Flat Blade Screwdriver
T40 Bit
10mm Socket
Ratchet
Brought to you by 1AAuto.com, your source for quality replacement parts and the best service on the Internet.
Hi, I'm Mike from 1A Auto. I hope this how-to video helps you out, and next time you need parts for your vehicle, think of 1AAuto.com. Thanks.
In this video, we're going to replace an ignition coil on this 2003 Honda Odyssey. We'll just do one, but all six cylinders are basically the same procedure. The front side's very easy. Their backside is easy as well, but you just can't see things as well. You have to do it a little more by feel. The only tools you'll need are a 10 millimeter socket with a ratchet and extension, a flat blade screwdriver, and a T40 Torx driver, and Honda recommends you replace these coils at a hundred thousand miles.
I have a 10 millimeter socket, and I have an extension because one of these, anyways, goes down in there, but there are four bolts that hold the engine cover on here. Now you need a flat blade screwdriver, and there are basically two little clips. Turn them a quarter of a turn counter-clockwise. Now just make sure that they come out and there is another plug on the end here that you have to pull up just firmly and pull that out. Now I'm looking at it from the passenger's side and you can see the coils right down here: one, two, three. Then for the rears, there's actually there's no cover and you can see the tops of the coils. There's one here, two, and three. There's plenty of room to reach back in there and take them out.
First thing, each one has a harness and there's just a little tab that you press in and disconnect the harness. I'm just going to do one to show you. I'm using a T40 Torx bit and a socket, and there's plenty of room right in here. Just loosen this bolt up. I'm going to remove it, and then grab your coil, shake up and down a little bit, pull it all the way out.
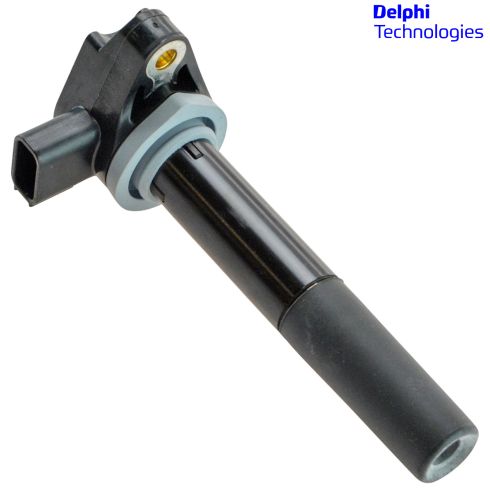
Here's a new coil from 1A Auto. It's an exact replacement. Put it in, right down on. You'll feel some resistance, just push it down on firmly and put your screw in. Start it with your fingers; T40 bit back in and tighten on their firm, not too tight, though. Reconnect and repeat for the other cylinders.
Now you bring this down. You put your thumb on here. You can see that go right in, see these plugs go right in. Push it down on, push that into place. Okay, and turn these a quarter turn clockwise. Put the engine cover back in place. I'll spare you some of this. I'm just tightening up those bolts. I basically just put them in by hand first, make sure they're going in correctly. Then just tighten them up firm. You don't have to have them really that tight at all, and you should be all set.
We hope this video helps you out. Brought to you by www.1AAuto.com, your source for quality replacement parts and the best service on the Internet. Please feel free to call us toll-free, 888-844-3393. We're the company that's here for you on the Internet and in person.
Shop Products


How to Replace Ignition Coils 1998-2012 Ford Crown Victoria
Watch this video to learn how to install ignition coils on your 1998-2012 Ford Crown Victoria.
