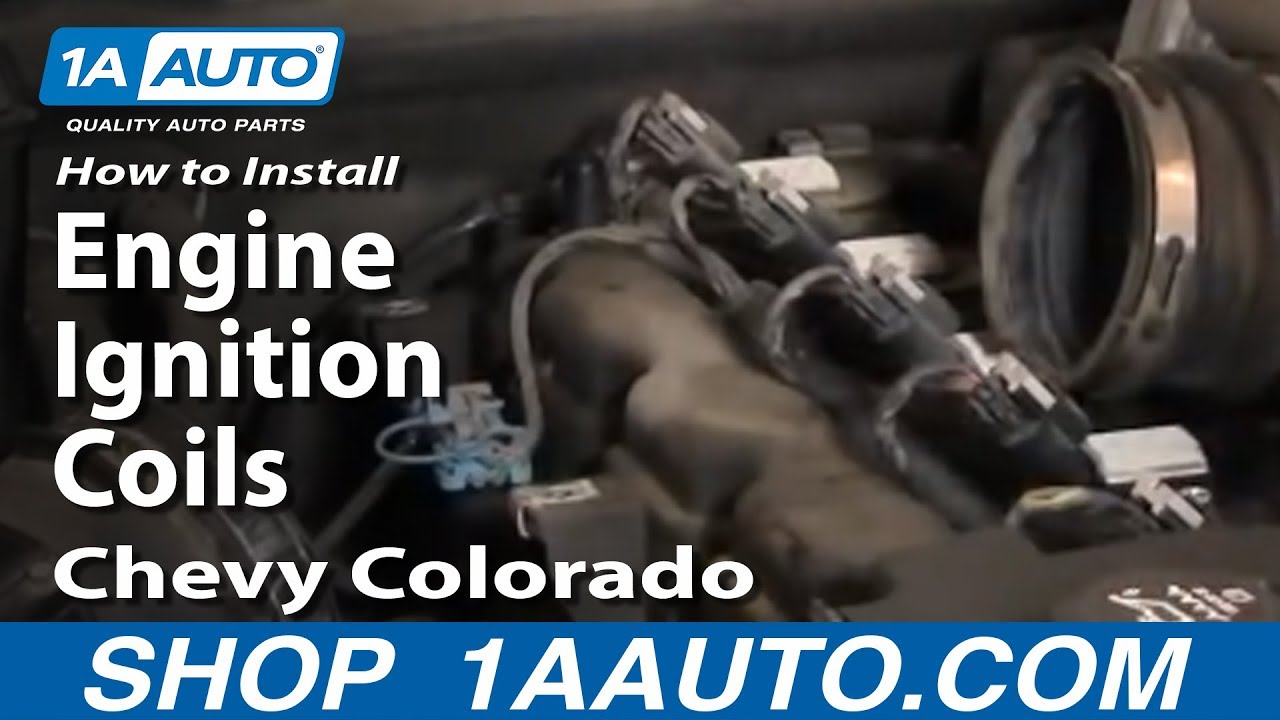
How to Replace Ignition Coil 2004-06 Chevy Colorado
Created on: 2012-11-01
Check out this video on how to replace an ignition coil on your 04-06 Chevy Colorado.
-
step 1 :Removing the Air Intake Box
- Remove the two 8mm bolts holding the top of the air box
- Remove the two hose clamps with a flat blade screwdriver
- Twist and remove the two vacuum lines
- Pull the air intake box up and out
- Twist the air intake hose collar off
-
step 2 :Removing the Ignition Coil
- Disconnect the locking tab with a flat blade screwdriver
- Disconnect the ignition coil wiring harness
- Remove the 10mm bolt from the engine coil
- Pull the ignition coil up and out
-
step 3 :Installing the New Ignition Coil
- Insert the ignition coil into place
- Insert and tighten the 10mm bolt
- Connect the ignition coil wiring lead
- Replace the locking pad
-
step 4 :Installing the Air Intake Box
- Twist the air intake hose collar into place
- Insert the air intake box into place
- Insert the two vacuum lines
- Insert and tighten the two hose clamps with a flat blade screwdriver
- Insert and tighten the two 8mm bolts holding the top of the air box
Tools needed
-
10mm Socket
8mm Socket
Flat Blade Screwdriver
Ratchet
Socket Extensions
Brought to you by 1AAuto.com, your source for quality replacement parts and the best service on the Internet.
Hi, I'm Mike from 1A Auto. I hope this how-to video helps you out, and next time you need parts for your vehicle, think of 1AAuto.com. Thanks.
In this video, we're going to show you how to replace ignition coil. On these vehicles, they recommend you replace these coils at 100,000 miles. Also, sometimes if your engine runs a little rough and turns the "check engine" light on and you get a code that says, "Cylinder 1 or Cylinder 3 or something misfiring," that's usually a coil going bad. It is a pretty easy replacement. You'll need a ratchet extension with 8mm and 10mm sockets. If you don't have an 8mm socket, a flat blade screwdriver can help you get the clamps off as you'll see.
Working from the passenger side, you want to remove two bolts that hold the top of the air box: one here and one right here. Now to remove this, you want to remove this intake tube which is a clamp here and a clamp here. Remove that tube and then loosen both this one and this one to pull this apart. I'll speed this up a little bit. You can either use a flat blade screwdriver or an 8mm socket with a ratchet and extension to undo those clamps. This also has a small vacuum line on here. Twist and pull that off, and then this goes up, and there's also a line right back here. Just pull off of there.
This big vehicle has been sitting for a while, so I'm just using a vacuum cleaner to clean up the vacated mouse house that's sitting on the intake. Okay, then take, twist, and get this collar off here. You can see here are our five coils. Pick any one of them, and just remove the 10mm bolt. Each of them have a little gray clip that you just pull on. Use a screwdriver. There's a little tab right in the center. Push the tab down and pull the clip right off.
Then there's just a tab for your thumb. Press that. Remove the lead, remove this 10mm bolt, and then, once you have the bolt removed, just move it around, shake it up and down a little bit, and then the coil comes up and out.
The new coil from 1A Auto is exactly the same as the old one. Put it right down in. You want to just push it straight in. Tighten up the 10mm bolt. Plug your lead back in, and then put the locking tab back in place. Repeat that for any cylinders you need. The cylinder order on these is usually just from front to back: 1, 2, 3, 4 and 5. If you get a code like "number 3 cylinder misfiring," that's usually a bad coil, so you'd replace the number 3 coil.
To put it back together, put this on there. There's a little notch that should stick up right there. I've got my two bolts already kind of in there. Right here is that hose. Push that hose down first. Put this down in place. I'm just kind of maneuvering it into this hose here. Push it into place and twist this hose a little bit off. Push it down onto here. Get it good and tight on there. Hook up the vacuum hose. Use an 8mm socket to tighten up. Just inspect where the hoses go and their housings. Make sure they're nice and tight, and then tighten up our clamps. Again, you can use either a flat blade screwdriver or an 8mm socket. Then we go back to our 10mm socket and then tighten them up and you're all set.
We hope this video helps you out. Brought to you by www.1AAuto.com, your source for quality replacement parts and the best service on the Internet. Please feel free to call us toll-free, 888-844-3393. We're the company that's here for you on the Internet and in person.
Shop Products


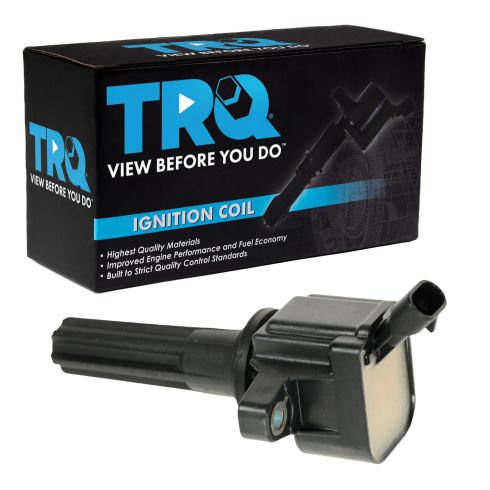
Ignition Coil TRQ ICA61815
Part Details:
- No
- Male
- No
- No
- 3
- Female
- Blade
- 30000 VDC
- Direct Replacement
- Black

How to Replace Ignition Coil 1999-2000 Chevy Tahoe
This video shows you how to install a new ignition coil in your 1992-2000 Chevy Tahoe.
