
How To Replace Ignition Coils 2003-07 Cadillac CTS
Created on: 2014-12-04
Check out this video to learn how to replace the ignition coils on your 03-10 Cadillac CTS. 1A Auto shows you how to do it yourself!
-
step 1 :Loosening the Intake Manifold
- Remove the oil fill cap
- Remove the engine cover
- Remove the 13mm bolts from the top of the intake manifold
- Loosen the air intake hose clamp
- Pull the air intake box off
- Loosen the stud with a 10mm wrench
- Loosen the 18mm bolt to pull back the bracket from the hose
-
step 2 :Removing the Ignition Coil
- Loosen the 10mm bolt on the ignition coil
- Pry off the ignition coil sensor harness
- Lift the intake manifold
- Remove the ignition coil
-
step 3 :Reinstalling the Ignition Coil
- Insert the ignition coil into place
- Connect the ignition coil sensor harness
- Tighten the 10mm bolt to the ignition coil
-
step 4 :Tightening the Intake Manifold
- Preliminarily tighten the 13mm bolts to the top of the intake manifold
- Torque the 13mm bolts to 20 foot-pounds
- Tighten the stud with a 10mm wrench
- Tighten the 18mm bolt
- Press the intake box to the intake manifold
- Tighten the hose clamp
- Insert the engine cover in place
- Tighten the oil cap
Tools needed
-
13mm Socket
Flat Blade Screwdriver
Torque Wrench
18mm Socket
10mm Wrench
5/8 Inch Spark Plug Socket
Ratchet
Brought to you by 1AAuto.com, your source for quality replacement parts and the best service on the Internet.
Hi, I'm Don from 1A Auto. I hope this how-to video helps you out, and the next time you need a part for your vehicle, think of 1AAuto.com. Thanks.
In this video, we're going to show you how to replace an ignition coil in this 2006 Cadillac CTS. It has the 2.8-liter V-6 engine, and we show you how to replace one of the harder ones, which requires you to pull up the intake plenum. You'll need new ignition coils from 1AAuto.com, various wrenches and sockets, flat blade screwdriver, and a torque wrench to put things back together.
Twist out your oil fill cap, and then pull off your engine cover. Now there's a series of 13mm bolts going all the way back, and you want to just go ahead and remove those. The ones in the back are a little hard to remove, but you want to at least loosen them up as much as you can. For the back ones, we use a small breaker bar and a shallow socket. Using a flat blade screwdriver, loosen up this hose clamp and then pull the air intake box from the front of the intake manifold. Using a 10mm wrench, just loosen up this stud and then twist it free. Then loosen this 18mm bolt. You want to loosen it enough until you can pull that bracket back.
Okay, with all five of these bolts out and that one loosened up, this bracket detached and this detached. You should be able to lift up your manifold enough to access all the coils. Loosen up the 10mm bolt on your ignition coil, and you want to get it out as much as you can and pry out on the tab on this harness and then slide the harness free. Lift up on your intake manifold and pry the ignition coil up, and now you can loosen that bolt more and pull the ignition coil free.
Now, to replace the ignition coil, we can show you on the other side. Just lower the ignition coil into place and twist the bolt back in. Make sure the ignition coil is all the way down, and reconnect the harness. You can see that if you're doing it on this side, you will need to pull that censor out. It just makes it a lot easier, and then it just pushes back in when you're done.
Once you have the harness back in place, push that clip back in. Now you can replace these bolts. We'll fast-forward as Mike does that. Now tighten each of those up preliminarily. Then just torque each of them to 20 foot-pounds. This back one, you just want to tighten firmly by hand, put the stud back in place, and tighten it up with the wrench. Then tighten up that 18mm bolt. Push the air intake box back onto the manifold, and then tighten up that hose clamp. Then take your engine cover, push it back down into place, and replace the oil fill cap.
We hope this video helps you out. Brought to you by www.1AAuto.com, your source for quality replacement parts and the best service on the Internet. Please feel free to call us toll-free, 888-844-3393. We're the company that's here for you on the Internet and in person.
Shop Products


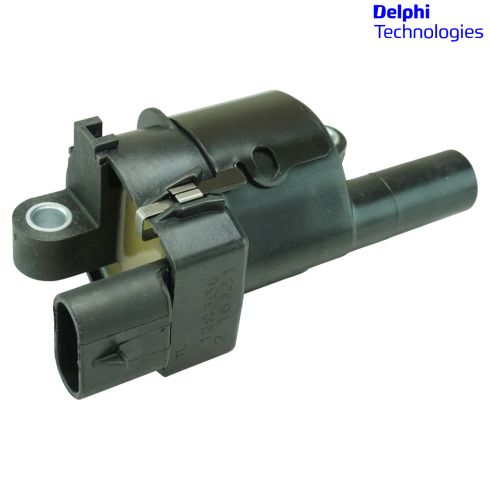
Ignition Coil Delphi GN10165

How to Replace Ignition Coil 1999-2000 Chevy Tahoe
This video shows you how to install a new ignition coil in your 1992-2000 Chevy Tahoe.
