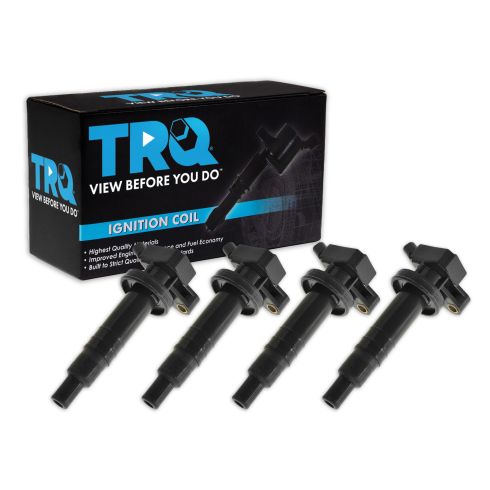
How to Replace Ignition Coils 2003-08 Toyota Matrix
Created on: 2020-08-28
This video shows you how to install new ignition coils on your 2003-2013 Toyota Matrix.
Tools needed
-
Dielectric Grease
Drill
10mm Socket
5/8 Inch Spark Plug Socket
Ratchet
Pocket Screwdriver
Okay, friends. One of the first things we need to do is get under the hood. Once you're under the hood, just make sure it's not super hot because we don't want to deal with a hot engine. Go ahead and remove this cover right here by removing your two 10-millimeter headed nuts. Okay, there should be one right here. Ours is missing. Go ahead and carefully lift that up and set it aside.
Awesome. Now that the cover's off, we have a clear view of our ignition coil harness right here. We need to go ahead and squeeze on this tab right here and try to draw it off. If you can't squeeze hard enough, go ahead and use a pocket screwdriver, come right underneath this ear, carefully lift it, and then draw this away. Every time I remove an electrical connector, I always look to see if there's any funny colors. If there is, it's probably corrosion, and that's gonna cause restriction. This looks good. Let's set it aside. The next thing we're gonna do is remove our 10-millimeter headed bolt right here. Set that aside as well. Go ahead and grab onto the coil, twist, and lift.
All right friends. Now, it's going to be time to install our brand new coil. Install the coil, I always like to put a little bit of dielectric grease right down inside this area here. It's going to keep the moisture away, and of course, along this area right there also to keep the moisture away. Right in there. Along here. You don't need very much. Go ahead and set that down on there and press it down onto the spark plug. Let's put our bolt in there. Always want to start these in by hand, of course. Now, we'll snug it up. Just bottom it out, give it a teeny bit more. That's good. If you want to use a little bit of dielectric grease inside of your connector, we'll call it your prerogative. Aside from that, go ahead and press it on, listen for a click. Give it a nice tug. Make sure it's secure. We would just do the same down the line.
Now, when you get down to this portion of this, you're probably gonna see that this black piece is in the way. There's a 10-millimeter bolt here and a 10-millimeter headed nut right there. We're going to remove the pair of those, and then you can lift this up and out of the way.
All right. Now that we have everything nice and securely connected, we have this back on there as it should be, let's go ahead and put this cover back on. Line up the holes with the studs coming off your engine. Put on your nut, and then of course, snug it up. Do the same to the other one if you have one.
Okay, friends, the next thing that we need to do is carefully start up the vehicle. We're going to come right back out here and we're going to watch the engine. Make sure it's not shaking around. If it's shaking around, you have a misfire. There's a possibility that maybe you didn't plug something in. Aside from that, shut the hood, hop back in the vehicle. Make sure there's no check engine light, and take it for a road test.
Shop Products

Chevrolet Toyota Pontiac 4 Piece Ignition Coil Set TRQ ICA61458
- 4 Piece
- (4) Ignition Coils
- Direct Replacement
- Black

How To install Replace Ignition Coils 2-5L 2002-06 Nissan Altima
Learn how to replace ignition coils on your 02-06 Nissan Altima. 1A Auto will guide you with this video.


