How to Replace Inner Tie Rods 2004-14 Mazda 3
Created on: 2018-09-28
Inner Tie Rods - How to repair, install, fix, change or replace a broken, busted, bad, loose, or damaged tie rod on 04, 05, 06, 07, 08, 09, 10, 11, 12, 13, 14, Mazda 3.
-
step 1 :Removing the Wheel
- Break the lug nuts loose with a 21mm socket and breaker bar
- Raise the vehicle and secure it on jack stands
- Remove the lug nuts the rest of the way
- Remove the wheel
-
step 2 :Removing the Outer Tie Rod
- Soak the inner tie rod mounting nut with rust penetrant
- Do the same for the jam nut
- Use a 24mm wrench to break the jam nut loose
- Use a 14mm socket to remove the outer tie rod end mounting nut
- Hammer the knuckle where the tie rod goes through it to release it
- Remove the outer tie rod from the inner tie rod
-
step 3 :Removing the Inner Tie Rod End
- Remove the jam nut
- Remove the outer boot clamp
- Cut and remove the inner boot clamp
- Use a small flat head screwdriver and pry the boot up, spray rust penetrant inside
- Pull the boot off
- Inspect the boot for tears or holes
- Slide the inner tie rod end tool wrench type adapter and place it on the inner tie rod
- Slip the pipe part of the tool over and lock it on to the wrench piece
- Use a 1/4 inch ratchet or breaker bar to break the inner tie rod loose
- Remove the inner tie rod
-
step 4 :Reinstalling the New Inner Tie Rod End
- Apply a small amount of thread locker on the threads
- Install the lock washer
- Start threading in the inner tie rod in by hand
- Make sure the lock washer stays aligned with the two notches in the steering
- Insert the tie rod tool
- Snug it up by feel, do not pull on it very tight
- Fold the lock washer over to lock the tie rod in
- Remove the jam nut
- Pack the inner tie rod end with as much grease as can fit in there
- Apply some silicone paste or grease to the ends of the bellow boot
- Slide the bellow boot back on the tie rod
- Slip the inner part over the steering rack, it will lock in place
- Reattach the old outer boot clamp
- Use a plastic cable tie to secure the inner part of the boot
-
step 5 :Reinstalling the Outer Tie Rod End
- Line up the jam nut as close as possible to where it was on the old inner tie rod
- Apply anti-seize on the threads
- Insert the outer tie rod all the way to the jam nut
- Insert the outer tie rod though the knuckle
- Install the castle nut
- Use a 16mm socket and snug it up
- Install the cotter pin
- Bend the ends of the cotter pin
- Tighten up the jam nut with a 24mm wrench
-
step 6 :Reinstalling the Wheel
- Install the wheel back on
- Thread on the lug nuts by hand
- Lower the car on to the ground
- Torque the lug nuts in a star pattern to 87 ft-lbs
- Go around and check the torque again
Tools needed
-
Socket Extensions
Torque Wrench
14mm Socket
Rust Penetrant
16mm Socket
Jack Stands
21mm Socket
Inner Tie Rod Removal Tool
24mm Wrench
Flat Blade Screwdriver
Ratchet
Floor Jack
1/2 Inch Breaker Bar
Hi, I’m Mike from 1A Auto. We’ve been selling auto parts for over 30 years!
Hi everyone, this is Sue from 1A Auto. Today we're installing an inner tie rod end from 1A Auto on our '07 Mazda 3 sedan. If you need this part or any other part for your car, click on the link below and head on over to 1AAuto.com.
Keep in mind, before this repair, set up an appointment with your local alignment shop, and you're going to need an alignment afterwards. We're going to loosen the lug nuts with the weight of the car on the tire, and it's a 21 millimeter. Now you're going to raise the vehicle with a jack and jack stands, or a two post lift, if you have that. Now I can take the lug nuts off. It’s up in the air.
This is the inner tie rod end. It has a bellow boot that covers the end that screws into the power steering rack and this is your outer tie rod end. This is a jamb nut, this is where adjustments are made for a tow on a car. I'm going to start by spraying the jamb nut and the upper part of the outer tie rod end. Let that soak. I'm going to break the jamb nut free first, it's a 24 millimeter on this Mazda3. Now that that's broken free and spinning, I have to undo the top nut to the outer tie rod end.
Take this cotter pin out and discard it, because we're going to use a new one. The nut is a 14 millimeter socket. It’s kind of rusted so just wiggle it on down there. Now I'm going to break it free. Now I'm going to take a hammer and hit the end of the knuckle, where the tie rod end goes in, to pop the stud out. Now we remove the jam nut, and I'm going to remove the clamp on the outer part of the bellow boot, and I'm going to have to cut the inner clamp off. I'm just going to try to pinch and tweak it so that it breaks free. You cannot reuse it. There you go.
For easy access, I take a pocket screwdriver, a flathead screwdriver, I'm going to try to pry this bellow boot up, and then I'm going to spray. See if that works all the way around. Now I'm going to grab the bellow boot from inside, and hopefully just pull it right off. At this point, I'm checking my bellow boot. Make sure there's no tears and no holes. You don't want any rain, salt from the winter, dirt getting inside the rack and pinion. This is an inner tie rod end tool. This is the tool I'm going to be using. This is like a wrench and it goes over the hex on the back of the inner tie rod end. Rest it on there, and then I'm going to slide it into the slots and turn the lock. The lock thing just turns like that. Then I'll use a nice half inch ratchet and twist it free. Now with it all set up right. Got it. So now you can see me turn it. That's your inner tie rod end.
Here we have our inner tie rod end to our '07 Mazda3 from 1AAuto.com. It comes with a new jamb nut, grease, once you install it you'll pack the inner joint, and a lock. The lock slides on the end, on the power steering rack side. Here we have the one that I took out. Now, I don't know if this is factory or aftermarket. There's no way you're telling if the car has some high miles on it, but they are identical in height and length, and that's what you need to look for. Whenever you do tie rod ends or anything in suspension, you want it to be the same. If you need this part or any other part for your car, click on the link below and head on over to 1AAuto.com.
Now we have our new inner tie rod end, and the new one came with a lock. I thought it was kind of funny when I took the old one off, the lock was missing. So that tells me it's not factory. Someone else had installed it and neglected to install a lock. This is kind of self explanatory. See the key ways. They sit right in those notches that the manufacturer has cut out. So I'm going to put a dab of thread lock on there, and then I'm going to install it.
So I have some thread lock on there, and I'm just going to hand thread it in. I'm going to try to line up that lock and those notches before that tie rod end bottoms out. There we go. Hold that with my fingers. Bring that down. Perfect.
Now I can install my inner tie rod end tool. Tighten this up. Now, it's important when tightening this, not to rank on it, because you'll damage the gears inside that power steering rack. So I'm bottomed out here. I'm going to give it like a quarter of a turn, and go by feel. That's nice. There is no torque for that. There we go. Then I get a long brass punch, and I raise the vehicle up and I'm going to fold the lock pin over. It's like a lock washer.
Now I'm going to move down to another angle, a different side. I'd like to get as many of them bent over as I can. There we go. That's good. Two tabs over, secure. You got to take your jamb nut off. Now we got to pack the inner tie rod end with the grease that's provided. I'm just going to place it in there, and then I'm going to pack it in with my fingers. Rotate the ball around, and make sure I can maybe push some of that grease into the back of the joint, as much as I can in there.
To help out the person that does the alignment, I'm going to put some silicone paste right there on that bellow boot. Trust me, if they don't say thank you, they mean it. If the boot is dry on the tie rod end when they're spinning it to make the adjustment on the tow, if the boots dry it sticks to the tie rod end. I've seen many of times where they're twisted like a spiral. What that ends up leading to, is torn bellow boots, and then you're looking at a $1000 rack and pinion, so let's not do that.
It has a notch and it just clicked right into the notch, and we're going to slide the inner part over. There we go. I just squeeze my clamp, reuse my old clamp, and put it on. Take just a plastic tie, I'm going to slide that in. Put it right on that plastic groove, over the plastic bellow boot. There we go. Make sure it's in that groove, and make sure it's tight. Cut her off.
To assure that I have this as close as to the alignment that it was at before, I drive it to my local alignment shop. I want to put the jamb nut an equal amount, all the way in, to line up with that rust line. So I know I got quite a way to go, so I'm just going to bring it in until I think I'm close. Line up my old tie rod end, looks like it could be getting there. I'm going to line it up by lining the end of the tie rod end. Making sure the threads are the same length, and they are.
I can see that I need to turn it a couple more turns. I feel good with that. Now I'm just going to put some anti-seize on the threads. Now install the outer tie rod end. Thread it on, up to the jamb nut. Now I'm going to bring it up, put it in the knuckle, and install my castle nut. The new one is a 16 millimeter socket. There is no torque for this. I just really want it down tight. There we go.
Now I can install my cotter pin. Just fold that over. That just stops the nut from possibly, on back threading out. I like to squeeze all sharp edges down, only fair to somebody. Now we're going to take our wrench and tighten up the jamb nut. You want that snugged right down, because you do have to drive it to the alignment shop. That's a 24 millimeter wrench, same as the old one. There we go. Once I lower this to the ground, always tighten wheels in a star pattern. Our wheel torque on our '07 Mazda 3 is 87 foot-pounds. Always go around twice.
Thanks for watching. Visit us at 1AAuto.com for quality auto parts, fast and free shipping, and the best customer service in the industry.
Shop Products


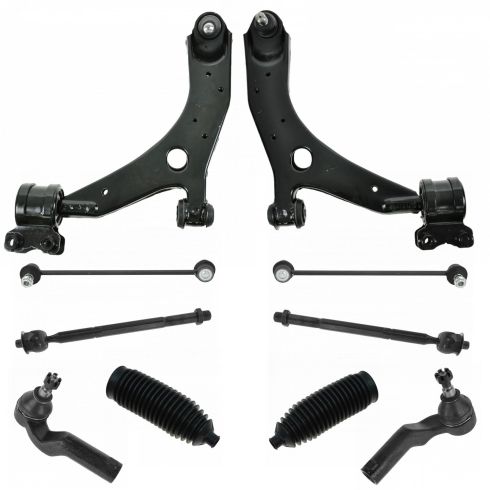
Mazda 3 5 Front 10 Piece Steering & Suspension Kit TRQ PSA69933
Part Details:
- (2) Front Sway Bar Links
- (2) Front Lower Control Arms with Ball Joints
- (2) Front Steering Rack & Pinion Bellows
- 10 Piece
- (2) Front Outer Tie Rods
- (2) Front Inner Tie Rods

How to Replace Tie Rod Assembly 1998-2004 Nissan Frontier
If the tie rod needs to be replaced, this video will show how to remove it and prepare a new on one the 98-04 Nissan Frontier
