
How to Replace Interior Door Handle 2001-07 Toyota Sequoia
Created on: 2012-03-13
Check out this video on how to replace the interior door on your 01-07 Toyota Sequoia.
-
step 1 :Disconnecting the Battery
- Disconnect the negative battery cable with an 8mm wrench
-
step 2 :Removing the Door Panel
- Pry off the mirror base trim panel with a flat blade screwdriver
- Pry off the window switch panel with a flat blade screwdriver
- Disconnect the window switch wiring harness
- Pry off the screw cover panel below the door pull with a flat blade screwdriver
- Pry off the courtesy light with a flat blade screwdriver
- Disconnect the courtesy light wiring harness
- Pry off the door handle trim piece with a flat blade screwdriver
- Pry off the screw cover panel at the top front corner of the door with a flat blade screwdriver
- Remove the Phillips head screw at the top front corner of the door
- Remove the Phillips head screw inside the door handle
- Remove the Phillips head screw below the door pull
- Pry off the door handle bezel with a flat blade screwdriver
- Push in the clips at the back of the door panel
- Pull the clips out of the back door panel
- Pry the door panel off of its clips with a putty knife or door panel clip tool
- Remove any clips that remain in the door with needle nose pliers
- Push those clips into the door panel
-
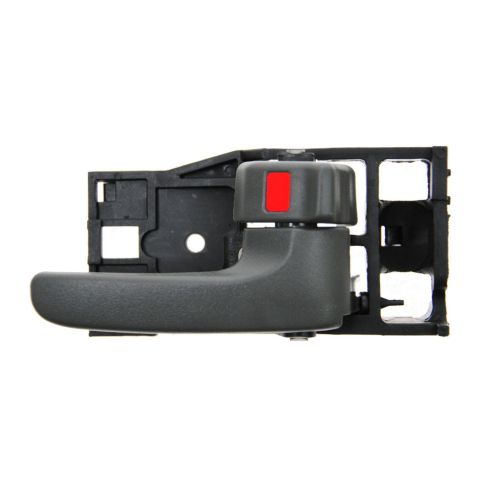
step 3 :Removing the Door Handle
- Slide the door handle back and pull it off
- Pull the cables out of the door handle
-
step 4 :Installing the New Door Handle
- Turn the new door handle upside down
- Put the top cable into the lower clip (still holding the handle upside down)
- Put the bottom cable into the lower clip (still holding the handle upside down)
- Turn the handle right side up
- Push the door handle into place
-
step 5 :Reinstalling the Door Panel
- Put the door panel into place, pulling the wiring harnesses through their cavities
- Push the door panel clips in
- Push on the mirror base trim panel
- Push the door handle bezel in
- Connect the window switch wiring harness
- Push in the window switch panel
- Connect the courtesy light wiring harness
- Push in the courtesy light
- Insert the Phillips screw below the door pull
- Insert the Phillips screw into the door handle
- Insert the Phillips screw at the top front corner of the door panel
- Push in the screw cover below the door pull
- Push in the screw cover into the door handle
- Push in the screw cover at the top front corner of the door panel
- Push the clips into the back of the door panel
-
step 6 :Reconnecting the Battery
- Reconnect the negative battery cable
Tools needed
-
Flat Blade Screwdriver
Phillips Head Screwdriver
Putty Knife
8mm Wrench
Door Panel Removal Tool
Needle nose pliers
Brought to you by 1AAuto.com, your source for quality replacement parts and the best service on the Internet.
Hi, I'm Mike from 1A Auto. I hope this how-to video helps you out, and next time you need parts for your vehicle, think of 1AAuto.com. Thanks.
In this video, we're going to show you how to remove and reinstall the front driver's side door handle on this 2001 Sequoia, same as any '01 to 04. The procedure is very similar for the passenger side as well. Tools you'll need are the same tools that you'll need to just remove the door panel. That's a flat blade screwdriver, both the regular and small size, Phillips screwdriver, and a door panel clip tool or a putty knife.
Your battery is here on the driver's side. You want to disconnect your negative battery cable, which should be the one closer to the fender. Loosen it, pull it up off the terminal, and tuck it down on the side.
You start up here with the flat blade screwdriver. Carefully pry at the top and pull this up and out. Then, this is your switch panel here. Insert your screwdriver right in the middle of the front, and it's a little unnerving. It eventually comes, but you have to pry it pretty hard. The switch panel comes up and out. There's a little tab right here. Press that down and disconnect. Next, there's a little detent here. Pull this little plug out. Then, on your courtesy light here, put your screwdriver in at the front and pry it out. There's a little metal clip, you kind of heard it fall down in the door. It will fall out in a second. Then, you pull this right off. You'll need a smaller flat blade screwdriver. For the little trapdoor in your door handle here, just pry that out, and you'll see a Phillips screw. Then, also here, there's a little plug, pry that off and the Phillips screw right there. Use your Phillips screwdriver. Fast forward here as we remove that screw, the one that is in the door handle, and then the one underneath the armrest as well. Take your regular screwdriver again, put it in right above the lock here, and pry up and out on your bezel and then down and out and pull that right out. On the back edge of the door panel, there's two little pins. Push the center of the pins in and then these clips come out. Take the door panel clip tool and insert it into the back here, slide it up, you'll feel a clip. Try and go around the clip, and pull it out. There's my little clip for my courtesy light. Go right around the door. If you don't have a door panel clip tool like this, then, a household putty knife works as well, as long as it has a tempered blade. Once you release the clips, lift the door panel up, then off. If a clip or two stay behind, just use a pair of needle-nose pliers and pull those out. We'll just put them right back into your door panel.
To remove your inside door handle, you slide it back. Then, it comes off. Then, just turn it over and you pull your cables carefully out, spin them around, and then, take them out. The handle comes off. For reinstallation, you have to turn your handle upside down, so you take the top cable, and you put it in the bottom here, putting the handle upside down that is. Put that in, clip it in place. Take this cable up in, clip it in place, and flip it around.
To put the door panel on, put it up in place. Make sure you pull your window harness through and push this harness through right down here. I'm just going to look back and make sure your pins are going in. Start from top to bottom. Make sure this goes down in correctly. We'll fast forward here again. As I put the screw in underneath the armrest in the door handle, as well as the front one, and put that clip on and the little cover panels. On these pins, make sure you push them out, so the center is sticking out. Then, you push it into place, and lock it in by pushing the pin flush. Again, push it out, so the pin's sticking out, put it in, push the pin in flush to lock. Then, if you haven't already, reconnect and tighten up your negative battery cable. We hope this helps you out.
We hope this video helps you out. Brought to you by www.1AAuto.com, your source for quality replacement parts and the best service on the Internet. Please feel free to call us toll-free, 888-844-3393. We're the company that's here for you on the Internet and in person.
Shop Products


Toyota Sequoia Tundra Rear Passenger Side Interior Door Handle Dorman Help 81225
Part Details:
- Gray

How to Replace Interior Door Handle 2002-06 GMC Envoy XL
How to repair, install, fix, change or replace a broken or snapped off interior door handle on 02, 03, 04, 05, 06, 07, 08, 09 GMC Envoy, Envoy XL, or Envoy XUV.
