How to Replace Knock Sensor 2009-12 Ford Escape
Created on: 2019-04-30
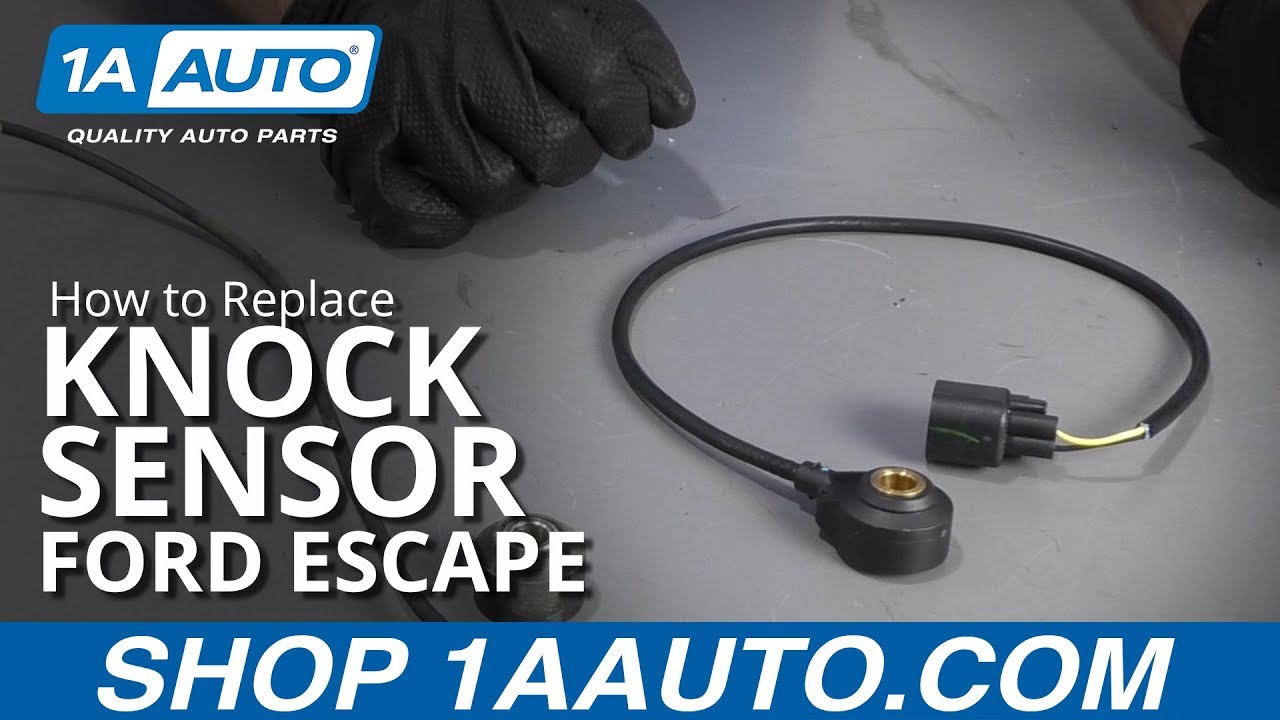
Watch this video to learn how to replace a broken or malfunctioning knock sensor on your 09-12 Ford Escape. The experts at 1A Auto show how to replace yours.
-
step 1 :Removing the Intake Plenum
- Disconnect the battery ground with an 8 mm socket
- Disconnect the mass air flow sensor electrical connection
- Pry off the electrical retaining clip from the intake tube with the plastic fastener remover
- Loosen the worm clamp securing the intake tube to the throttle body
- Pry up the three plastic retainers securing the air box duct
- Disconnect the smaller tube from the intake tube
- Remove the entire air box and intake tube
- Disconnect the throttle body electrical connector
- Disconnect the electrical connector on the intake plenum adjacent to the throttle body
- Disconnect the electrical connection from the EGR valve
- Pry off the electrical retaining clip near the EGR valve
- Disconnect the narrow hose that connects behind the throttle body using a small screwdriver and pick tool
- Disconnect the two hoses near the EGR valve
- Disconnect the MAP sensor at the rear of the intake plenum
- Remove the two 10 mm bolts securing the EGR valve
- Remove the three 8 mm mounting bracket bolts below the EGR valve
- Remove the seven 8 mm bolts securing the intake plenum to the intake manifold
- Carefully remove the intake plenum. Avoid spilling any dirt or debris into the intake manifold
- Plug the intake ports with clean cloths or paper towels
- Clean the area around the lower intake as necessary
-
step 2 :Removing the Lower Intake
- Pry off the wiring retainer clip from the fuel rail
- Disconnect the fuel injector electrical connector
- Loosen the eight 8 mm lower intake bolts
- Remove the eight 8 mm bolts with a magnet
- Remove the lower intake and set it aside, be careful not to damage the still connected fuel line.
- Plug the intake ports with clean cloths or paper towels
- Clean the area around the intake manifold as necessary
-
step 3 :Removing the Engine Mounted Knock Sensor
- Remove the 10 mm knock sensor bolt
- Remove the knock sensor
- Remove the knock sensor wire from the plastic retaining clip
- Disconnect the knock sensor electrical connector
-
step 4 :Installing the Engine Mounted Knock Sensor
- Install the new knock sensor and the 10 mm bolt loosely
- Route the knock sensor wire and reattach it to the retaining clip
- Reconnect the knock sensor electrical connector
- Torque the 10 mm bolt to 18 ft-lb
-
step 5 :Replacing the Lower Intake
- Remove the lower intake gaskets, and clean the area
- Install new lower intake gaskets
- Remove the rags from the intake manifold ports and clean the area carefully
- Replace the lower intake
- Replace the eight lower intake 8 mm bolts using a magnetic socket, tape or grease to hold the bolts into a socket if necessary
- Torque the eight 8 mm lower intake bolts to 89 in-lb in the specified sequence
- Clean off the EGR valve gasket
- Remove the rags from the lower intake ports and clean the area carefully
-
step 6 :Replacing the Intake Plenum
- Remove the intake plenum gasket, and replace it with a new gasket
- Replace the intake plenum
- Torque the seven 8 mm plenum mounting bolts to 89 in-lb in the specified sequence
- Torque the seven 8 mm plenum mounting bolts an additional 45 degrees
- Replace the plenum mounting bracket with the three 8 mm bolts
- Replace the EGR valve with the two 10 mm bolts and a new gasket
- Reconnect the two hoses near the EGR valve
- Reconnect the locking hose behind the throttle body
- Reconnect the throttle body electrical connector
- Reconnect the electrical connector on the intake plenum adjacent to the throttle body
- Reconnect the EGR valve electrical connector
- Reconnect the fuel rail electrical connector
- Reconnect the wire retaining clip to the fuel rail
- Reconnect the locking hose to the air intake tube
- Reconnect the air intake tube to the throttle body
- Press the air box down to lock it in place
- Reconnect the mass air flow sensor electrical connector
- Replace the three air box duct plastic retainers
- Reconnect the battery ground
Tools needed
-
Razor Blade / Gasket Scraper
Socket Extensions
Torque Wrench
Magnet - Extendable
Brake Parts Cleaner
Pliers
Pick
Bearing Grease
Vacuum
Flat Blade Screwdriver
8mm Socket
Plastic Fastener Remover
Painter's Tape
10mm Socket
Ratchet
Cloth Rags
Marker / Writing Utensil
What's up, guys? I'm Andy from 1A Auto. In this video, I'm going to show you how to replace the knock sensor on this 2012 Ford Escape. If you need this part or other parts for your vehicle, click the link in the description and head over to 1AAuto.com. I'm going to start by disconnecting the battery. I have an eight-millimeter socket and a ratchet. Loosen up this nut and take the terminal off. Just wiggle it off back and forth, and set it aside.
All right. So I'm going to disconnect this mass air flow sensor first. Just take a screwdriver, pull that lock out, and push down on the tab. Pull that off. Disconnect the electrical retainer right here. Just use a trim tool and slide that up. I'm going to take a straight blade screwdriver, loosen up this worm clamp right here. That's good. The trim tool. Pop these out, and get underneath. I guess they got to be a little higher, so pull those out. Then instead of taking the air box apart, I'm just going to grab this intake tube, which there's a little tube that's connected down here. Disconnect this. There's a little lock on here. I just need to push it down like that. Slide that off. I can grab this and slide the air box out of the way.
Okay, I'm going to disconnect the throttle body connector. Just take a screwdriver. Release that lock and push down on the connector. Slide it out. There's another connector right here. Disconnect that. Push down on that. Slide that out. And right here, disconnect this connector to the EGR valve. Slide that out. Take the trim tool, release the container that holds the wire on. Pull that off. Slide those out of your way.
I want to take this hose off right here. I'm going to use a curved pick and a pocket screwdriver. The curved pick, I'm going to get underneath this little lock tab right here and just apply a little bit of pressure, not too much. And then on the back side of the pocket screwdriver, just release the tabs. Then that'll slide right out, and you can slide the hose right off.
Take some pliers. Release this hose clamp right here. Just wiggle this off. If the hose doesn't come off, you can take a right angle pick and get underneath there and release it. And I'll do the same with this one. Sometimes this isn't too easy, so you can take some needle nose pliers. Try to lock this. Some right angle needle nose pliers. What I'm trying to do is get that little pin in the hole of the hose clamp so that it stays together. Just like that.
Slide it off. I'll disconnect the map sensor right here. Just push down on the lock and slide it off. I'm going to take these EGR bolts out. There's two 10-millimeter bolts. So I'll use a 10-millimeter socket and ratchet and pull the bolt out. And that's going to be separated from the intake. There's a bracket underneath this intake, so I'm going to use an eight-millimeter socket and ratchet. Take these--there's three bolts that hold this on. And then I'm going to pull that bracket out. You could just leave that bracket loose there, but I don't want to forget it, so I'm going to pull it out.
Now, I'm going to take these bolts out. There is seven of these bolts. I'm going to use an eight-millimeter socket, extension and a ratchet. Okay. So, this long bolt comes out. These other ones are caged. They stay in there with the intake. Just make sure they're loose. Just get these wires out of the way. Grab the intake. You want to make sure if there's any debris on top you don't tip the intake because you don't want any of that going into the intake ports. We don't want anything going into these intake ports, so just going to take some rags. Make sure you put them in there.
I don't put them in all the way. I leave them hanging out so that I don't put the intake on my accident with them in there. I know that there's a rag in there. Before I pull this intake off and before I disconnect the fuel line, I noticed there was a mouse that got in there or some kind of rodent, and there's a lot of debris and stuff. So what I want to do is vacuum it out. You want to make sure when you're using a vacuum, especially an electric vacuum, don't suck up any fuel because then your vacuum's going to blow up.
I'm going to do that--suck this all out. I want to take this trim tool, just want to slide this wire retainer off there and disconnect this connector right here. Push down, pull that off. That just goes to the injector wiring harness. Now that I got that cleaned out I'm going to take an eight-millimeter socket, extension and a ratchet, and there's eight bolts all around the lower intake. I'm going to take those out. I am going to leave the fuel rails connected for now. All right. So with all those bolts loose I'm just going to take a magnet and pull them out.
I don't want them to fall out while I'm pulling the intake off. So make sure you don't drop them. Oops. Dropped it. Let me get the last one. At this point I can grab the lower intake. Just give it a little force and lift it up. Pull it up. Be careful with this hose. You don't want to break that. So I'm just going to slide this out of the way a little bit. Just like that. And then make sure nothing goes in. You still have a lot of mouse nest stuff that I'm going to have to vacuum up. And it's good that I didn't disconnect the fuel yet because I don't want any fuel in there when I'm vacuuming it up.
All right. Now that we have that off and cleaned up, I can take some rags and just stuff them back in there, just so if I drop anything it doesn't fall into the intake ports. All right. I want to take off this knock sensor, so I'm going to use a 10-millimeter socket extension and a ratchet. And loosen this up. This is on there pretty tight. All right. Pull that bolt out. Grab the knock sensor, pull it out. There's a little clip right here that holds the wire on. I'm just going to pull it past that clip. Right there. And disconnect it right here. Push down on that lock and disconnect the connector.
Here we have the old knock sensor. Here we have the new knock sensor from 1AAuto.com. The sensor itself is the same. The wire length is the same, and the connector is the same. Get yours at 1AAuto.com and you can do it yourself.
Now we're going to take this knock sensor--slide down here. It's a little bit tricky to get your hands in there. Be careful not to drop the sensor. You're going to try to have the wire go in the same location it was when I pulled it out. And I'll take a 10-millimeter socket, extension and ratchet and get it started. Before I tighten it down I'm just going to make sure the wire goes exactly where it needs to be connected.
So put that in that retainer right there, and then plug it in right here. And it's good. And now I'm going to torch it down. Now I'm just going to use a torch wrench with a 10-millimeter socket, and I'm going to torch this to 18 foot-pounds. So there's another knock sensor on the side of the head. So this would be the head mounted knock sensor. The one we just replaced was the engine mounted knock sensor that's under the intake. This one does not have the long wire. So procedure for this one would be the same, except you would not need to take all the intakes off and stuff. You can access it without doing that.
Disconnect the connector and remove that bolt. Pull the sensor off and reinstall the bolts. Torch it to 18 foot pounds. Reconnect the connector. All right. I want to take these old seals out. Just take a pick, grab the seal. Try not to scratch the aluminum, and peel those out. And I'll do the same with the other ones. Okay. Before we install this I'm just going to take some brake parts cleaner and a rag and just try to clean this up a little bit. And I'm going to take the gaskets and install the new gaskets. Just line them up. And press them in. All right. So that's all set. I'm just going to set that aside for now.
And I'm going to take these rags out. Make sure to pull all those out. Now I'll just take a little brake parts cleaner on a rag and just clean these areas up. Just make sure you don't get any sand in there or anything. All right. So those are all cleaned up. No rags in there. Take this intake, flip it into position. If you disconnected the fuel line you can reconnect that, but I left mine connected the whole time. I'm just going to try to line up those bolt holes. And I'm going to start the bolt right here. It's going to be easiest to start this one on the end.
Take the eight-millimeter socket and the extension. Just get it started. I'm not going to go all the way down. And then I'm going to take the bolt, stick it in the socket and try to hold it. It is a little bit tricky to get these in and get those started. These ones are a little more tricky. You can get your finger in there. It would also be ideal if you had a socket that had a magnet in it because then you could hold that. So I'm going to take the socket and the extension. You can take the bolt, and I can take some tape. You can use electrical tape or masking tape. I'm just going to tape around the bolt like this.
Just like that. That way it stays in the socket. You can install it. When you go to install it, you get it started. Just pull the socket up, and it pulls right out, and the bolt's in the spot you need it. Another way to use tape is to put tape over the socket, and then we'll just push. You're just going to force the bolt in there like this. And the tape is going to hold the bolt in there, and you can go over and install the bolt. Get that started. Once it's started then you can pull it off. There's the tape. Pull it right off.
Another trick to take some grease. Put some grease on the bolt. Put that on the socket and just wipe the grease off, and the grease is going to hold the bolt in. Okay. Slide the bolt in just like that. And then it pulls right now. That little bit of grease on the bolt isn't going to make any difference. It can stay there. Now all those bolts are in and it's just snugged up. Now I'm going to take a torch wrench with the eight-millimeter socket, and I'm going to torch it in a certain sequence to 89 inch-pounds. So I have number one right here.
Number two is right here. Number three is over here. Number four is right there. And here's number five, number six, number seven, and number eight. So basically from the center and then outwards. Before I put the upper intake on, it's going to be easier to scrape this EGR value gasket. So just take a scraper, and just scrape any of those excess gasket off. We're going to replace this gasket. If you don't have a gasket, and the gasket you had doesn't look too bad you can try to reuse it. Although, it's recommended that you replace it when you take this apart. Make sure you don't get any stuff inside the EGR valve. Just try to blow it out after.
Now you want to make sure you remove these rags from the intake ports. Don't want to leave those in. Going to take a rag and some brake parts cleaner. Clean up the surface right here. Just make sure there's nothing raised up. At this point you're going to want to replace this gasket on the intake. We have already done that. So this is a new gasket, so we don't have to do that. Just take a pick and peel it out just like the lower intake gasket. And put the new one on. Just kind of slide this in position. Try to get the hoses out of your way. Take the wiring harness, we're going to fish that in position. And that looks like it's lined up pretty good.
I'm going to get all these bolts started. Make sure you get that long bolt, get that one in. You can just snug these all down by hand. Now we're going to use the eight-millimeter socket and the torch wrench, and we're going to torch these 89 inch-pounds in a sequence. We're going to start with number one. Number two's right here. Number three's over here. Number four's over here. Number five's right here. Number six, and number seven. One, two, three, four, five, six, seven. Okay. Now we have to torch these to a specific angle. We have to torch these bolts to 45 degrees, which you can take a felt tip pen, and we're going to mark these bolts.
The angle that I need is 45 degrees, which 45 degrees is going to be half of 90. So if I have 90 degrees is right here, I want these bolts to be in between those two lines, so right about there. So I want to torch those all to that. Another thing you can do is you can actually take your socket and you can draw a line on your socket. So if you wanted to go to 45 degrees you'd go to that line. If you had to go to 90 degrees you're going to do a right angle. So depending on what the angle is that you need this could be easy, or it could be kind of difficult trying to find the actual angle that you need.
But 45 degrees is pretty easy. So that's a quick way to do this. The washer seems to be moving with it, so that's not really good in our instance. But I can also look at my torch wrench. Right now if I torch this and went all the way to my forearm it's going to be 90 degrees. So I want to go halfway in between. So that would be 45 degrees right there. Because I marked all these, now I know that I actually torched all those to the right angle. The washers didn't move, so that didn't help me out. But I could've marked it somewhere on the case right there, or right there, and that would work.
But that's an easy way to get angle torch if you don't have an angle meter. I'm going to install this bracket underneath here. I'm going to attach to the backside head in the lower part of the intake. I'm just going to take an eight-millimeter socket and a ratchet and tighten these up. Not too tight. The intake is plastic, so be careful. Now I'm going to install these EGR bolts, but I'm going to have to slide the gasket behind here. Slide the bolts through. It's a little bit tricky. There we go. Got that one started. And got that one started. Now I'll take a 10-millimeter socket and ratchet and tighten these up.
All right. Now I'll just snug those up. Take this hose, slide this on. This hose clamp was still in that lock position. So we can take a screwdriver, keep your fingers clear. Just release it. This one I'm going to need some pliers to clamp that. You can use hose clamp pliers as well, or regular pliers work. Release that. This hose, install this. Slide it down and push the lock on. Make sure it's nice and secure. Now we're going to connect the electrical connectors, connect the throttle body, and then push down on the lock. Whoops. Lock that in place. Lock this one in place. Now lock on that one.
And then put the EGR in this wire retainer right here. Connect the map sensor. And we didn't connect this earlier. This is the fuel rail connector right there. Connect that, and then connect this wire right into that bracket. And I'll take this intake, going to connect this hose right here first. Move the wires out of the way. Should've lock it place. Slide that bolt of the throttle body, the snorkel. Line air box up. Press it straight down. Now I'll connect the electrical connector first and the wire retainer. Take a straight blade screwdriver, screw in the worm clamp. Take these push pins, install these right here.
Lock them down. We can connect the negative terminal on the battery. Take an eight-millimeter socket and a ratchet and snug this up. Just make sure the terminal's tight. It's loose. Tighten it up a little more. That's good.
Thanks for watching. Visit 1AAuto.com for quality auto parts shipped to your door. The place for DIY auto repair. And if you enjoyed this video please click the subscribe button.

How to Replace Knock Sensors 1997-2006 BMW 325 Xi
Check out this video to learn how to replace the knock sensor on your 97-06 BMW 3 series vehicle. 1A Auto makes it easy to do it yourself!
