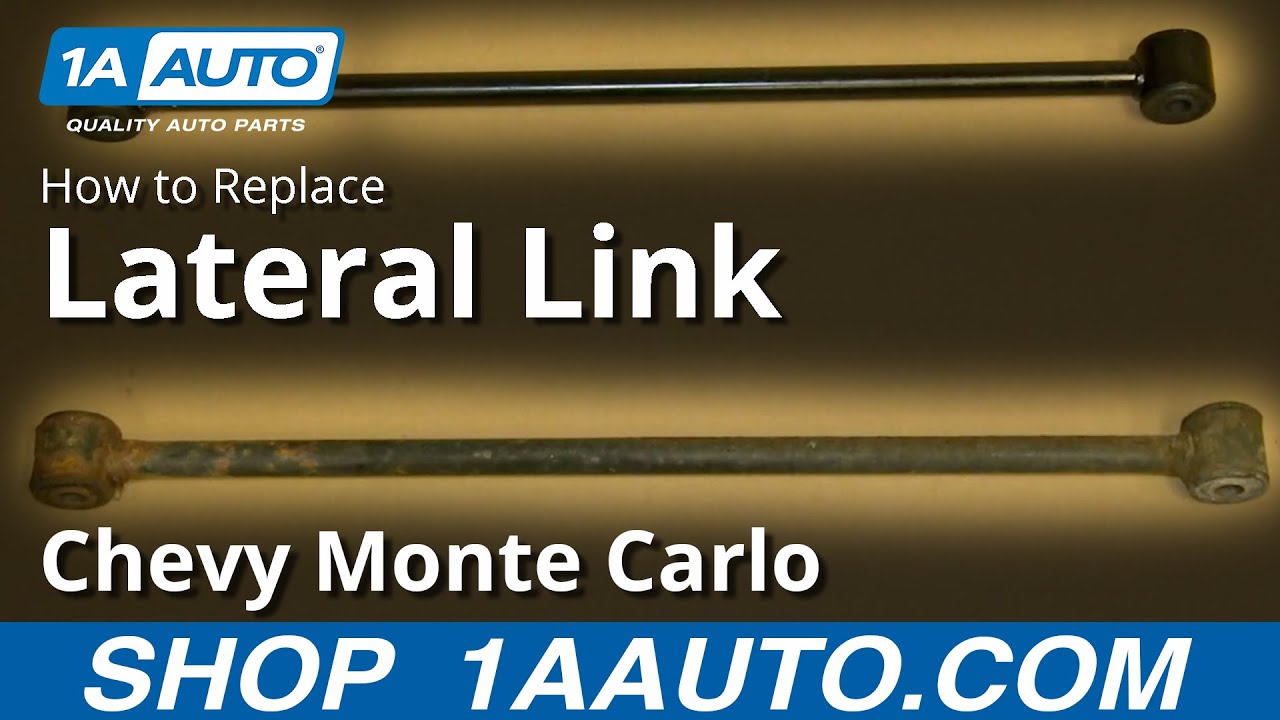
How to Replace Lateral Link 2000-07 Chevy Monte Carlo
Created on: 2014-08-18
How to remove, replace, and install a loose, rattling or broken track bar on 00, 01, 02, 03, 04, 05, 06, 07 Chevy Monte Carlo.
-
step 1 :Removing the Wheel
- Loosen the lug nut covers with a 19mm socket
- Pull off the center cap by hand
- Loosen the lug nuts with the vehicle on the ground
- Raise the vehicle with a floor jack
- Secure the vehicle on jack stands
- Remove the lug nuts
- Pull off the wheel
-
step 2 :Removing the Brake Caliper
- Remove the two 13mm bolts from the brake caliper
- Pry the brake pads into the caliper with a flat blade screwdriver to push in the pistons
- Pull the caliper aside
-
step 3 :Loosening the Struts
- Apply penetrating oil to the track bar bolts
- Hold the inside track bar bolt with a 21mm wrench
- Loosen the inside track bar bolt with a 21mm socket and ratchet
- Hold the outside track bar bolt with a 21mm wrench
- Loosen the outside track bar nut with a 21mm socket and ratchet
- Support the suspension carriage with a jack
- Remove the four 18mm bolts from the carriage
- Carefully lower the carriage
- Remove the outside track bar nut
- Pull down the track bar
- Pull off the brake rotor
- Pull the outside track bar bolt up and out
- Remove the inside track bar bolt
- Pull the track bar down and out
-
step 4 :Installing the New Track Bar
- Remove the two 21mm nuts from the strut
- Hammer the bolts out of the strut
- Repeat Steps 1 through 3 on the opposite side
-
step 5 :Installing the New Track Bar
- Raise the new track bar into place
- Slide the inside track bar bolt into place
- Slide the outside track bar bolt into place
- Push the track bar onto the outside bolt
- Fasten the washer and 21mm nut onto the outside track bar bolt
- Raise the suspension carriage with the jack
- Insert the four 18mm bolts into the carriage
-
step 6 :Reinstalling the Strut
- Insert the two 21mm bolts into the strut
- Tap the bolts in with a hammer
- Fasten the 21mm nuts onto the strut bolts
- Tighten the 21mm nuts to 120 foot-pounds of torque
-
step 7 :Reinstalling the Brakes
- Slide the brake rotor on
- Put on the brake caliper
- Insert the two 13mm bolts into the brake caliper
- Repeat Steps 6 and 7 on the opposite side
-
step 8 :Tightening the Track Bar Bolts
- Lower the suspension onto jack stands
- Tighten the track bar bolts
-
step 9 :Reattaching the Wheel
- Slide the wheel into place
- Start the lug nuts by hand
- Tighten the lug nuts preliminarily
- Lower the vehicle to the ground
- Tighten the lug nuts to 100 foot-pounds in a crossing or star pattern
- Reattach the center cap
- Tighten the lug nut covers with a 19mm socket
- Have the suspension professionally aligned
Tools needed
-
Adjustable Wrench
13mm Socket
A Piece of Pipe (for leverage)
Torque Wrench
Hammer
Rust Penetrant
Pry Bar
Jack Stands
18mm Socket
19mm Socket
21mm Socket
21mm wrench
Flat Blade Screwdriver
Ratchet
Floor Jack
Brought to you by 1AAuto.com, your source for quality replacement parts and the best service on the Internet.
Hi, I'm Mike from 1A Auto. I hope this how-to video helps you out, and next time you need parts for your vehicle, think of 1AAuto.com. Thanks.
In this video, we're going to show you how to replace the forward, fixed track bar on this 2003 Chevy Monte Carlo. It's the same part and a similar process on these Monte Carlos from 2000 to 2007. We show you on the driver side but the passenger side is the same procedure. The items you will need for this are a new forward fixed track bar from 1Auto.com; 13, 18, 19, and 21 millimeter socket and ratchet with a piece of pipe for leverage; 21 millimeter wrench; two adjustable wrenches; torque wrench; jack and jack stands; pry bar; and a hammer.
Start off by loosening these 19 millimeter lug nut caps, and then pull your hub cap free. Then, remove these 19 millimeter lug nuts. You want to loosen these while the vehicles is on the ground. When you raise it, remove them the rest of the way, unless you have air powered tools. Then you can remove them entirely while the vehicle's in the air. Once the lug nuts are removed, pull your wheel free.
Then, you want to remove these two 13 millimeter bolts on the back of your brake caliper.Now pry in on the caliper. This will push in the piston and make it easier to remove. Set that aside.
Then, remove these two 21 millimeter nuts. We will fast forward as Mike does this. Hammer in between the strut just to help loosen it up and now you can just hammer those two bolts out. We will fast forward as Mike repeats the entire process on the other side.
Spray some penetrating oil on this bolt and on this bolt right here. Then just loosen up these two bolts that go into these track arms. Now, just loosen up this 21 millimeter nut and just use a 21 millimeter wrench on the other side. Jack up this center piece here that your track bars go into and then remove these four 18 millimeter bolts. We will fast forward as Mike does that. Now, carefully lower that down. Then remove this bolt far enough back that you can get the track arm free. Pull the rotor off so it doesn't fall while you are pulling this bolt out. You want to just pry up on the bolt, up and over that bar and then pull the bolt free. Now, we'll fast forward as Mike removes this bolt at the top of the track arm. To get the bolt out the rest of the way, once the nut is removed and the bolt is completely loosened, you can just pry out on this carriage here and then angle the bolt out as you twist it out and you can pull it free. Then the track arm will just pull down and out.
On top, is the new track bar from 1AAuto.com. On the bottom, is the original one. They are identical although they could be slightly longer or shorter so you may want to have your vehicle aligned after this procedure is done. Once you have it in place, just pry out with the pry bar and then angle the bolt back up into place. Once you get it in, then put the nut on the other side and just tighten it up preliminarily. Take the bolt and push it back thought the knuckle. To get it to go in you will have to have the knuckle at the right angle. Then, you can hammer it in the rest of the way making sure you angle it up and over that line. You can see he prys out as he hammers so that he can create a line easier and then hammers itdown in place. Now push this back onto that bolt and push the bolt back through it. Then replace that washer and 21 millimeter nut. We will fast forward as Mike tightens those up. Now, just raise the jack to push this carriage back into place. Replace and tighten up those four bolts.
Now push your bolts back into the strut. Just hammer them in a little bit until you can get the nut on the other side. Then, replace the nut and tighten those up and they will pull through. Then, you want to torque both of those to 120 foot-pounds.
Replace your rotor and then take your caliper and slide it back into place, lining up the holes on the back with the holes on the knuckle. Then replace those 13 millimeter bolts and tighten them up. Then repeat the process on the other side.
Now, you want to lower down the rear suspension onto two jack stands putting the pressure on the suspension and then tighten up the top track bar bolt and the lower track bar bolt as tight as you can get them. Here we are just tightening up the other track bar bolt and you will probably want to get an alignment after this is done because the track bar could be slightly smaller or larger than your old one.
Then, replace your wheel and replace the lug nuts and tighten them up. You want to tighten those while the vehicle is on the ground and then you want to torque each of them to 100 foot-pounds in a crossing pattern. Then replace your hubcap and tighten up those lug nut caps. Then you're all set.
We hope this video helps you out. Brought to you by www.1AAuto.com, your source for quality replacement parts and the best service on the Internet. Please feel free to call us toll-free, 888-844-3393. We're the company that's here for you on the Internet and in person.
Shop Products


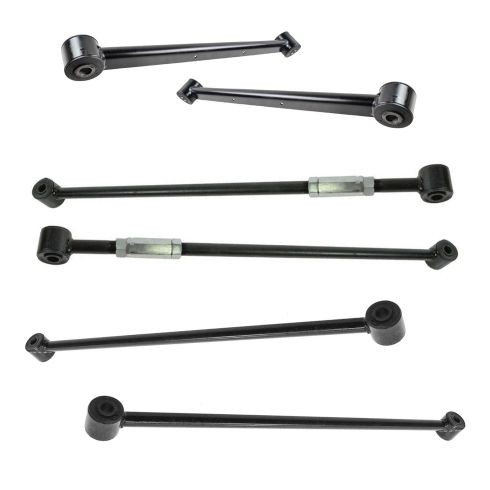
Chevrolet Buick Pontiac Olds Rear 6 Piece Suspension Kit TRQ PSA64929
Part Details:
- (2) Rear Trailing Arms
- 6 Piece
- (2) Rear Forward Lateral Links
- (2) Rear Rearward Lateral Links

How to Replace Steering Column Shift Tube Assembly 1995-2007 Ford Ranger
Watch this video to learn how to fix a shifter that sticks or is hard to shift. The experts at 1A Auto will show you how to replace the steering column shift tube on your 01 Ford Ranger.
