How to Replace Lift Gate Handle 2007-14 Chevrolet Suburban
Created on: 2018-05-23
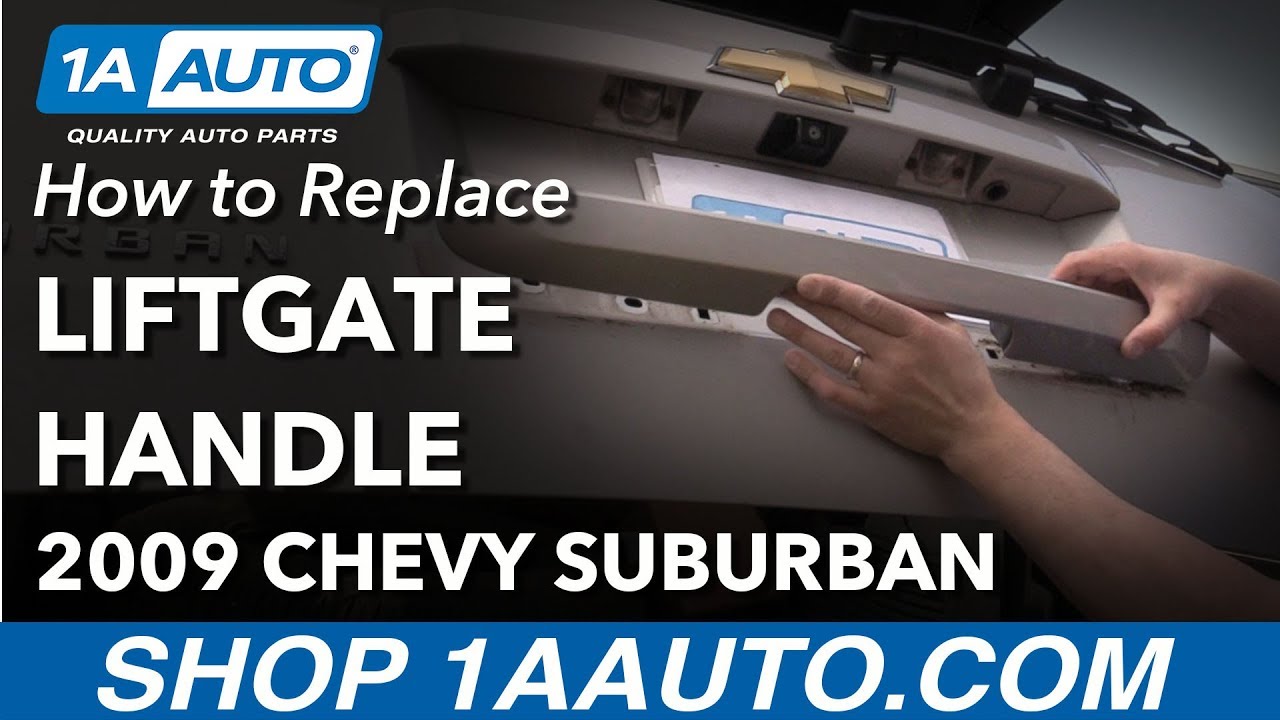
How to repair, install, fix, change or replace a broken or snapped off lift gate handle on 09 Chevrolet Suburban
-
step 1 :Removing the Tailgate Trim
- Turn the automatic lift gate off
- Open the lift gate
- Remove the T30 Torx screw from the trim panel
- Pry the upper trim panel loose
- Close the tailgate
- Open the tailgate glass
- Remove the two plastic clips from the tailgate glass latch panel
- Close the glass
- Open the tailgate
- Pop out the lower tailgate panel clips
- Lower the tailgate partially
- Open the tailgate glass
- Pull the trim off the tailgate
- Disconnect the tailgate switch wiring harness
-
step 2 :Removing the Tailgate Hatch Handle
- Remove the 10mm bolts from the handle
- Disconnect the connector
- Press the grommet through
- Press the tab with a flat blade screwdriver
- Pull the handle out
-
step 3 :Installing the Tailgate Hatch Handle
- Insert the handle into place
- Connect the electrical connector
- Tighten the 10mm bolts to the handle
-
step 4 :Installing the Tailgate Trim
- Lift the tailgate panel into place
- Feed the switch wiring harness through the panel
- Push the tailgate panel clips into place
- Push on the upper tailgate panel
- Connect the tailgate switch
- Insert the T30 screw into the tailgate panel
- Close the tailgate
- Open the glass
- Push the two plastic clips into the tailgate glass latch panel
Tools needed
-
T30 Driver
Trim Tool Set
Hi, I’m Mike from 1A Auto. We’ve been selling auto parts for over 30 years!
In this video, we'll be removing and reinstalling a liftgate outer handle in a 2009 Chevy Suburban. If you need parts for your car or truck, click the link in the description and head over to 1AAuto.com.
I'm going to open the lift gate. We're going to switch our automatic lift gate off. We're going to take this handle off. We're going to use a T30 and an extension. We're going to use one of our trim panel tools, we sell these at 1AAuto.com. Slide it in, peel it back. I'm going to pull that down. I'm going to pull this one down. I just need to pull the edges out to gain access to this. Before I pull it out, I'm going to pop this. I want to pop this rear glass, I'm going to use this button on the key fob, hold it down and this rear glass will pop up. I'm going to take these two push pins out. Push down on them, release. Pull them out.
Pull those out. We don't want this to close all the way. I'm going to pull this up a little bit. Pry down on this. We can push this up and out of the way. For this switch there's a little clip, pull that up, pop that switch off.
Next we're going to use our ten millimeter socket, and extension and a small ratchet. Pull these nuts off, and there's two more over here. We're going to pop this connector off right here. Slides out like that. And here, we're going to use our flat blade screwdriver and just push this grommet through. Just like that. We're going to use a screwdriver and push on this retainer tab right there, while pulling from up top. There's another one on the other side. And then pull out.
Next we're going to fish our wiring through the hole. You can push this grommet in. If you need help, use a flat blade screwdriver. Line up the holes, and push it down.
Next, we're going to use out ten millimeter socket and extension and install the ten millimeter nuts. And over here. And get those in. Then I will snug it down. Next, we're going to plug in the connector till it clicks. We want to slide this over up top first. Sliding this, these parts underneath up here. Just like that.
Before we push those push tabs in, we're going to line some of these push rivets, get those in. You need to remember there's an electrical connector right here, hook that up for your switch.
We're going to use these plastic type rivets that we pulled out before. You want to get it set up like this, so you're going to push on this to get it to where it's popped through like that, so that when we put the ... When we get these in the hole, you're just going to push down and make it flush. And that's good. You can close this. I'm going to line these up. Push that up. Over here, line these up. It's all lined up. Now we're going to install this bolt, it's a T30 torx. Tighten it up. Just snug it up. We're going to turn on our automatic lift gate. Now we're going to test our lift gate, hit the close button. And it latches good. Now we're going to open it, just push the button. Good.
Thanks for watching. Visit us at 1AAuto.com for quality auto parts, fast and free shipping, and the best customer service in the industry.

How to Cover Chrome Emblems or Badges on Your Truck with Plasti Dip
Say goodbye to chrome! Learn how to dip, or coat with special rubberized paint, any part of your vehicle you like!
