How To Replace Lower Ball Joint 1997-2002 Ford Expedition PART 2
Created on: 2011-12-15
This video continues the installation of the ball joint and CV axle, including some handy ways of completing the repair without special tools
-
step 1 :Install the new ball joint
- Set up the ball joint in the ball joint press.
- Get the top of the ball joint flush with the top of the control arm.
- Readjust the press, taking the rubber boot off and get the control arm the rest of the way in.
- Replace the rubber boot.
- Lock it into place with a snap ring.
- If you have snap ring pliers, this is much easier but you can do it without them.
-
step 2 :Reassemble the steering knuckle and control arm.
- Position the ball joint pointing outward and work the steering knuckle onto it.
- Lower the jack stand from the control arm.
- Thread the nut onto the ball joint.
- Put the grease fitting on the ball joint.
-
step 3 :Install the axle
- Get the axle into the hub and transmission.
- Torque the bolts to 60 foot pounds, using a star pattern to secure the axle evenly.
-
step 4 :Put the tie rod back on
- Torque the ball joint nut to 98 foot pounds and secure with a cotter pin.
- Fill the lower ball joint grease fitting with grease using a grease gun.
- Torque the tie rod nut to 60 ft lbs and secure with a cotter pin.
-
step 5 :Install the stabilizer link.
- Thread the washers and bushings onto the link.
- Jack the control arm up and tighten the stabilizer link nuts to 15-16 ft lbs.
- Thread the hub nut on.
- Lower the jack from the suspension.
- Retighten the torsion bar to the mark you made earlier.
-
step 6 :Put the wheel back on
- Thread the lug nuts on.
- Lower the vehicle.
- Torque the lug nuts in a star pattern to 100 ft lbs.
- Torque the hub nut to 220 ft lbs using your 35 mm socket.
- Put the retainer and cotter pin and wheel cap on.
- Have your alignment checked and adjusted.
Tools needed
-
Phillips Head Screwdriver
Grease Gun
Floor Jack
Needle nose pliers
Complete Metric Socket Set
Center Punch
Ratchet
Marker / Writing Utensil
1/2 Inch Breaker Bar
Complete SAE Socket Set
Jack Stands
Pitman Arm Puller
A Piece of Pipe (for leverage)
Flat Blade Screwdriver
35mm Socket
Ball Joint Press
Brought to you by 1AAuto.com. Your source for quality replacement parts and the best service on the Internet. Thanks for tuning in, this is Part Two of a two part series. We're going to go through reinstalling your lower ball joint on this '97 Expedition. This procedure is similar for a whole bunch of different Ford trucks and SUVs. Here's a list of tools that we used on this Expedition. If you have a different vehicle some of the sizes may differ and one thing that is not on here, you will want a grease gun to grease up the ball joint after you install it.
We've got our control arm here. We're just going to put it right on there like that. Our ball joint, our collar and then that's going to go up and in. We put our press on there. I'm going to speed it up here so we use the press to push the ball joint up and in and you do this in two steps. This first step is just going to get the top of the ball joint flush with the top of the control arm. We're going to take this boot off. Now with this ramp here on top of it. I'll fast forward here again as we use that press to push the ball joint the rest of the way up into the control arm until it's nice and tight, the bottom is nice and tight against the bottom of the control arm and then put your protective boot back on. Now you want to lock it in place with a snap ring. You can get this on without snap ring pliers, but they certainly are a help. Just get this set up.
What I'm going to do is I'm just going to thread the nut on a little bit and then use a hammer to kind of knock the ball joint outward, that helps make it easier to get the other and just keep that protective boot up on there. That's just going to allow your knuckle down on there, your knuckle up, take your jack out of the way. Lift it up on the knuckle and bolt. Okay, I'm going to speed through putting the half shaft back in. One thing I did forget to do, I do a little bit later, is now is the best time to put the grease fitting on top of the ball joint, before you put that axel in there, but put the axel in place to get it into the hub and then get it lined up on the axel and start a couple of those 13 mm bolts. Once you get all the bolts in you want to torque them to 60 foot pounds and what I do is I use a black marker.
I mark the head of them after I torque them. Then you want to kind of go to the opposite side, torque the next bolt, mark it and just keep going until they're all torqued. I'm just putting the tie rod back on. Just put the nut on there and keep it in place. Now we want to tighten the ball joint nut to 98 foot pounds and that's for this '97 Expedition. It could be different for your vehicle. Okay, I put our cotter pin through, bend it down and around. I'm going to fast forward through putting the grease fitting on top. Like I said earlier a little bit easier to do this step before you put the axel in. Then continue to fast forward as a put a grease gun onto that fitting and fill the lower ball joint with grease. Okay, I'm going to tighten my tie rod nut to 60 foot pounds. Next the cotter pin through, bend it down. Here I'm going to install this sway bar link. I've already put a new link on the other side, then just started the nut on it. Bushing, the bushings always go towards the metal.
Okay, so I've got a bushing on the bottom going up to the mount control arm and a bushing above that. Then my shaft goes on there and then the washer, then the bushing pushing down and in. Make sure the bushing is centered in the stabilizer bar unit. Now bushing and washer, then my nut. Now you'll want to use your jack to put some pressure on the suspension and then tighten up the stabilizer to 15 to 17 foot pounds. Then we'll put on our center hub nut. We're just going to tighten that preliminarily. We're not going to torque it until the wheel's back on. Now you can let your suspension back down and you want to re-tighten your torsion bar and since we marked it we can tighten it right back up to where it was before. You can put your tire back on and start each lug nut one by one. Make sure you don't cross thread them. Tighten them down preliminarily. Torque the lug nuts to a hundred foot pounds using a star pattern. Okay, now using a 35 mm socket torque your lug nut to 220 foot pounds. Put the retainer back on and then the cotter pin, then your wheel cap. We recommend you have your alignment checked and adjusted if necessary.
We hope this helps you out. Brought to you by www.1AAuto.com, your source for quality replacement parts and the best service on the Internet. Please feel free to call us toll free 888-844-3393. We're the company that's with you on the Internet and in person.
Shop Products


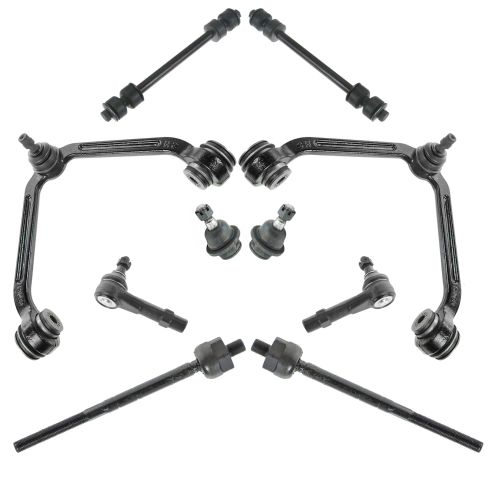
Ford Mazda Mercury Front 10 Piece Steering & Suspension Kit TRQ PSA58656
Part Details:
- (2) Front Lower Ball Joints
- (2) Front Upper Control Arms with Ball Joints
- (2) Front Sway Bar Links
- 10 Piece
- (2) Front Outer Tie Rods
- (2) Front Inner Tie Rods

How to Replace Front Lower Ball Joint 1992-2001 Toyota Camry
Check out this video from 1A Auto and you can learn how to replace the ball joint on your 02-01 Toyota Camry!
