How to Replace Lower Radiator Hose 2003-12 Volvo XC90
Created on: 2019-09-09
Check out this video to learn how to replace the lower radiator hose in your 03-12 Volvo XC90! 1A Auto shows you how to do it yourself!
-
step 1 :Removing the Skidplate
- Raise and support the vehicle
- Remove the two 14 mm bolts on each arm of the skidplate
- Remove the long 14 mm through bolt on each side of the skidplate
- Lift and slide the skidplate forward to remove it
-
step 2 :Removing the Lower Radiator Hose
- Open the coolant tank cap when the system is cool
- Open the radiator petcock to drain the coolant
- Remove the two 10 mm bolts to remove the air collector
- Loosen the lower radiator hose worm clamp with a 7 mm socket and remove the hose from the radiator
- Loosen the worm clamp to remove the intake tube from the air filter box, and move the tube aside
- Loosen the lower radiator hose worm clamp, and remove the hose from the engine
-
step 3 :Installing the Lower Radiator Hose
- Slide the lower radiator hose onto the engine fitting
- Secure the hose with the worm clamp
- Connect the air tube to the air filter box and secure it with the worm clamp
- Connect the lower radiator hose onto the radiator fitting and secure it with the worm clamp
- Install the air collector and secure it with the two 10 mm bolts
-
step 4 :Installing the Skidplate
- Apply anti-seize to the skid plate bolt holes
- Lift the skid plate and slide the hooks over the subframe
- Align the bolt holes in the hooks with the subframe
- Line up the skid plate arm bolt holes
- Install the long 14 mm bolts into the front bolt holes
- Install the short 14 mm bolts
-
step 5 :Refilling the Coolant
- Refill the coolant using a vacuum system if available
- Otherwise, add coolant to the reservoir tank, and allow it to fill into the system
- Continue adding coolant until the reservoir stays full
- Run the engine with the heat on, and continue filling the reservoir as more coolant is drawn into the system
- Continue filling until the reservoir stays full
Tools needed
-
Socket Extensions
Flat Blade Screwdriver
Rubber Mallet
14mm Socket
Jack Stands
7mm Socket
Drain Pan
Ratchet
Floor Jack
Hey friends, it's Len here at 1A Auto. Today we're working on our 2004 Volvo XC90 all wheel drive version. We're going to be replacing the lower radiator hose. It's going to be super easy. I can do it. You can do it too. If you need this or any other part, you can always check us out 1aauto.com. Thanks. Okay, so now what we're going to do, now that the hood's up. We're just going to open up this right here. This is your coolant reservoir. You want to make sure that your cooling is not hot. This vehicle has been sitting for a while, so I'm not worried about it.
We'll set the cap aside and we can move along. Okay, so now that we're underneath the vehicle, what we're going to do is we're going to try and get this out of here so we can get to the radio that's located right here. It'll be very easy. We're going to use a 14 millimeter. We're going to take out this bolt, this bolt. There's one hiding up in here, and then the same thing for the other side of the vehicle. All 14s. I got my airgun, 14 millimeter. You can use a ratchet if you want.
Here's what my bolts look like. There's two long ones and then the other four look the same. The two long ones were of course the two that were hiding. So we'll set this stuff aside. We can move along to the next step. Okay. So I grabbed a rubber mallet just in case I need it because what we need to do, these arms right here, they kind of have almost like this that goes right up here. So what we need to do is get this to go forward and then come undone and then come out. So I'm just going to use some my rubber mallet. Just give it a couple bonks. Try to lift up.
Just getting it to move is the hard part here because the way that these hooks are. There it is. Almost. Come on baby. There we are. We got this out of here. Let's move ahead to the next step. Okay. So we've got our recycling receptacle here. It's ready to catch the coolant that's going to come out. Now we need to do is drain the coolant. We're going to come right up here, got a little petcock area. We're going to turn this counter-clockwise, that's to the left, with our a 13 millimeter socket, and we should have coolant get ready to come out of this. Getting close here. I'm probably going to make a mess. Safety glasses, hand protection, here we go. There we are.
Cool. We'll just let this do its thing and we'll move along. Okay, so we're going to remove this 10 millimeter headed bolt and this 10 millimeter head bolt. That's going to make it so we can move this out of our way. Both are the exact same. We'll set these aside and we'll reuse them later. We'll grab this, give it a little wiggle. It's just got this end right here, which slides into the box. Air comes up through here into your airbox, goes through the air filter and into the intake. We'll set this aside.
Okay, so we're going to take off this lower clamp right here, and that's for the lower radiator hose to the radiator. I'm just going to use my flathead. I'm going to get this fairly loose. I don't want to keep going until the clamp comes completely apart. It's not about that. It's just getting it loose from the hose so I can move it and I can get the hose off of the radiator. That's all I need to do. There we are.
Slide that up and out of the way. We know we got plenty of room there. Let's go like this. It might have coolant coming out, even though we drained it. You never really know. So of course, hand protection, eye protection, super important. Keep your mouth close while you do this. There it is. Wipe off of there. So we're going to take this clamp off right here so that way there we have a better view of where this lower hose connects onto up there.
Could you get it without taking this off? Yeah, you probably could. Is it going to be a little bit extra labor? Probably to do it that way without actually taking this off I would say. Because this thing right here, you just loosen up this clamp, and then we're just going to give it a wiggle. This is hard plastic, so it's going to kind of fight you to come off, but there's literally just a little lip that sits inside here. So once it pops off, there it is, we can get that a little further out of the way.
Now we can see right down in there to where our clamp is. We'll take that clamp off and get the hose out of there. So I'm going to use my small quarter inch ratchet, my seven millimeter socket. We're going to come right down here and take off this clamp. When we go to remove it, we don't need to fully take it apart or anything. We just want it to be loose enough to get the hose off, and hopefully we can reuse this clamp. If we can't, then we'll have to replace it. But you do not need to take it completely apart. Just get it so it's loose enough to get the hose off. We'll check the clamp after, and hopefully reuse it. So the clamp's definitely loose. I can't say that it's fully loose enough to be able to get the hose off. So I'm just going to continue a little bit further here.
All right, so we've put that clamp loose now. We're just going to take it, push it off with the hose so it's out of the way. And we're going to grab our hose, see if we can get it to break free from the tube. Once it does that, we'll be able to move on to the next step. So I'm just going to take my finger, push that clamp right off of there. There we are, it's off the hose. Try to grab my hose, give it a little wiggle. You can see it starting to slide off. Okay, so now it's time to get this hose out here. It's important to remember which way it goes. Essentially it just kind of goes underneath all this wiring and tubing and all that crud. So just pull it out and bring it up this way, since this is where we're standing and there's our lower radiator hose.
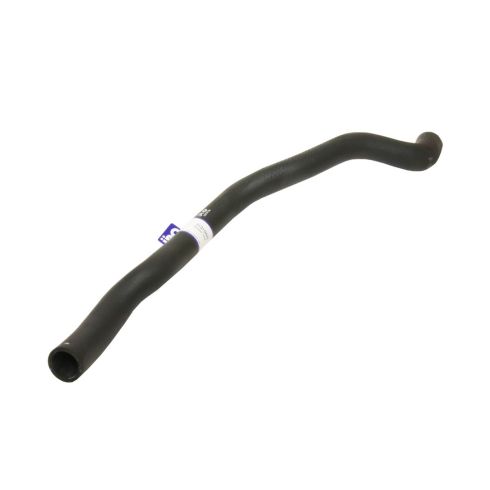
So here we are, friends, a quick product comparison for you. Over here we have our original lower radiator hose out of our 2004 Volvo XC90, all wheel drive version. Over here, we have our brand new quality 1A AUTO part. These hoses are shaped the exact same, which is very important because they're formed to fit. They have to go up and over and under and around and all sorts of funky stuff, and that's why they're just formed like this. They're not a straight hose. All right, so as you can see, they're the same length, same funky shape, looks about the same to me. I don't see any reason why this wouldn't be a quality part to install onto the vehicle. So I'm going to go ahead and do it. If you need this or any other part, you can always check us out at 1aauto.com. Thanks.
Okay, so we've got our hose. We're going to put it in the same way we took it out. I'm just going to run it all the way down to the bottom here. I'm going to bring it under this hose and the plastics. I'm going to bring it back up the exact way that I took out the other one, and bring it right up here. Before we go too far, we can grab the clamp. Let's take a look at it. It doesn't look like any of the teeth are stripped out. I would say that this is reusable. We'll set that right there. I'm going to grab a rag and we'll clean that up real quick. Okay, so I grabbed a rag. Just come right over here. I'm just going to wipe this down. If you happen to feel any big crusties on there, or if it feels like your tubing's corroded and it has lots of holes, you're going to want to replace that.
Crusties and stuff, you can get the majority of that crud off of there. Just use some sandpaper or even a nice small screwdriver. Get it as clean as possible. As long as you don't have any big holes on there, you're doing all right. We'll grab our hose and our hose clamp. This up on here just like that. We'll have it waiting for us. Get our hose up. I'm just going to wiggle it so it's all the way up on there as far as it can go. Grab our clamp, slide that up on there. So we've got the clamp up on there. We don't have it sitting right near the edge of the hose. We've got about the size of the clamp, maybe about half the size of the clamp, distance from the end of the hose, but we can still feel that the tube comes way past where the clamp is.
You definitely don't want your clamp all the way at the end of the hose, and you definitely don't want it past the end of the tube that comes inside the hose. So if your clamps all the way up here, it's not going to hold on to anything. So we'll just grab our seven millimeter. We're going to snug that up and I'm just going to snug this up a little bit. Then I'm going to check my alignment.
Make sure it doesn't move too much. If the hose clamp is super loose when you go to start this, it's going to wobble around and it could go kind of crooked. You want it to be pretty much parallel to the end of the hose. Okay? That looks good. We'll continue to tighten. Once again with these hose clamps, you want to make sure that you don't over tighten them and if you feel like you do over-tighten it and it skips or strips, it's garbage. You just replace it.
So right here it feels like it's stopped, give it like a teeny bit and then that's it. I'm going to grab my hose, give it a nice little tug. That's going nowhere. It feels great. We can move ahead. So we get our clamp. Sometimes they just slide down. It's easy. Just reach down and grab it, no big deal. Like I said, when we were taking this off, the housing just has a little lip on it and that lip sits inside here. So when you go to push your hose in, you just grab both pieces, squeeze them. This should let you in pretty well. You can give it a wiggle. You might even think you don't need to use this clamp, but it is super important to use a clamp. I'm not telling you not to use it. The reason for that is because if you don't put this clamp back on or tighten this clamp enough, you can pull dirty air into the engine.
Also, you'll be pulling unmetered air into the engine, in which case your car won't run right, and you'll probably have poor fuel economy. Of course, you'll be doing damage to your engine if you're pulling in dirty air. I'm going to try to put this clamp so it's facing down just like this so it's down and out of the way. Nobody's going to get caught on it and cut themselves. All right, it feels like it bottomed out right there. Just give it a teeny bit more. Give it a nice tug. It feels good. On to the next step.
All right, I'm just going to get my hose clamps started on here so it's close to where it needs to be. Bring our lower hose up. I'm going to get it onto the lower portion of the radiator there. Slides right on. All right. Slide right over that. Once again, you want make sure it's flush. Make sure your hose is all the way up against the radiator as far as it can go. Make sure when you put your clamp on, you don't have it very close to the edge and you also don't have it past the edge of the tubing that comes out of the radiator.
That looks pretty good right about there. I'm just going to snug this right up, tight. Just putting a little bit of copper never seize on there. It's going to help it come off down the line. So on the skid plate, you've got these little P tots that come down into right in between here. So this part right here sits up on the subframe area right up here. So that P tots going to come up and then sit down into its groove right up along the top up there. So if you're struggling and you're getting it over, but it's just not doing its thing, it's because that thing needs to slide down in right there.
All right, so let's get this up here. I'm going to go at an angle. I'm going to try to do one side at a time, under there, up over that. Bring this around, up this way. Give that a little push, bonk. There we are. Those little P tots came right down into the sub frame like what we wanted them to do. All of our bolt holes are lined up. Let's grab some bolts and get it in.
All right, so we've got our bolts, we've got four of these, two of these. These two are the same. It's The same as those two over there. Let's get those started in. It's going to start all these in. We're not going to tighten anything down until they're all started. I'm going to use a 14 with my extension, just so I can get up in here. Now that they're all started, we'll go ahead and tighten them down.
All right, all six are tight, easy peasy. All right, so we have our air dam. This is where the air gets pulled in, right up through here into the airbox, filtered, metered, drawn into the engine, burnt. This is super important. You need to make sure you put it back in. There's a slot where this square connects into in the bottom of the box, same place we took it out of. That's where it's going to go in. Slides right in just like that. Take your two bolts now that we haven't both started. We'll go ahead and snug them up.
There we are, easy peasy. Okay, so when we're filling the coolant, generally speaking, you'd want to apply vacuum. Add coolant that way because that'll make it so it draws coolant into all the areas inside the cooling system. If you don't have access to a vacuum system to be able to fill a coolant, you're just going to have to slowly top it off. It's going to work its way in. Once it gets up, so it looks like it's full, run the vehicle for a little bit. It's going to draw down. Just keep adding. Make sure you're wearing safety glasses as you're doing it. Once it gets hot, anything can happen in there.
You're going to want to run it for a little while because it's going to burp out a lot of air through the system. There's the heater core. You got all your coolant hoses, you got the inside of the engine, all sorts of areas where this coolants going to need to go, easy peasy.
Thanks for watching. Visit 1aauto.com for quality auto parts shipped to your door, the place for DIY auto repair. And if you enjoyed this video, please click the subscribe button.
Shop Products

How to Replace Upper Radiator Hose 2008-16 Chrysler Town Country
This video shows you how to install a new engineered to fit TRQ radiator hose in your 2008-16 Chrysler Town & Country.
