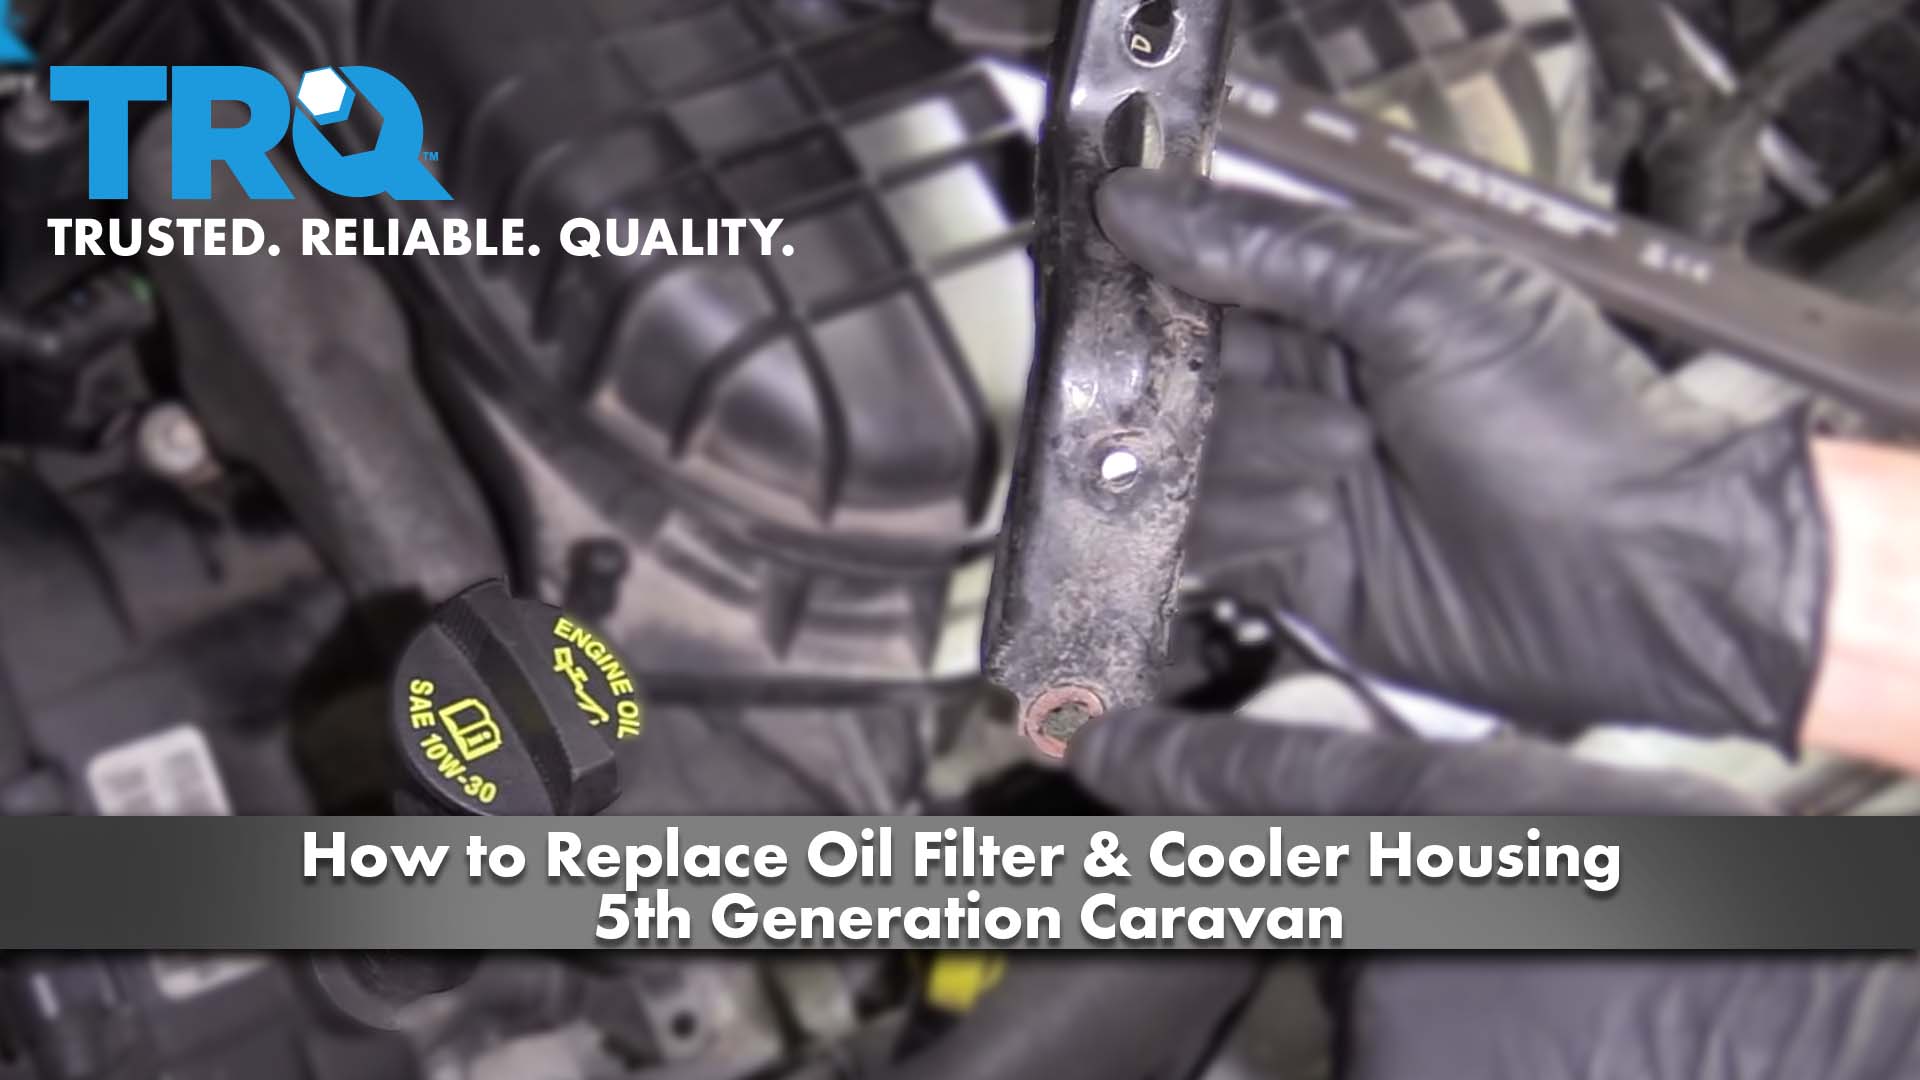
How to Replace Oil Filter Cooler Housing 5th Generation Caravan
Created on: 2020-04-08
Watch this video to learn how to install a new oil cooler and filter assembly in your 2011-13 Dodge Grand Caravan.
Tools needed
-
Razor Blade / Gasket Scraper
Torque Wrench
Pry Bar
E8 Inverted Torx Socket
Trim Tool Set
Pocket Screwdriver
Coolant Funnel Set
Air Blow Gun
Vacuum
Coolant Pressure Tester
8mm Socket
Air Compressor
Push Pin Pliers
Silicone Paste
Hose Clamp Pliers
10mm Socket
Ratchet
Cloth Rags
13mm Wrench
So now that we have the coolant fully drained, we're gonna come right up here. Grab on to this. We just wanna lift it right up. We're gonna start removing this intake area. So the next thing we're gonna do, grab on to this. And if you follow this end down, and slide that right off of there. Let's remove this air inlet. You can use an 8-millimeter or a flathead, just loosen up the clamp right there.
Remove that. We're gonna continue on to getting off some of this wiring and this hose up here. Just pull that straight up, set it aside. You don't wanna forget it. Grab a small pocket screwdriver to continue. We're just gonna push in on the tab and then draw it off. Some of these have a little red tab. I'll show you it. And that's actually a lock, if you look right here, that was pressed. I just kind of popped it up, and it unlocks it, just start rolling that away. These are just little clips that hold onto the plastic. Get this one, little red lock on it. There it is.
These right here are just little push tabs. You can try to use something as simple as a 4-key tool and try to pry it out of there, which is what I'm gonna do. I wanna be careful not to break the plastic on the intake, of course. I'm just gonna see if I could give that a little push. Awesome. Okay.
So I can see there's a mounting nut for a bracket that's right back here along the intake. We're gonna need to make sure we get that off as well. Let's continue on checking for hoses first. There's this hose that goes to the brake booster right along the backside. That's where the brake booster gets vacuumed from the engine. We need to get that off of there.
Now we don't wanna forget about this bracket back here, but first, we're gonna come along here to the front. Get this. You can either disconnect it right here or just pop it up and out of there. I had the 4-key tool out. So I can see up along the front, there's another mounting nut there and another mounting nut up here that hold he intake down. So we're gonna pay attention to those.
As far as I can tell, everything that needs to be disconnected should be disconnected, so let's start taking off the mounting hardware. You've got your two front nuts, one right there, one located right there, 10-millimeter, get them both off of there. There's the two fronts. Now that we have the top nuts loose on there taken off, I'm just gonna get this wire off of there. She won't pop out. The same over here. There it is. So I can pull the wire away from the brackets, and that looks pretty great.
Now we're gonna remove the nuts that hold the bottom portion of the bracket. If you look down along in between these brackets, you're gonna see this aluminum-looking tube. That's actually a coolant tube, and it's mounted to this bracket. So I'm gonna use a 13-millimeter ratchet wrench. I'm gonna come down through here. And get right on this mounting nut, okay? And that's holding, like I said, this tube to the metal bracket. There's the nut. I'll set that aside so we don't lose it. We should be able to grab this tube, move it around. Awesome.
At that point, now I can see over here. I can see that 13-millimeter nut. We can get that one off as well. Let's see if I can move this far enough to get it off of there. Okay. So that's off pretty decent amount. We just need to be far enough to get our 13-millimeter wrench on there to get the nut off. This looks like it's turning the whole stud, and that's okay. I'm all right with that. Here we go. Get that one out of there. There's the bracket, our bolt. Now we're just gonna do the same to the other side. It might be better to do this one from underneath.
Now that we have the two nuts off on the top, we're just gonna follow this down. We're gonna be removing the bracket, so of course, I'm gonna get the wiring off of there, but I wanna point out where the other bolts are. This is gonna be one. Let's see if I can get this stuff moved. Okay. Right down here, okay?
So next, I'm gonna come along the top here. You have a little pushpin. It's a little hard to get to with some cutters or anything like that or even a tool that you'd normally pull them out with, so I went ahead and grabbed something that look like this. I'm just gonna grab onto that center, just like that, lift up on the center. That should draw it right out. Set that up there. At this point, we can give this a little wiggle. It's starting to feel pretty good. Just kind of lift up, push back. Here it comes. There we are.
So next let's start taking out all these mounting bolts using an 8-millimeter. You wanna do that starting on one side and working your way over to the other.
Before we go too much further, we wanna make sure we have something to cover up this engine, and I'll show you why. Let's carefully lift up on this, okay? Just got a bolt that's a little bit in there. Here we go. So now that we have that upper portion of the intake off, it's important to remember that the engine is wide open at this point. If you were to drop anything inside these holes, something as small as maybe a bolt or a nut, or even just a small piece of debris that you happen to knock off into there, it's gonna cause an issue inside of your engine.
So let's move along. I'm gonna carefully lift this up, get this out of the way. Now that we have the upper intake off, we're gonna start removing these clips that go into the fuel injectors. You lift up on the red tab. Once you do that, you can press on the black, and then draw these right off. Take a peek at the connector. It looks great. Move along. Do the same to all six.
So now it's time to remove the mounting bolts for the lower intake. And what I mean by that is all these bolts that run along there. Start on that outside or on a corner.
So now when we lift this up, it's important to remember that we have these holes up here, but we're also gonna have holes that are underneath there that actually go into the engine a little deeper down. So as we lift this up, if there's any crud that might be laying on top of the engine or around the edges there, there's a potential that it could fall into the engine, so just pay attention for that. And if it does, we'll just make sure we clean it out the best we can.
We get this. Just gonna pull this up and out of the way a little bit. Just like that. If you wanted to, you could, of course, remove this fully from the vehicle. I didn't wanna disconnect the fuel line. You can if you want. It might just make a little bit more of a mess. So if you look all along here, you can see where the gasket is supposed to ride. There's a lot of crud. We're gonna need to make sure we clean that up. And when we do, be careful not to force it down into where the valves are. That would become a major issue. I'm gonna grab a vacuum, a razor blade, maybe a scraper, and some nice, clean rags.
So now that we got this all nice and cleaned up, we wanna be very careful not to drop anything in the engine, once again. But to continue on, I'm gonna lift up on this red tab right here, and then I'm gonna press in right there, and draw this up. I'm gonna do the same thing down here. Just pressing on that tab. Grab it off of there. Grab this tool. See if I can grab this clamp. If for some reason we can't, that's all right. We can get it once we get this off. It's close. They don't give you very much room in there. And I know that I'm coming at it from the side. But that's what I have to do here. Okay. All right.
So as you can tell, it really didn't wanna come off that way. So now let's remove these mounting bolts. To do that, we're gonna use an inverted torque socket. I'm just gonna wiggle this around. There it is. Okay. Lift straight up on this.
Now, of course, it's time to get this hose off of there. It's definitely coming off. There we are. Carefully lift this up and out of here. So we've got our new engine oil cooler here with the oil filter assembly. If you look underneath, you're gonna see you have all these nice, new gaskets. So this has new gaskets. We need to check everywhere where that's gonna sit to make sure that there isn't any gaskets from the old ones sitting on here. Well, nice. There's one. That would have been a big issue.
So now that we know those are off of there, I'm just gonna clean up these areas where the gaskets are supposed to ride, make sure they're nice and clean. I'll try to get some of that oil out of there the best I can, of course, and then we'll start the install.
So I got the majority of that oil out of there now, I'm just gonna go around one more time just to make sure that I get all these areas where the seals are gonna ride and make sure that they're super clean and there's definitely no raised edges or areas that might cause an issue with the seals. Because if you have an issue down here, you're gonna have to take this all back apart again and resurface.
You wanna grab that new cooler, just slide this one there. You wanna slide the hose on first. Let's see if I can get on as far as possible. There it is. Get that clamp to release. Yeah, the hose is definitely on there all the way. That looks great. You just wanna double-check to make sure all your seals are definitely in there.
And then we're just gonna get a little bit of silicone paste. I just went with a tiny bit of silicone paste right on my finger. I'm gonna go right along those seals, just where they made onto that metal of the engine. You could also use a little bit of motor oil if you want, or if you're really daring you could use nothing at all. I'll say it's your prerogative. Carefully put this down on here. Make sure everything is sitting down where it belongs. Perfect. Now I'm going to start in all these bolts before I tighten them down completely.
Okay, so now, using our inverted torque socket, we're gonna go ahead and snug these up. I'm just going to bottom them out, going in a specific order. Once everything is bottomed out, we'll go ahead and torque them to manufacturer's specifications. The first one we're gonna tighten down is right over here. Number two, all the way over in this corner. Three is over here. Four is in this corner. And number five, right there. So now that we have all these snugged up, let's torque these to 106 inch-pounds in the same order that we just tighten them down in. All those are torqued. Let's move along.
So now it's gonna be time to get the gaskets off of this, but before I do that, I'm just gonna put this down to cover all the holes that lead down into the engine. At this point, we're gonna continue on by removing the gaskets on this side of the intake and also the gaskets on this side of the intake. Once we've done that, we're gonna try to just clean this out a little bit as much as we can, make sure there's no raised areas, reinstall new gaskets on all these ports, and then we'll continue with the install.
So let's start here. This little gasket looks like it's still good. It's not dry and brittle. I like to replace them anyways. I got a brand new one here, just slide it right in there. We're gonna continue on to all the rest. Nice. All right. Now let's do the other side. It's not horrible. I'm just gonna clean this up with a rag, get it all along here where the gasket is gonna ride. Grab our new gasket, slide it right in there, just like that. Now we're gonna do the same right down the line.
Look at that. Just from turning over the intake, look at how much crud would have just fallen into the engine. Get all those gaskets on there, get as much sand out of this thing as possible. Carefully lift this up and out of here, just like that. You can see how much crud is in there. To continue on with crud patrol, I'm just gonna use this, and just kind of put a little bit of air inside these cylinders. I just wanna see if any large chunks of anything come flying out. Nope.
Let's wipe down these meeting areas, where those gaskets are gonna ride, make sure they're nice and clean. We wanna double-check to make sure there's no raised areas anywhere. This is very important. This feels really good, super smooth, nice, and clean. All right. Let's grab that intake one more time. I'm just gonna use a little bit of lubricant. It's good to use a little bit of oil, especially if you have some new oil laying around, just spread it around on these gaskets. Yep. And this is also a perfect time to make sure you're pressing down on those gaskets. So they're definitely gonna be ready to go.
Let's get this down, pay special attention to if any gasket falls out while you're doing this. This is looking great. Yeah, nice. Get the fuel injector plugs out of there. It's gonna sit right down. Oh, yeah, this is perfect. Okay. Now I'm gonna start in all the bolts. Give them all a couple of threads before I tighten anything down. Awesome. Okay.
Now let's bottom out the bolts. We're gonna do it in the specific order, so pay attention. Now it's time to bottom these out. I'm just gonna do it very lightly, but I'm gonna do it in a specific order. Number one over here in this corner. Number two. Number three is right here. Four. Five. Six is right here. Number seven. Number eight, located right there. Awesome. Let's torque it down.
So now it's time to torque these. We're gonna do it in the same order starting with number one over here. Using our 8-millimeter, torque them to 106 inch-pounds. Those are all torqued. Let's move along.
Next, we're gonna move along to connecting in these fuel injectors. Let's grab the connector. You're gonna press it right down on there. Press down on the red so it's locked in and give it a tug. Do the same to all six.
Continuing on, I've got my oiled finger here. I'm just gonna go over these gaskets. Of course, I'm using fresh oil, super important. Let's grab this little foam insert, just put it here. It's kind of like an insulation barrier. Got our upper intake. Make sure you clean up all these ported areas. If there's any raised areas that you feel might be a problem, you could take a nice, smooth razor blade and just kind of smoothen them down, but there really shouldn't be any issue areas where this is just plastic.
That's nice. Carefully put this up and over here and bring it down. And I'm just gonna try to line up those spots. It's proximate, come a little further. So, great, about there. Wiggle it so the bolts drop down. That means they're into their spots. Awesome.
Now it's time to snug up these bolts. We're gonna do it very lightly because we're gonna be screwing these into plastic. And the torque specification form, believe it or not, is actually very low. We'll get to that in a minute. Start right over here with number one. Number two, you're gonna come all the way over here. Number three. Number four. Number five. Number six. And number seven.
Now it's time to torque these down. We're gonna torque them to 89 inch-pounds. Let's install that driver's side bracket. It's right along here. It's gonna go over that stud and that stud. Now once you have it over, just grab that bolt. I'm gonna start it in, and then I'm gonna start those other two nuts, and then we'll snug them down. Awesome. Grab your 13 and tighten this up. Okay. It's bottomed out. A teeny bit more. That's great.
Make sure you put the wiring harness back on here so it's nice and secure. We've got this one, slides in there. Don't forget your 10-millimeter nuts. We're gonna snug those up as well. Okay. It's bottomed out, just a teeny bit more. Obviously, I don't wanna break the plastic intake. Okay, it's bottomed out. A teeny bit more. Get our wiring here. This goes in there. We got the small connector at all these. Here we go. We're in here. Okay. Pushing that lock tab, give it a nice tug. Don't forget to put this on here. That's what holds it, very nice.
I've got this rubber hose it goes right on the back side here. You can feel a little pit down come out of there. Then put that on. If you forget that, you're not gonna have vacuum going to the brake booster, so your brake pedal is gonna feel very tight. I'm gonna grab this one. Let's see. That has to come around through here, so I'm just gonna get this out of the way again. There it is. Put that in. And then, of course, just put this back inside there. Okay. This is all nice and secure. We're doing all right.
We've got this one. We need that as well. That's vacuum as well. All right. We're gonna leave this just like that. At this point, we're gonna grab our air intake. We've got this right here. That's the air temp sensor. I'm gonna come right under here. I'll just try to sneak it in. And then if you look down along the engine in the bottom of the intake, you can see those little pitons, they need to go into those little rubber grommets. At the same time as that's happening, we need to be bringing this part down on to this part of the intake. So there's multiple things that have to happen all at the same time.
You have to press and twist. And it should pop right in there. Oh, yeah, nice. We have our push clip. When we push this in, grab from here. Once it's all the way bottomed out, push in the center. Just like that. Perfect. All right. Let's continue on with this wiring. We're gonna connect this one in. Air temp sensor, give it a tug. Now make sure you anchor it down. Super important to make sure nothing is flopping around as much as possible. Let's get this back on here. You can either snug this up with an 8-millimeter or a flathead screwdriver.
So now we have this hole right up here. We need to make sure that we close that up using this tube. I'm gonna insert that on this end, comes right across the top, and then it's gonna plug in right here, squeeze it right in there. This should sit right along the top. Everything looks great. Let's move along towards the front of the engine.
Now it's time to get the bracket in. Start with the passenger's side because the driver's side has an extra bracket that's gonna hold the coolant tube, and that's gonna be in the way. I'm gonna start right up here. We have our little stud, put my bracket down and through. Okay. I'm gonna start this nut on here. Now I'm gonna go underneath, and I'm gonna start in the other one. While I'm down there, I'll just go ahead and snug it up, and then I'll do the top portion again later.
I'm gonna go ahead and snug that right up, make sure that this is nice and tight. Nice. Snug up that top nut. Now, this is mounted only into plastic, so you only need to bottom it out and give it a teeny bit more. And that's perfect. Let's do the same to the other bracket.
So we're gonna do the bracket that's on the driver's side now. I've got my bolt going through like this. You've got the washer side going right up against the bracket. This is gonna go into the engine. This portion right here it's gonna sit right on this stud that's located right underneath the intake. And in between, we have that cooler line. That's very important to remember. It has to go in between the engine and the cooler line. That's going around here. Oh, the wrong way. That's good.
All right. So I've got the upper portion of the bracket up on there. Let's see if I can get a nut on before it falls off. Awesome. Okay. So now is gonna be the tricky part. I need to get that bolt in through the bracket and then into the engine and tightened, and then I need to put that bracket that's part of the coolant line over it and then put a nut on top of that. The problem is the bracket that holds the coolant line on to here is pretty much hanging out right over this. So get it in and in between is just gonna be a tight squeeze. I'll try to wiggle it around, see what I can do to get the most space. All right. I'm just gonna snug this right up. Nice. Let's get that top nut. Okay. It's bottomed out. A teeny bit more.
So now we need to get the bracket for the coolant line over that bolt that we just put on the intake around the engine. Come on. There it is. Grab that 13-millimeter nut. Go ahead and put that on. All right. So it just bottomed out right there. You can give it that teeny bit more. Perfect. Let's just get this down so we can really put it in there. That feels great. Double-check everything. Just go around, make sure everything is definitely connected in, we didn't forget anything. This looks good. Let's continue.
Let's make sure the petcock is nice and closed. Perfect. Of course, we're gonna clean up our mess when we're done. The next thing I wanna do is test the pressure of the cooling system, make sure that it holds vacuum. So I'm just gonna use this kit right here. And what it's gonna do is it's gonna put force air through here, rush it right by, create vacuum inside the cooling system, you're gonna see the hoses start to, you know, crush down or collapse. And we're gonna watch this needle go all the way up into the green. It has to go past the 25. Anywhere in between the 25 and 30 is great. And then it has to stop. Once it stops, I'm gonna close off the vacuum, turn off the air, and we're gonna make sure that that needle doesn't go dropping into the yellow or, even worse, the red.
So that's been holding pressure right there for a while now. So I'm just gonna take this off. We're gonna take a 5 to 10-minute break here. I'm gonna come back, and I'm gonna see if this drops down below that 25. So now you just use your manufacturer's specified coolant, or if you want to use a universal coolant of some sort you can do that. You just need to make sure that it meets the specifications required by the manufacturer.
This is gonna fill the system using the vacuum that's inside of there. You're gonna see this hose right here is gonna expand back to its regular size. All right. Now that I've got that as full as it's gonna go, I'm gonna go ahead and put this adapter on here. I've got a nice funnel with a stopper. I'm gonna put in some of this coolant. Now, this is gonna burp out any air that might be still left in the system.
The way that you do that is you can start-up the vehicle and run it for a little while. As it runs, the coolant is gonna heat up to the right temperature where the thermostat is gonna open up. Once it opens, more than likely, it's gonna end up pushing through any air that's inside this system, and it's gonna come out the highest point, which of course would be here. As air comes out, the coolant is gonna make its way in, and it's gonna fill up just the way it should.
So let's get the engine cover on here. See these little grommets? Those are gonna line up with these pitons, okay? We got them all over the top there. Just line it up. There it is.
Okay, so we made it inside the vehicle. We're gonna start up the vehicle. You're gonna put your heat all the way on high. You wanna face there. And then go ahead and crank it up. At this point, you could pay attention to the dash, and that's where your temperature gauge is. Obviously, if it starts making its way all the way up into the red, there's gonna be an issue. I'd like for it to come up into the middle, maybe a little bit above. That should be about where the thermostat is gonna be, at about three quarters. It's gonna open up. You're gonna see it drop back down again.
All right, so we ran this for a long period of time. We got all the air out of the cooling system. We're sure of it. Awesome. Next, I'm just gonna grab this cooling hose. It's gonna be a little warm. I'm gonna give it a squeeze, and then I'm gonna push this down in there. What that's gonna do is it's gonna give me a little bit of slack, where it's gonna draw the coolant down and hopefully spill less. There we are.
At this point, you can either take your leftover coolant and put it in your reservoir, if you haven't already replaced the cooling inside there, it's a good idea to. That's already full. So I'm just gonna go right in here, and I'll recycle it later. Get that adapter off of there. We have our cap. Go ahead and close that up so it's completely tight. Perfect. We'll just double-check everything. If you left anything loose, make sure it's covered. Go ahead and take her for a road test.
Shop Products
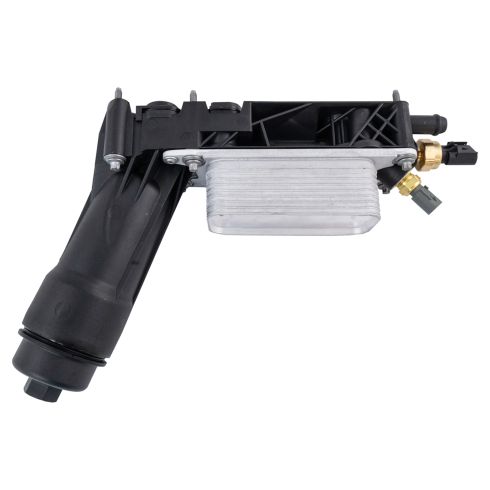
2011-13 Jeep Dodge Chrysler Oil Filter Housing & Cooler Assembly TRQ ECA92434
Part Details:
- No
- Performance
- Aluminum & Plastic

How to Replace Oil Filter Housing Cooler 2006-2018 Jeep Wrangler JK
This video shows you how to install a new oil filter housing and cooler on your 2006-2018 Jeep Wrangler JK.
