How to Replace Parking Brake Shoe 2000-14 Chevy Suburban
Created on: 2014-05-30
Watch this video to learn how to fix fading or squeaky emergency brakes. The experts at 1A Auto show you how to replace the emergency brake shoes on your 00-06 Chevy Suburban
-
step 1 :Removing the Wheel
- Loosen the lug nut covers with a 22mm socket
- Pry off the center cap by hand
- Loosen the lug nuts with the vehicle on the ground
- Raise the vehicle with a floor jack
- Secure the vehicle on jack stands
- Remove the lug nuts
- Pull off the wheel
-
step 2 :Inspecting the Brakes
- Check for gouges on both sides of the rotor
- Check the thickness of the brake pads
- Check the brake pad wear indicator
-
step 3 :Removing the Brake Pads
- Remove the two 12mm bolts from the brake caliper
- Use a large C-clamp to push the pads into the brake caliper
- Pull the caliper aside
- Pry the brake pads off with a flat blade screwdriver
-
step 4 :Removing the Brake Rotor
- Remove the two 18mm bolts from the brake caliper bracket
- Pull off the brake caliper bracket
- Pull the rotor off
-
step 5 :Removing the Emergency Brake Shoes
- Remove the 8mm bolt from the emergency brake bracket
- Pull off the emergency brake bracket
- Pull the emergency brake shoes off around the hub
-
step 6 :Installing the New Emergency Brake Shoes
- Put the emergency brake bracket into place
- Insert the 8mm bolt into the emergency brake bracket
- Put the new emergency brake shoes into place
- Put one emergency brake shoe tab into its slot
- Push the second tab into its slot with a flat blade screwdriver
- Turn the adjuster wheel with a flat blade screwdriver
- The adjuster should be set so that the rotor slides on with some resistance
-
step 7 :Reinstalling the Brake Rotor
- Slide the rotor on
- Thread on one lug nut to hold the rotor in place
- Put the bracket back into place
- Start the 18mm bolts by hand
- Tighten the 18mm bolts to 85 foot-pounds of torque
-
step 8 :Installing the New Brake Pads
- Install the new brake pads into the bracket
- Put the caliper on
- Thread the 12mm bolts by hand
- Tighten the 12mm bolts to 30 foot-pounds
-
step 9 :Reattaching the Wheel
- Slide the wheel into place
- Start the lug nuts by hand
- Tighten the lug nuts preliminarily
- Lower the vehicle to the ground
- Tighten the lug nuts to 100 foot-pounds in a crossing or star pattern
- Reattach the center cap
- Fasten the lug nut covers with a 22mm socket
-
step 10 :Testing the Brakes
- Pump your brakes repeatedly until they feel firm
- Test your brakes at 5 miles per hour and then 10 miles per hour
- Road test the vehicle
Tools needed
-
12mm Socket
A Piece of Pipe (for leverage)
Large C-Clamp
Flat Blade Screwdriver
Torque Wrench
Jack Stands
18mm Socket
8mm Socket
Ratchet
Floor Jack
22mm Socket
Brought to you by 1AAuto.com, your source for quality replacement parts and the best service on the Internet.
Hi, I'm Mike from 1A Auto. I hope this how-to video helps you out, and next time you need parts for your vehicle, think of 1AAuto.com. Thanks.
In this video, we're going to show you how to replace your E-brake shoes on this 2002 Chevy Suburban. We show you on the passenger side, but the driver side is the same procedure. The items you'll need are new emergency brake shoes from 1Aauto.com; 8, 12, 18, and 22 mm socket and ratchet with a piece of pipe for leverage; flat blade screw driver; large C-clamp; torque wrench; and jack and jack stands.
Start off by loosening up these lug nut covers. We'll fast forward as Don does this. Once those are all loosened up, you can pull the hub cap free. Now, you want to loosen the lug nuts preliminarily, raise the vehicle and remove them the rest of the way, unless you have air powered tools. Then, you can do it while it's up in the air.
Then, to inspect your brakes, just run your finger along the rotor, and check for any deep grooves. You can look in here for the life of this brake pad, and then through here for the life of the other brake pad.
Now, remove these two 12 mm bolts. We'll fast forward as Don does that. Use a large C-clamp. You just put it on this end on the back of the caliper, and on this brake pad and just twist it in. This is going to push the caliper piston in and make it easier to pull the caliper up and off. Now, remove the large C-clamp. Pull the caliper free and set it aside. Now, pry out the brake pads.
Now remove these two 18 mm bolts. Just use a piece of pipe to help break it free. We'll just fast forward as Don removes those two bolts. Now pull your caliper bracket off. Pull the rotor off.
There should be a bracket underneath here held in with an 8mm bolt. So, you'd want to remove that next. Ours is missing. After that, you can pull your E-brake shoes forward, and then hit them down. Now you just want to pull it over the hub. You do have to angle it just right to get it over.
Now, before you install your new E-brake shoes, make sure you put this new bracket into place. The E brake shoes from 1Aauto do come with this bracket. Just replace that 8mm bolt and tighten it up. Put your new E-Brake shoes on. Now you want to just put these two tabs on the ends of the shoes into these two slots, one on either side of the adjuster here. Once you get one side into the slot, just use a flat blade screw driver to pry the other side. Once it's lined up, you can just use your flat blade screw driver to just turn this adjuster. If it's a little stiff, just use a hammer. Just adjust it so that when you put your rotor on there's just a little bit of resistance.
Slide your new rotor into place. Then twist on a lug nut to hold the rotor in place while you put the caliper bracket back on. Then put your caliper bracket back into place and replace those two 18mm bolts. We'll fast forward as Don tightens those up. You want to torque these to about 85 foot-pounds.
Push your brake pads back into place. Then, put your caliper back down into place and replace those two 12mm bolts. Now we'll just fast forward as Don does this and tightens them up. You want to tighten these to about 30 foot-pounds.
Put your wheel back into place. Then replace your lug nuts and tighten them preliminarily. We'll fast forward as Don does this. Lower the vehicle and torque the lug nuts to 100 foot-pounds in a crossing pattern. Then replace that hub cap and tighten up each of your lug nut covers.
Before taking the vehicle out on the road, you want to just pump the brake pedal until it firms up. Then do a stopping test from 5 miles per hour, and then 10 miles per hour. Then you're all set.
We hope this video helps you out. Brought to you by www.1AAuto.com, your source for quality replacement parts and the best service on the Internet. Please feel free to call us toll-free, 888-844-3393. We're the company that's here for you on the Internet and in person.
Shop Products


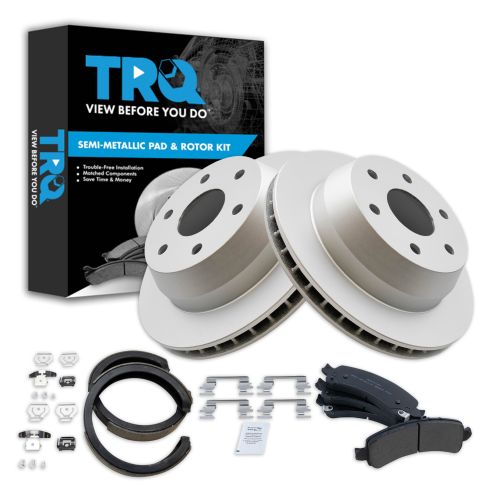
Chevrolet GMC Cadillac Rear Semi-Metallic Premium G-Coated Brake Pad & Rotor Kit TRQ BKA37926
Part Details:
- Semi-Metallic
- Premium Posi
- (1) Rear Parking Brake Shoe Set
- (2) Rear G-Coated Brake Rotors
- Premium G-Coated
- (1) Rear Semi-Metallic Brake Pad Set

How to Replace Parking Brake Shoe Set 2003-11 Ford Crown Victoria
Check out this video to learn how to replace the emergency brake shoes on your 03-11 Ford Crown Victoria.
