
How To Replace Parking Brake Shoes 2009-17 Ram 1500
Created on: 2020-11-09
This video shows you how to install new, quality TRQ brake pads and rotors on your 2009-2018 RAM 1500.
Tools needed
-
12mm Socket
Torque Wrench
Hammer
Socket Extensions
Pry Bar
Jack Stands
Trim Tool Set
Brake Parts Cleaner
Pick
21mm Socket
Flat Blade Screwdriver
Brake Caliper Hanger
Socket Driver
Paper Towels
Copper Anti-Seize
Wheel Chocks
Brake Grease
Ratchet
Floor Jack
Wire Brush
Needle nose pliers
1/2 Inch Impact Gun
22mm Socket
Now I'm gonna remove the wheel. Take a 22-millimeter socket and remove the lug nuts. And pull the wheel off. Now we're gonna take the brake caliper off. Use a 12-millimeter socket and take these two caliper bolts off. And grab the caliper. You might have to wiggle it back and forth a little bit. And slide it out. Use a brake caliper hanger and attach it to the coil spring or somewhere that the brake hose is not being pulled on too hard. And just take a straight blade screwdriver, pry out the brake pads. Now take a 21-millimeter socket and take the caliper bracket bolts off.
Pull those bolts off and slide the bracket back. Now take a hammer and just tap on the rotor in those locations. Make sure you don't hit the studs. Now it's loose from the hub itself, but the brake the parking brake shoes are holding me up a little bit so I got to loosen those up. On the backing shield, there's this little window right here. There's a rubber grommet. Just take your screwdriver, take that off. On the passenger side, this is on the bottom. On the driver's side, it's on the top. And then, there's a little wheel right there that if...it's like a star wheel, that's the adjuster. You can take a screwdriver and just find something that fits or a brake spoon, it's what they call this. And to tighten this up, you're gonna go and turn the wheel up. Just like this. And grab the rotor and slide it right off.
Now we need to remove these clips that hold the shoes on. I'm just gonna use a right-angle pick. Just get underneath the clip. Then I'm just gonna use a trim tool and just push down on this side of it as I slide the clip up. I'm just gonna take it off the pin. Just like that. And just try to pry this out a little like that. And do the same on the other side. Now I wanna get this adjuster out under here. It's kinda hard to get that spring off with the adjuster on there. So, I'm just gonna take two pry bars and just pry this out and just hopefully the adjuster will fall. There we go. Then with the shoes closer together, then the spring just comes out pretty easily. Grab the spring. Ther's the adjuster just fell out. And slide the spring out. Now there's two springs, there's a spring on the front side and a spring on the backside. And what you're gonna do is just try to get this off of out of this bracket right here. So, I'll use a pry bar and a screwdriver. Just try to pry this out a little bit. Same on this side.
There we go. Pop that spring out. And the other spring, let's pop that one out as well. There's that one. And here's that front shoe and the springs. So these springs, one spring goes on the backside, one spring goes on the front side like that. I'm gonna take these pins out. I am gonna re-use them because I don't have a hardware kit, but I just need to take them out. It's just gonna make putting the new shoes on easier. Put those aside and just take a wire brush and just any of the surface where the shoes touch the backing plate. Just clean those up a little bit. You could put a little grease on there if you want to. Now take the new shoes. Now, there is a top and a bottom and it's gonna be the opposite on the driver's side. There you go like that. So, for this side, this arch area it's gonna go on the top for both shoes.
Now, we want this spring we're gonna put both springs on before and we want one of the springs to end up behind here. So it has to go in behind there. So, it's a little tricky to get it in there. So hook that on right there and then there. The other spring you put it on the outside, right there and right there. So, these are together like this. Now what I'm gonna do is take the shoes and just go like this and then just rotate. This makes it easy, easier. And then take the shoe, and it has to go in between here and here. Just make sure that other spring doesn't pop out. And it's good like that. And then I'll take a screwdriver and just pry this one out, just like that. And there we go. Those are in position. And check your adjuster. If the adjuster doesn't move too easily, you wanna take it apart and just clean those threads up and then put some lubricant on those. This one moves pretty good. Now, I'll just put a little grease on here, just on the threads. To make putting the pins in a little easier, I'm just gonna put this adjuster in. Just pry this apart. You could use a pry bar if you want. That's lined up right there. Now take the pins, sometimes they call these nails. And then going from the back of the shield. And just get it lined up through the shoe. Now I'll just take this retainer and slide it up through here. And I'm sure they have special installers to put these on, but use what you can. I'm just gonna use this trim tool. There we go. It might take a little bit of effort. It's not too bad. Do the same on this other one.
Now I need to put this spring in, but it's gonna be very difficult to get that spring in with the adjuster in there. So, what I'm gonna do is just spread these shoes apart, take the adjuster out temporarily. And I can take the spring, push the shoes together. I'm just gonna use a screwdriver or a tool, get the spring lined up, so that's in there good. Now we can put the adjuster back in position. Just get it past the spring. I have to turn the hub a little bit. Now I'm gonna use two pry bars. Just pry this out a little bit and push the adjuster in place.
Just like that. Now you wanna clean the hub surface. Just use a wire brush or a die grinder. Just clean up some of the rust. And now take your rotor and slide that on. And now we wanna adjust this up a little bit. Just use a little, either a screwdriver or a parking brake tool, and just tighten it up. Just want it tight enough so that it just drags a little bit. That might be a little too tight. I'm just gonna loosen it. And you can always adjust it later. If it's not tight enough, tighten it up. And then take this little cover. Just use a screwdriver or a pick and just reinsert that. That's good. Now take the bracket and slide it in position over the rotor. Put the bolts back in. You can put some thread locker adhesive on these if you want to and then torque these to 132 foot-pounds. You can put a little grease just where the pads are gonna slide on the slides. That's good. And then take the pads themselves. Line those up. Do the same on the inside. Just like that. Now take the brake caliper off the hanger. Now we wanna compress the caliper and slide that compressor tool in there and slowly compress the caliper.
All right. Now that pistons all the way in, now on the passenger side, you're gonna start with the caliper on the top and fold it down and on the driver's side, it's gonna be the opposite. And put the bolts back in and get those started. And then torque these bolts to 24 foot-pounds. And then put the tire back up and the lug nuts. Now we're gonna torque the wheel, tighten this down to 130 foot-pounds in a star pattern so you tighten the wheel down evenly. Now you wanna pump the brake pedal nice and slow. There's gonna be an air gap between the brake caliper piston and the brake pads. And once it feels good, that's good. And you wanna double-check the brake fluid reservoir. Make sure you have plenty of brake fluid. Make sure it's up to the max line. Adjust accordingly.
Shop Products


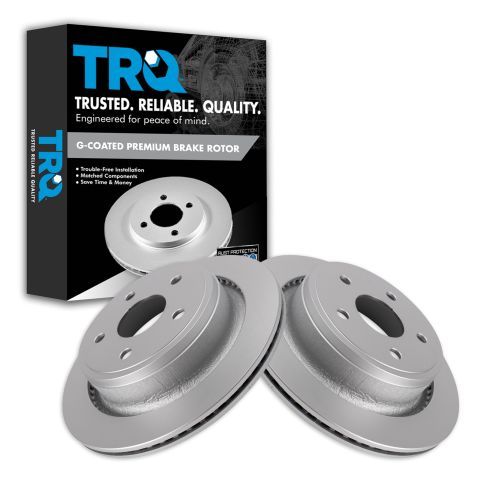
Dodge Ram Chrysler Rear Driver & Passenger Side 2 Piece Premium G-Coated Brake Rotor Set TRQ BRA22861
Part Details:
- Vented
- Premium G-Coated
- 2 Piece
- 20 mm
- 3.07 in
- 78 mm
- 140 mm
- 5
- No
- No
- Smooth
- 22 mm
- 72 mm
- 2.83 in
- 17 mm
- Yes
- Vented
- 0.87 in
- Cast Iron
- Drum-In-Hat
- 5.51 in
- 13.86 in
- 0.79 in
- 0.67 in
- 352 mm
- Standard Replacement
- (1) Rear Passenger Side Premium G-Coated Brake Rotor
- (1) Rear Driver Side Premium G-Coated Brake Rotor

How to Replace Rear Brake Backing Plates 2002-09 Chevy Trailblazer
Watch this video to learn how to replace the rear brake backing plates on your 02-09 Chevy Trailblazer or GMC Envoy.
