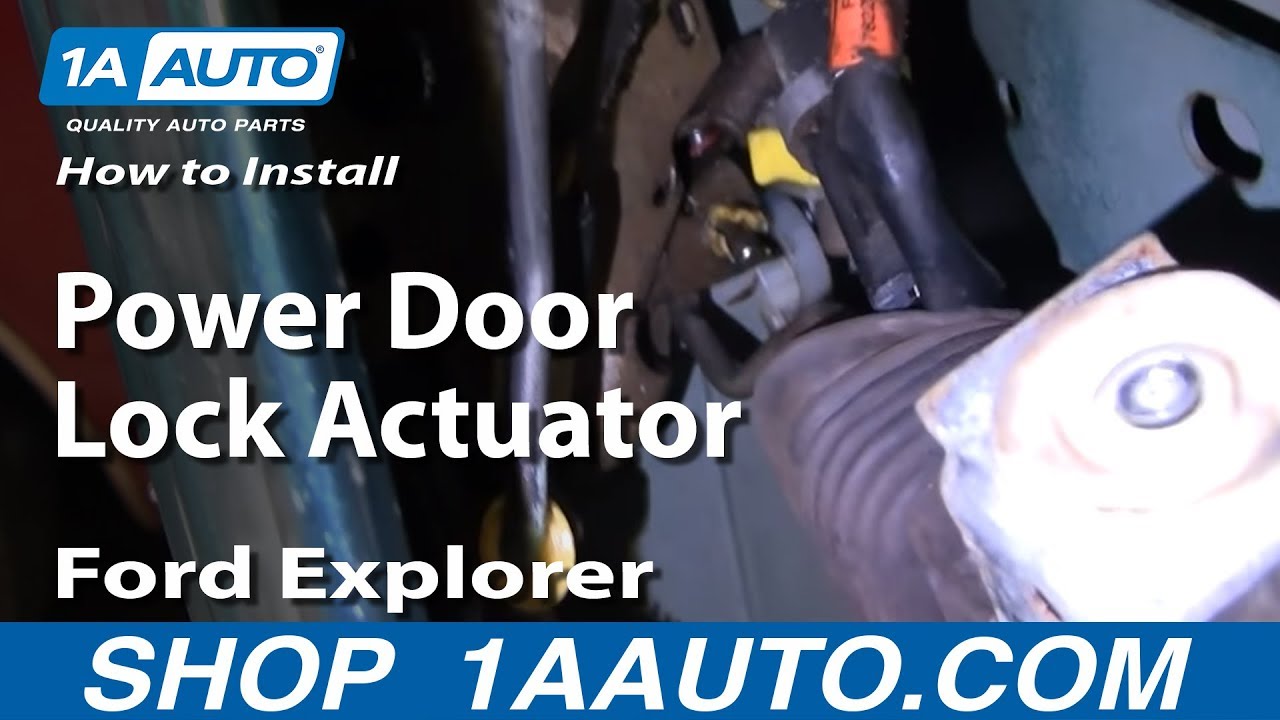
How to Replace Power Door Lock Actuator 1988-2003 Ford Explorer
Created on: 2010-10-15
Watch this video to learn how to fix a door that won't lock or unlock. The experts at 1A Auto show how to replace a broken or snapped rear power door lock actuator on your 88-03 Ford Explorer, Mercury Mountaineer, or Lincoln Aviator.
-
step 1 :Remove door panel
- Unscrew a few screws and use a putty knife to release the clips.
- Watch our door panel and replacement videos to learn more.
-
step 2 :Remove window track
- Use a hammer and punch to knock out the center of the bolt, and use a drill to remove it.
- Remove the 11 mm bolt.
- Disconnect the wire connected to the track, taking care not to pull it too hard.
- Set the track aside in the bottom of the door frame.
-
step 3 :\Remove harness clip
- Remove the harness clip holding the actuator in place with a good pull.
-
step 4 :Disconnect harness from the actuator
- Use a small screwdriver to pry the tab away and disconnect the harness from the actuator.
-
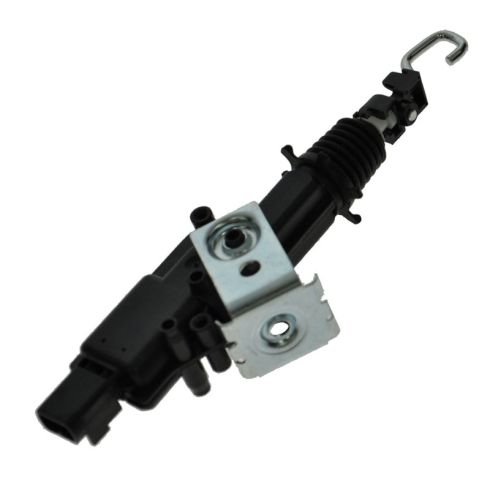
step 5 :Prepare new lock actuator
- Put the correct hook on the lock actuator.
- Put the first O ring on.
- Slide the farrell on, working 1 tooth over the collar of the hook and the second tooth will go over fairly easily.
- Slide the second O ring on.
- Use a little grease to help.
- Pry the bracket off the old one and push the rivet out.
- Put the bracket on the new actuator.
- Secure the bolt with the little nut to help secure it while you snap the bracket back on.
-
step 6 :Install actuator
- Fit the new actuator into the locking mechanism.
- Screw those three screws back on with your #3 screwdriver to secure the locking mechanism.
- Reach in and replace the bolt. Put your harness back in and reclip it.
-
step 7 :Re-assemble the window track
- Position it back up in line with the bottom of the window.
- Secure it in place with the bolt.
- Re-secure the wire connected to the track.
-
step 8 :Re-assemble the door panel.
- For more information check out our door panel video.
Tools needed
-
Hammer
Flat Blade Screwdriver
Phillips Head Screwdriver
Rust Penetrant
Center Punch
Drill
Door Panel Removal Tool
Ratchet
11mm Wrench
11mm Socket
5/16 Inch Drill Bit
Brought to you by 1AAuto.com-- your source for quality replacement parts and the best service on the Internet.
Hi, I'm Mike Green. I'm one of the owners of 1A Auto. I want to help you save time and money repairing and maintaining your vehicle. I'm going to use my 20-plus years experience restoring and repairing cars and trucks like this to show you the correct way to install parts from 1aauto.com. The right parts installed correctly. That's going to save you time and money. Thank you. Enjoy the video.
In this video, we're going to remove and replace the door lock actuator on this '98 Expedition. Same for any '95 to '01. Really Ford uses same actuator in a lot of different vehicles so the process is probably the same for quite a few different Fords. Tools you'll need are Phillips screwdrivers, a regular and a larger number three tip, putty knife, and door panel clip tool, hammer and punch, drill and 5/16 drill bit, regular screwdrivers, small and regular size, a small wrench, and a small socket and ratchet for the bolt that you use to replace the actuator, and some penetrating oil.
We're going to speed through taking the door panel off. You can probably gather enough just by this fast motion. It's basically a few screws and then use a putty knife or door panel clip tool to pry out the door panel as well as take off the mirror, which I just did there. Then the door panel comes off. If you do want to see this in regular motion, just check out our other videos for the Explorer door panel.
There is a little rivet right down here. You want to use a punch and a hammer and just knock out the center of that rivet. You want to drill that rivet out. You want to remove this 11-millimeter bolt here. There's a wire clipped to that track. You want to reach in and if you grab it firmly you can pull it, but be careful not to pull it too far or you could break off the switch that controls the lights in your vehicle.
Then you just grab hold of this track, pull it down, and right now I'm just going to lay it down in the bottom of the door for right now. I shot this a little out of order because I was trying to figure it out. You can see that the window track is in there, but it's a lot easier to do this when it's out of the way. What my finger is pointing to is a little harness clip that's clipped into the bracket for the lock actuator. You just give that a good pull. Hold onto the lock actuator and you can pull that clip right out. This is shot from the bottom up of the connector on the bottom of the actuator. It's actually pretty easy to get to it. I just couldn't film it from the top. You can pretty much see it from the top. Use a small screwdriver to help yourself pry the tab away and then disconnect the harness from the actuator.
There's three screws right here. You need a number three screwdriver. That loosens that lock mechanism up. I sprayed a whole bunch of penetrating oil in there, just kind of coated everything. Then what you do is you just take your lock actuator and you kind of fumble it a little bit, twist it. You can see the hook coming out of that fitting there as I raise it up. Push it right up and out.
Here's our old lock actuator. Here's our new one. A couple of things need to happen. We need to put the right hook on. New lock actuator comes with a few different ones because it's made for a few different applications. What you want to do is put a little O-ring on the hook here first. Then you put the hook up and in and through. Okay, I fumble with it a little bit to figure it out. The farrell has two teeth punched into it. You slide the farrell on and you kind of work one tooth over the collar in the hook and then the other goes over fairly easily- then another O-ring inside here. I just put a little grease in there to help things kind of slide together.
Now I have to get this bracket. Just kind of pry it right up and off the original one. Make sure you push this rivet all the way out. Then you want to put this bolt in and just put this nut on just so it doesn't fall out of there. You just want to take the bracket, pull it apart, feed it onto the knobs. You're in business. You can take this nut back off and you're ready to reinstall the new one. Let's bring the hook right up. Then rotate it down. Then twist it over. Then we'll lift this mechanism up. It will fit back on. Now I'm just going to reach in here. I'm going to get the bolt coming through here. Just get this nut started on here for just right now.
Now I'm going to reach in the bottom. That's the easiest thing to do. You can see that hole pretty well. Take hold of it with my wrench here. It's secure. Depending on how much of this you can see. Put my harness back in. Then up here, put this clip back in. Now take my window track and obviously this right here goes into the bottom of the window. As long as you wind that up and kind of push back on it, it goes right up and in. We can put this bolt back in.
We'll tighten that up. Then the last part is this little harness goes right back in there out of the way. If your water shell has lost some of its stickiness, you can use some tape or whatever to get it to stay.
Now we're going to speed through the rest of putting the door panel back on. If you want to see this in regular motion, just check out our other video for Explorer door panel removal and replacement. We hope that helped you out.
We hope this helps you out. Brought to you by www.1AAuto.com-- your source for quality replacement parts and the best service on the Internet. Please feel free to call us toll free, 888-844-3393. We're the company that's here for you on the Internet and in person.
Shop Products
Ford Lincoln Mercury Front Passenger Side Door Lock Actuator DIY Solutions BSS00080
Part Details:
- Bracket

How to Replace Door Latch 1994-2002 Dodge Ram 1500
Check out this video to learn how to replace the door latch assembly on your 94-02 Dodge Ram. 1A Auto shows you how to do it yourself
