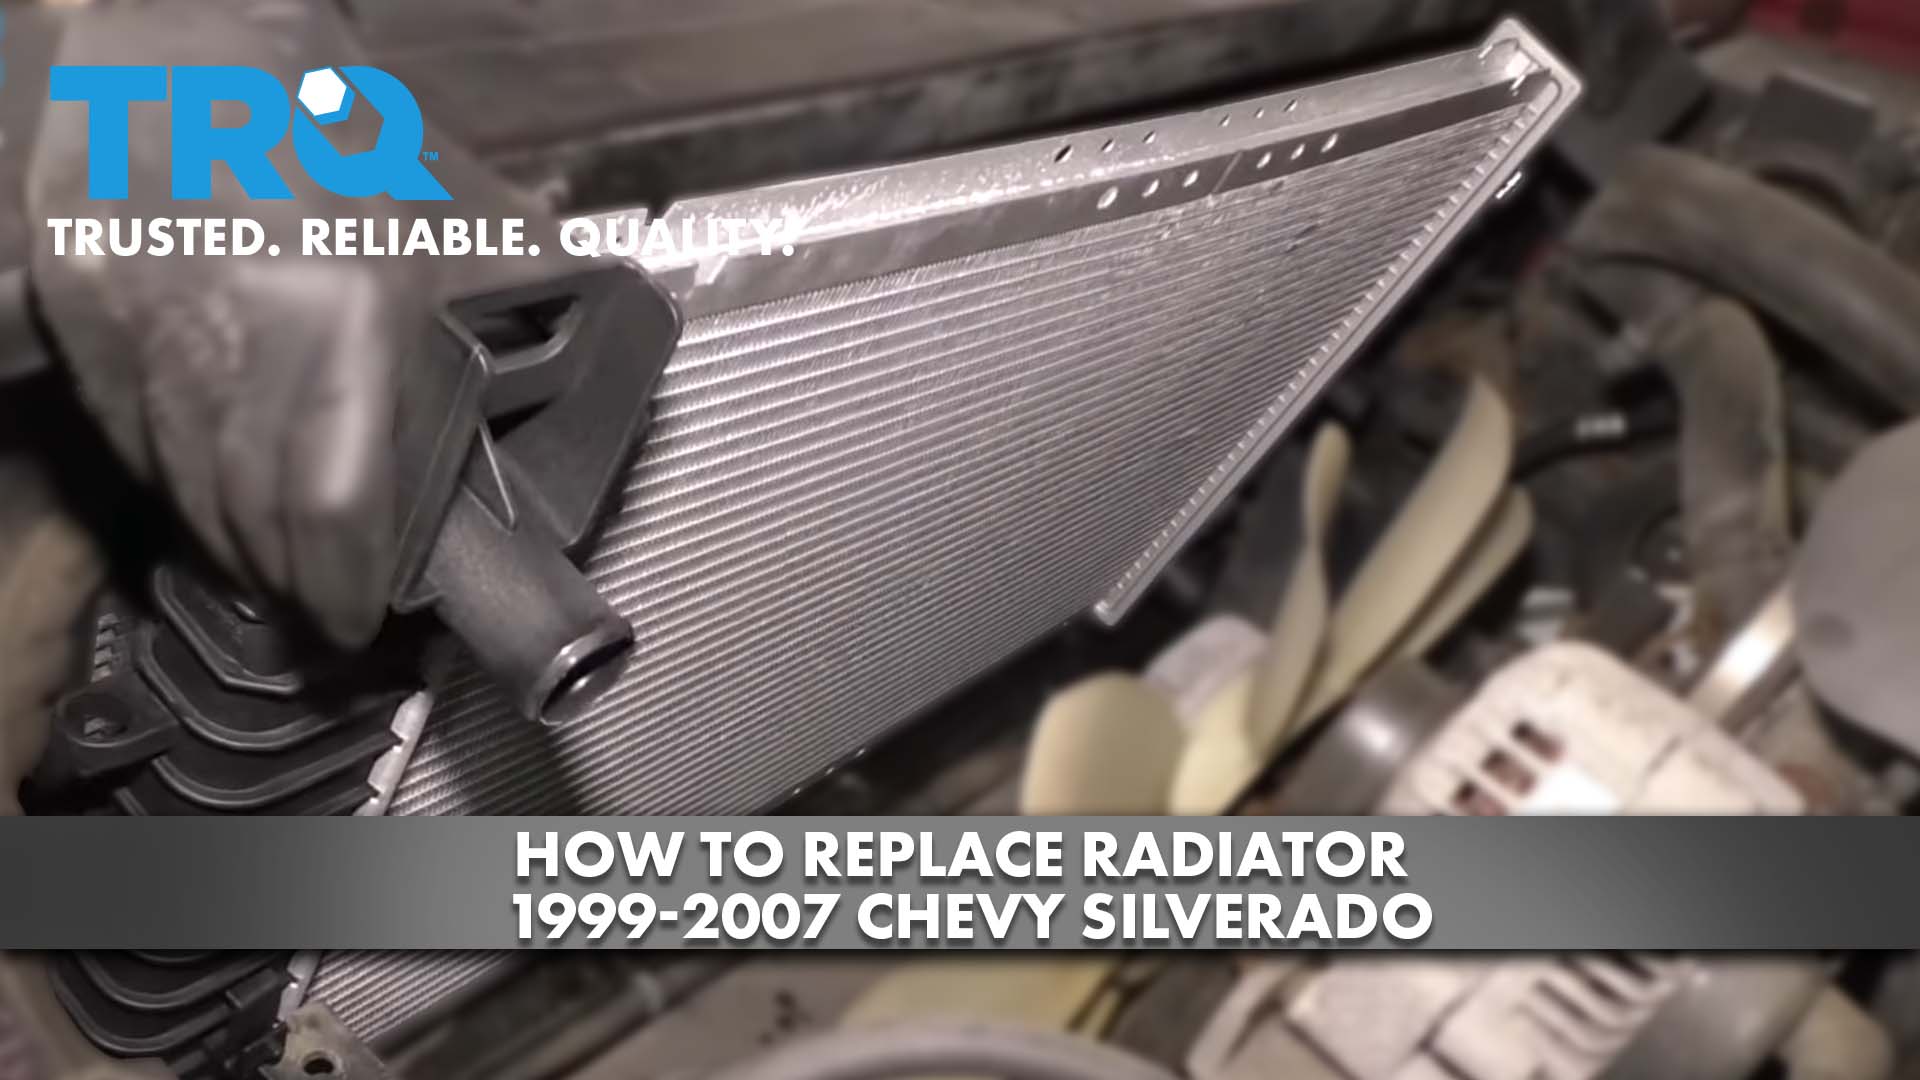
How to Replace Radiator 1999-2007 Chevy Silverado
Created on: 2020-06-16
Watch this video to learn how to install a new radiator on your 1999-07 Chevy Silverado
Tools needed
-
Socket Extensions
Jack Stands
Trim Tool Set
Safety Glasses
Pliers
Pick
Gloves
Flat Blade Screwdriver
Socket Driver
8mm Socket
Wheel Chocks
10mm Socket
Drain Pan
Floor Jack
Okay, friends. So to get started on this job, we wanna make sure a couple things. You wanna make sure that you're safe as can be, you have hand protection and eye protection. The next thing that we wanna make sure is that the engine is not very hot. If you were to come over here and you can feel that it's super hot, maybe you just came back from getting ice cream, you need to wait for it to cool. Once you know it's cool, go ahead and grab this cap, twist it while pushing down. Just in case there's pressure, we wanna try to relieve it, but in a controlled manner. Now we're gonna lift this up and away from our face just in case anything dispels. And before we get started on doing this radiator, one good thing that you definitely wanna pay attention to is you probably wanna flush out that cooling system first. Once you've done that, let's get started. You wanna have a nice collection bucket, something that's gonna be able to collect and be able to recycle that coolant when we're done. We'll put it down on the ground underneath approximately where the petcock's gonna be. I'm gonna come over here. And if you were to look right up along the side of the radiator on the bottom left-hand corner, you're gonna see right on the corner there should be a little petcock. It's like a little twisty knob. You would turn that to the left. And then, of course, as it turned to the left and started coming out, coolant will come out. It might make a mess, so, of course, be very careful. Now, our petcock is broken, but this is what it should look like right here. You would just grab this little nub, turn it counterclockwise. You can see it opening up, and at this point, coolant will come out the side.
All right. So before we go too much further, I just wanna give you a brief explanation of what's going on. Our drain or petcock on the radiator is broken, so you still have to get the coolant out of there. Could you poke a hole? Yeah. You could poke a hole, but if you happen to have the wrong radiator by chance, you're probably gonna have an issue down the line. So what we're gonna do is we're actually gonna take off the lower radiator hose. But before we take off the lower radiator hose to drain the cooling system, if you were to look right above it, you're gonna see one of the training cooler lines. I'm gonna actually take that off now, get that out of the way before I open this up, and cause coolant to come down all over the place, and it'll be, of course, in my way when I'm trying to complete the service.
Something else I wanna mention is you're probably gonna notice that the wheel's off and that the wheel well's out of the way. That gives a whole bunch more room to see what's going on and it's strictly for video purposes only, but theoretically, it could give you a lot more room to do the job if you needed it as well. Now, if you look at the training cooler line right here where it goes into the radiator, you're gonna see a plastic locking clip on there. Just go ahead and grab onto that. And that's gonna slide right out of the way just like that. Now, to get this metal clip off, there's gonna be a couple ways you can do it. If you happen to have a special tool that looks a lot like this, that's gonna work perfectly. You're more than likely not gonna have very much of a problem at all. Not everybody has one of these. A lot of people have one of these though. This is just a very basic pick right here. Just has a little curve, something, a little angle for me to get in. What I would do is I would just try to find the end where the clip is, see if I can grab onto one of the ears, and just draw it out of its area where it is. You can see it pulling away already. That's great. As I let go, it might pop back in. I'm just gonna grab this with a pick. Just be careful because once you get it past a certain point, it's gonna wanna go [vocalization] and go flying out of here. See if I can work it off. And there's our clip right there, friends.
Before we go ahead and pull this out of here, just make sure you have a nice collection bucket because there is gonna be transmission fluid in there. There's probably not gonna be a lot that comes out, but hey, why not catch it and recycle it? Go ahead and draw this right out of there and set it aside. At this point, you're definitely gonna wanna have your coolant collection receptacle because we're gonna be taking off this lower hose. To take it off, it might have a little squeezy clamp that you would grab with suppliers. Give it a squeeze and then draw the hose off. Or you might have a clamp that looks more like this. If this is the case, you can either use a screwdriver or a corresponding socket that fits on there. Loosen up the clamp and then we'll get the hose right out of here. Here it comes. Now, if you take it off just slightly, you can stand here and wait for this to drain out nice and slow, or, of course, you can just pull it and wait for the mess. Now, this definitely slowed down quite a bit. I'm just gonna go ahead and get the hose off of here. I can see the mud coming out of there. That coolant is definitely no good.
Now what we're gonna do is get back up top and we're gonna start getting things out of the way so we can get to the radiator. If you were to come right here, you're gonna see a clamp. We can either use a flathead or you can use an 8-millimeter to loosen this clamp. You don't necessarily need to take it completely off. That's nice and loose. Now follow it right over here, you're gonna find another clamp. Loosen that clamp the same way. Next thing you wanna do is reach under here. You can feel that radiator hose, right? Go ahead and wiggle it around. It should actually be clipped in to this area right here. This one is not. But if yours is, you can either unclip it right there with a small flathead or you can just kind of pull it away. Once you've done that, grab onto this air intake hose, pull it off of the airbox, then we'll come over here. We should be able to move this around as well and hopefully get it right up and out here. Give it a little twist. So now let's get right down alongside of that radiator again. Now we have a nice, clear view of everything that's going on. If you were to follow this hose, you can see where it's connected to the radiator, right there. Squeeze that clamp and then pull the hose off. You can use your fingers. And if you can't, you could also use some pliers. See I can try it with my fingers real quick. Feels like a no. I'm gonna go ahead and try it with the pliers, because why not. Just grab on onto both those ears, squeeze them together. If the hose is stuck, try to give it a little twist, break it free, and then just draw it right off of the right mediator. Now, continuing with our pliers, we're gonna follow this upper hose right here. Go ahead and grab it, squeeze it. If it's stuck, twist it and pull it off. Set that aside as well.
Now, with all that out of the way, we can see the next training cooler line. We're gonna remove this one the same way we removed the last. Get the plastic out of the way, remove your metal clip. I like to use some penetrant. And there we are. Use your special tool or, of course, the pick, whatever you have. Just gonna find one of the ends. Usually it's along the bottom. Try to grab on to it, pull it up. Be careful like I said, it's gonna wanna come shooting out there. There it is, friends. Let's grab that line, carefully pull it right out of there. Now let's head on over to the driver side, stopping in the middle at this, lift up on that. It should come on secured from the plastic. We'll come over here to this clamp. We're gonna remove this or at least loosen it and get the upper hose off of the radiator. A nice squeeze. Give it a nice twist. Try again. There it is.
Now, the next thing that we're gonna do is remove this up here. To do that, there's a push clip here. You'd lift out the center and then the outer portion. Same right there and, of course, on the inside of the vehicle, it'll be the same. You'll also have a mounting bolt here and right over there. We'll remove those as well. Grab the center of that push clip, lift it up and out, like I said, and then go ahead and grab the lower portion and draw it away. If you were to force this in, that's how it locks. Set it aside, remove all of them. Next, we're gonna remove our 10-millimeter head bolts. Grab this plastic. We'll get it right up and out of the way. Grab this lower portion, lift it up, and then slide it back as far as it can be against the engine.
Back at the top of the radiator, we have the mounting bolts that hold the radiator to the crossmember. We're gonna go ahead and remove those. Grab that radiator, wiggle it around, see if it moves. This way you can tell that the bushing's stuck. Just grab a nice screwdriver. Be very careful and can get it off of there. Awesome. This looks great. Let's go ahead and lift up the radiator. It should wanna pop out of its areas that it's located in the bottom. There it is, friends.
Looking at the bottom aspect of the radiator, you might notice that you have the rubber bushing stuck on it. Grab onto it, get it right off of there because you're gonna be reusing it. Once the radiator's out of the way, it's important to look down at the crossmember. If you were to look right here, you're gonna see one of the rubber mounting bushings. Continuing on, you see a whole big mess, which we're gonna get out of the way, of course. You don't wanna leave anything in here. And over on the other side, we don't have that rubber bushing. It's always a good idea to double-check your radiator. I found the bushing. I'm gonna go ahead and set it right down on here just like that and then that'll be good to go.
Here we go. Carefully slide this in. You don't wanna damage any of those fins. We're gonna try to line up those bottom pitons with the little rubber grommets down along the bottom and climb up here. Just try to set them right into those holes. That one's in. You definitely wanna double-check to make sure that they are inserted in the holes because if the radiator can move around, it's gonna potentially cause damage. There it is. Give that bottom a nice little wiggle. Make sure that it's fairly secured. It's not able to walk around, it's not gonna come sliding right out. We'll slide this top portion in. That looks pretty good. Let's grab those bushings. You're probably gonna need something like a screwdriver, or a pry bar, or something like that because to squish this rubber might be a difficulty. Just kind of start one side in and putting it at an angle. Now I'm gonna grab a nice pry bar, try to press down and just help this along. Make sure it's sitting in there like it should and do the same to the other side. We've got our bolts. Go ahead and set this up. If you hold the radiator away, you can line up the bolt hole. Start them both in before you tighten either of them down. Give your radiator a nice wiggle, top and bottom. Make sure it's completely secured.
It's gonna be time to go ahead and get these fittings into the radiator. They're gonna be located on the passenger side of the radiator, right where the lines are supposed to be going in. Go ahead and take one of your fittings, start it in there by hand to make sure it's not gonna cross-thread in. Go ahead and bottom it out. And now we're just gonna snug it up. Okay. It's definitely bottomed out. Just a teeny bit more. That's perfect. We're gonna do the same to the other one. Oh, by the way, in case you're wondering how come I didn't use any thread tape, these were actually tapered and the inside of the radiator also has a taper so they're gonna match up perfectly and there's gonna be no leak. You do not need to use thread tape on these. Real quick before we go too much further, let's go ahead and check that petcock. Make sure it's nice and tight.
It's gonna be time to make our over to the passenger side of the radiator now. We have the area where all the hoses and lines are supposed to go into. Let's start at the bottom. I'm gonna go with that lower hose, slide it all the way in so it connects against the radiator and then I'll start snugging it up. Couple things to pay attention to here, you wanna make sure the hose is definitely against the radiator. You wanna make sure your clamp is nice and straight, it's not laying diagonally in a way that it might actually break free or even cut into the hose. And lastly, if you snugged it up with an electric driver like I did, you wanna double-check it with a ratchet just to make sure it's nice and tight. The next thing we're gonna do is grab onto that lower transmission line. Go ahead and press it right in there. Listen for a click. Okay. I heard it. I'm gonna look all around that clamp that's supposed to be holding it into the fitting and then I'm gonna double-check it by grabbing right onto it and giving it a nice tug. If it slides right out, it's not locked in. It needs to be locked in. Now let's grab this little plastic cover right here. We're gonna slide this over. Go ahead and press it in completely with the screwdriver there. Make sure that it's secured all the way around. Let's go ahead and do that top one now. Got a nice click. Give it a nice tug. Inspect it. Make sure it's completely on there. Put the plastic on.
So now we're gonna grab the smaller of the two hoses that we have left over here and what we're gonna look at is the area that the clamp should be on. If it looks as though it's rusted or rotted in any way and maybe it might separate and fall apart like this one, recycle that metal and get yourself a clamp like his one, slide it right over there and put this just like that. Now, we want this curve to actually be facing up. So set this so it's gonna be facing up because when you put your upper radiator hose coming across, this needs to come along with it. Okay. That feels like it's nice and snug. Give that hose a nice tug and a twist. If it spins or tries to slide off, it's not gonna be tight enough. This looks good. Let's go ahead and grab that coolant overflow hose. Grab onto this. Press it in as far as I can so it's up against the radiator. Release the clamp. Give it a nice feel, give it a nice tug. Perfect. Let's go ahead and grab this, lift it up, and we're gonna get it so it's sitting inside the grooves. You can see right there you have an area where this piton's supposed to slide into. Then if you go over to the passenger side, you'd find the same.
The top plastic piece, we're gonna put that right back down and over the fan here. We'll line this all up. There's a little piton that's gonna fall inside the hole. Same on the other side. Let's grab some push clips. If you happen to notice one that seems as though it's pushed in a little bit too far, go ahead and grab it and slide it back out. You want this to be in the open position. Slide down the outside first, then lock it in with the center. Do the same to all four. Make sure that we have this nice and secured with some bolts. Line it up. Start them both in before you tighten either of them down. Just double-check your work. These are both in. All four of your push clips are nice and secured, and this does not shake around. If it can move around and get stuck in the belt or the fan, you're gonna have a major issue.
Now it's gonna be time to go ahead and grab that upper hose. We'll bring it right over. Squeeze your clamp to open it. Be careful for your fingers. It's spring metal. Slide it in all the way to the radiator, release. Check to make sure your clamp is exactly where it was when you removed it in the first place. Make sure everything's secure. Move along. Here are these hoses. We've got our little push clip here. Slide it in. Now if we come along here, we have our small hose. Press it, slide it into this one, slide it in right down here. Make sure everything's nice and secure and it's not wobbling around. Now let's move along to taking a look at the intake area. If you can see you still have the clamp with the rubber grommet on there, go ahead and remove it. Inspect it. Make sure it's not torn or worn in any way. All this white right here is corrosion. It's probably a good idea to try to clean that up. And then, of course, anywhere along the intake, because we're gonna wanna have a nice seal with this. Let's do that.
So we've got this cleaned up about as good as we can get it. We could've done a little better, but that's fine. Next thing we need to do is look right inside the intake. You wanna make sure that after you've cleaned this down, you didn't get any dirt or debris inside here. There can be nothing inside of there. To move along, let's go ahead and grab this piece right here. You're gonna notice that there's an area that opens up just like that. That's gonna slide over the plastic part on the air intake. Go ahead and put it on. See if I can get it on here. It can be hard to do. Catch on the clamp there. Okay. I'm just gonna look at it, make sure it's going on all the way around. That looks perfect. Something else you wanna pay attention to is the clamp itself. You can't have it so that the whole thing's spun and facing that way or whichever way it wants, it actually needs to be facing straight up when you have it on this piece right here. So just kind of eyeball it, make sure it looks like it's decent. If you need to twist it, now is the time. Looks like it should be pretty fair right there. Now let's go ahead and take it. We're gonna slide this part down in here and we're gonna slide this part underneath this hose.
The next thing we're gonna do is try to slide this down and in. You might notice that your engine cover's in the way. It's fairly flexible, so you don't necessarily have to worry about damaging or breaking it. But if you were concerned, right up top here, there's an 8-millimeter screw. To move along, we're just gonna go ahead and slide this down, press it onto the intake and keep pressing until it's completely up against right there. You can see where it meets. See if I pull away, you can see where it needs to go up to. Slide it in so it's nice and tight. Tighten up the clamp at this point. Moving along, let's do the same to the other side of the hose. Grab it, slide it right up on here all the way. Line this up. Tighten your clamp. Double-check it. Make sure it's completely seated. Make sure it's not loose in any way. We wanna look right along here. There should be a little piton that's gonna press in there. Make sure that you secure it if you can.
Now, the next step can go one of two ways. You can either use one of these super expensive tools, which does work super good and it's gonna apply vacuum to the cooling system, and that way there you'll be able to test to see if you, of course, connected everything properly before you fill it and you'll be able to fill it with having the minimal amount of air inside the system. But we're gonna assume maybe you don't have a couple 100 bucks laying around. What I would recommend is this at least right here. It's a nice little funnel buddy, and you can go ahead and add your coolant. You can run the vehicle and as the coolant goes down, this is gonna kind of go down with it a little bit. All right. You don't necessarily need to have it all the way up to the top, we'll just say, but it is gonna come in handy for filling your cooling system.
You don't necessarily wanna have this jug completely full. If you were to look at the side right there, it's gonna tell you when the vehicle's cold, the coolant full level should be right at approximately this line that goes around the middle of the tank. Something to think about also is if the engine's warm or the coolant's warm, the coolant's gonna expand and it's probably gonna come up a little bit higher. So you definitely don't wanna set it while the vehicle's hot to this level because then by the time it gets cold it'll be way down here. Now, assuming you have your coolant to the level that it needs to be, go ahead and take that cap and put it right back on there until it's completely tightened down. After this, I would take your vehicle for a road test and just pay attention to the temperature gauge that's on your dash. As long as everything's good, you should be good to go.


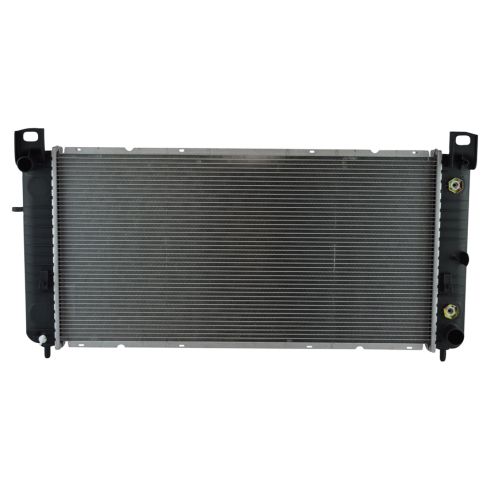
Chevrolet GMC Cadillac Hummer Radiator TRQ RDA82669
Part Details:
- Left & Right
- No
- Yes
- Plastic
- Plated
- Yes
- Female
- Aluminum
- 6
- Cross Flow
- 1
- No
- Bottom Right
- Top Left
- No
- 17.25 in
- 34 in
- 1.56 in
- 1.31 in
- 1 in

How to Replace Radiator 2011-14 Chrysler 200
Overheating is a sure sign there’s something wrong with your cooling system. A leak, rust, or obstructions are all cases that may require a radiator replacement. Install a new TRQ radiator that’s engineered to fit your vehicle. How to install one in your 2011-14 Chrysler 200.
