How to Replace Radiator 2004-08 Ford F150
Created on: 2020-08-05
This video shows you how to install a new radiator in your 2004-08 Ford F-150.
Tools needed
-
Torque Wrench
Gloves
Socket Extensions
Rust Penetrant
Socket Driver
Fan Clutch Wrench
Drain Pan
Ratchet
Trim Tool Set
Safety Glasses
Coolant Funnel Set
Okay, friends. Before we get started on this job, we need to talk about one thing, and that's safety. You want hand and eye protection at all times. With that said, we're gonna get under the hood along the passenger side, and we're gonna drain that coolant. Okay. Obviously, you wanna make sure you have a collection bucket under there because coolant will contaminate the environment and/or stay in your floor. Also, you wanna have a nice directional hose like this. This is gonna make it easy to direct the coolant when it comes out of the petcock. I'm just gonna slide that right onto the petcock tube here, and then I'm gonna aim it towards where my bucket's gonna be. That's gonna help me out. At this point, we're gonna loosen up this little nut right there, and that's gonna allow the fluid to come out. Get this nice and loose.
That feels pretty good. As the fluid starts coming out, now we're gonna make our way over to the driver's side and open up the radiator cap. We'll just open this up, set it aside. While we have that coolant draining, we're gonna start taking this plastic off of here. If you look along the top, you're gonna see these little push clips. In the center, there's a Phillips-head. You can use a Phillips-head screwdriver, or for me, I usually like to try to get underneath the center, twist, and pop it up. This actually works much better overall. And once you get it up and out of there, you can, of course, take off the outer piece as well. And I just kind of put them together so they're good for safekeeping. We're gonna remove them all, and then we'll get this right off of there.
Okay. Get this out of here. Now that we have that out of the way, if you look along the driver's side of the radiator, you're gonna see the area where your overflow hose is, and then, of course, you're gonna see your tranny cooler lines. We're gonna get all those off of there. I always like to spray these with some penetrant. To get your tranny cooler lines off of here, you're gonna need a special tool. You need one that's gonna be able to get over this little lip, that's where my finger is, and get inside of this area so we can push in on the prongs that are in there at the whole jut line. The tool is gonna look a lot like this, and you're gonna see that it has multilayers. If you were to open it up, you can see that it's leveled as well. The reason for that is because it needs to go over the line, and then, of course, over that little beveled area, you squeeze it down, and then you would just twist and push, and at this point, I should be able to carefully draw the line out of here. Do the same to both. For me, this line isn't coming out of here. I need to get this out of the way, but before I can do that, I need to remove some hoses. To remove the hoses, of course, I'm gonna go ahead and put a collection bucket underneath as well just in case any fluid makes its way down.
Let's get our coolant hoses off of here. Some coolant might come out. Let's get the upper hose from the passenger side. To get the fan shroud out of here, we're gonna need to get the fan off, of course, at the same time. To do that, you would use a 36-millimeter, and you can either use a wrench if you have a big old wrench and maybe a hammer of some sort to bonk this free, or you can use the special tool that's made for it. It's a fanning clutch tool. I'm just gonna go right over that nut for the fan clutch and then drive it counterclockwise. Go ahead and spin this off of here. Here we are. Looking along the side/top of the fan shroud, you're gonna see there's two mounting bolts, one on the driver's side and one on the passenger side. Remove them both.
At this point, we can wiggle this around. We're gonna try to sneak it out here. Okay. So let's get the brackets off of here. Right on top of the radiator, you have this rubber bushing. We're gonna hold on to that. Do the same to the other side. At this point, we can grab onto the radiator, give it a little wiggle, and get it right up and out of the vehicle. Make sure that your rubber bushings are still located down along this bottom area here. Once you've compared your new radiator to your old one and you know that it matches up perfectly, we're gonna get ready for an install. One thing that I wanna mention real quick is you'll notice up along the top you have a little piton, and then down along the bottom, you're gonna notice the same, and that'll be the same on both sides. The reason for those is because they need to go into those rubber bushings that I talked to you about earlier.
Take this, we're gonna slide it right down, and it should fit right into both of those bushings. As it slides down, you wanna make sure that it's nice and even. This feels great. We're gonna check for any of our little rubber pieces here because they need to go a certain direction like that. Check this one, same, put it up there. Perfect. Take your rubber bushing. Put it right up on there just like that and do the same to the other one. And now, of course, we'll take our brackets, put it right on over here like this, line this up, start in our bolts, and do the same on the other side. Snug them up. Okay. Let's squeeze this clamp and put our lower hose on there all the way on and, of course, release the clamp. Make sure it's nice and tight. Let's get this lower line in here. You need to push and twist until it clicks in. Now, we're gonna put on our little white locking clip here. We've got the big area that's gonna go around the adapter and then, of course, the small area that's gonna go around the line. I like to come from the outside right along here and then just push it right along. Locks in. Give this a nice tug. You wanna make sure that this cannot come out.
So now let's take our other line. And we're just gonna leave it right over here for now. Let's get our fan and our shroud. Now, it's gonna be time to get our fan shroud and our fan back into the vehicle. I like to put them in both at the same time just like this. As you go down, just be careful not to let anything hit up against those radiator fins. There we are. I'm just gonna try to get this shroud so it's not falling down too much on me. And now, of course, we'll start on our fan. The hardest part is just getting this started. You have to find that first thread. Once it's on, we'll just bottom it out, and then we'll snug it up. You're gonna notice with your radiator, it came with these nice little clips right here. They go right along the top, and that's where the bolt that holds the shroud to the radiator goes. So just put the little Nutserted end facing towards the radiator so the flat side's facing towards the shroud. Couple loving bonks. Do the same to the other side. Now, we're gonna take our two mounting bolts. We'll start one in on this side one, one in on the other side, and then we'll snug them up. Let's get this hose on there. Let's get our line in here. Make sure it clicks in. Give it a nice tug. Couple little bonks for good luck. Let's make sure we get our lock on here. Time for the upper radiator hose. I always just try to line it up as close as possible to how I removed it. Awesome.
Okay, friends. Now, it's gonna be time to fill our cooling system. There's a couple of different ways you can go about doing this. You can use a funnel and try to fill it up. Of course, run it for a little bit. You're gonna have to keep refilling it and keeping an eye on the fluid. You could also use a vacuum bleeder. That's the best way because it'll make sure it gets out all the air. I'm gonna go with the assumption you don't have the special tool. So I'm just gonna go ahead and show you to fill it up with the funnel just like this. As you fill it, you wanna make sure that you fill it with the manufacturer-specified fluid, which will be Ford Gold. You can also use a universal coolant such as like a vanilla, but you definitely don't wanna use green or Dex-Cool. What that said, go ahead and fill it up, burp out all the fluid, watch your thermostat, check for leaks, take it for a road test.
Shop Products
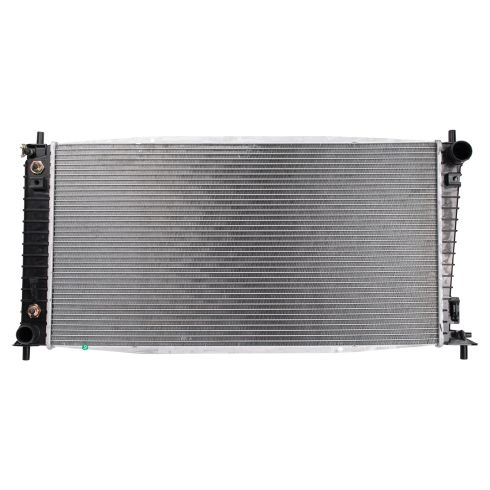
Ford Lincoln Radiator TRQ RDA82751
Part Details:
- Left & Right
- Top Right
- Bottom Left
- Plastic
- Plated
- Yes
- Aluminum
- No
- 6
- Cross Flow
- 1
- 1.5 in
- No
- Yes
- No
- 16.81 in
- 31.88 in
- 1 in
- 1.75 in

How to Replace Radiator 1999-2013 Chevy Silverado 1500
How to repair, install, fix, change or replace a broken, damaged, or leaking radiator on 99, 00, 01, 02, 03, 04, 05, 06, 07, 08, 09, 10, 11, 12, 13 Chevy Silverado 1500
