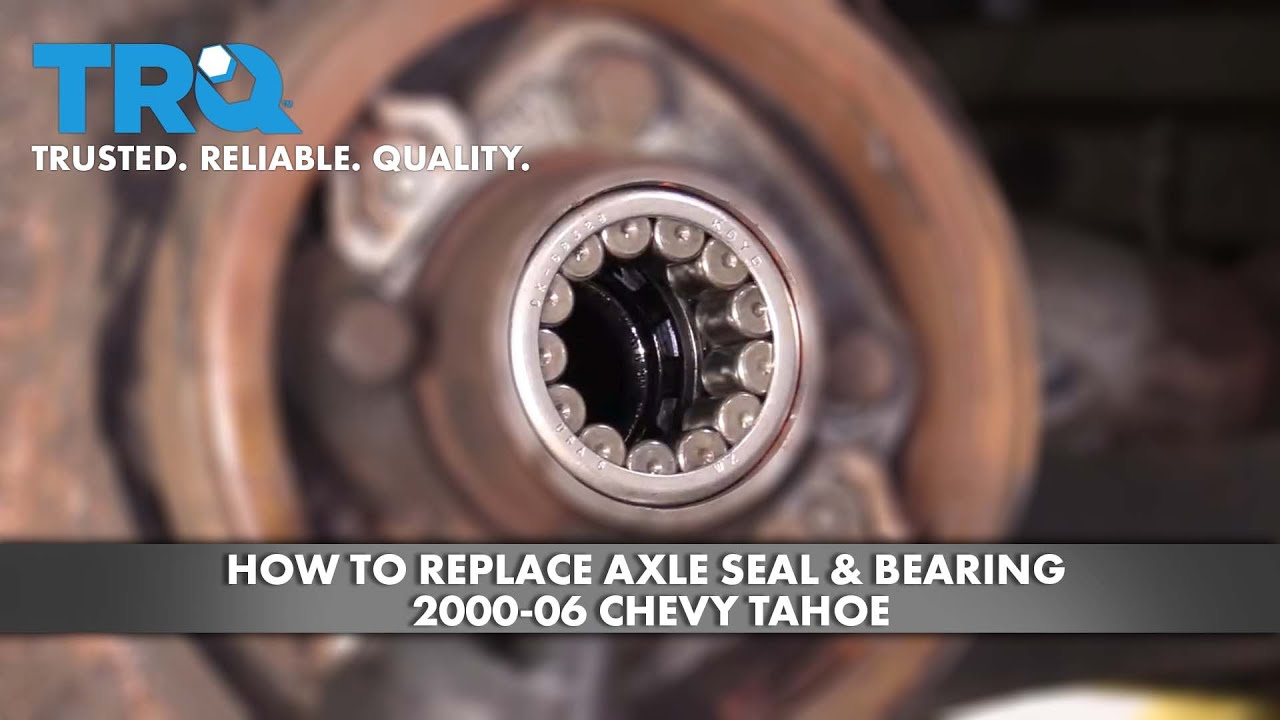
How to Replace Rear Axle Seal Bearing 2000-06 Chevy Tahoe
Created on: 2020-06-26
This video shows you how to install a new rear axle seal and bearing on your 2000-2006 Chevy Tahoe.
Tools needed
-
Hammer
Socket Extensions
Pry Bar
Jack Stands
Gear Oil
Rubber Mallet
Brake Caliper Hanger
Wheel Chocks
Bungee Cord
Drain Pan
Ratchet
Floor Jack
Swivel
12mm Socket
13mm Socket
Torque Wrench
17mm Wrench
18mm Socket
Magnet - Extendable
Block of Wood
Brake Parts Cleaner
Bearing Puller
21mm Socket
21mm wrench
Bearing Race and Seal Driver
Flat Blade Screwdriver
Socket Driver
Paper Towels
8mm Socket
Slide Hammer
Wire Brush
22mm Socket
I'm gonna start by taking the wheel off. I'm gonna use a 22-millimeter socket, take off all the lug nuts. And take the wheel off. Now we can take these caliper bolts out. I'm gonna use a 12-millimeter socket, loosen those up. And if the caliper slide is spinning, you can use a 17-millimeter wrench to hold it while you take the bolt out.
Now you can grab the caliper. You might want to rock it back and forth a little bit. That'll compress the piston a little, make it easier to slide off. Then you can use a brake caliper hanger, and just hang it from the upper control arm, or you can hang it from the coil spring, just like that. Just make sure there's not any tension on the brake hose itself. Now I'll take the brake pads off. Just slide them out of the way.
Now we're gonna take the bracket off. You need to take these two bolts out. Use an 18-millimeter socket. Loosen these up. And then grab the bracket and just slide it off. Now we're gonna take the rotor off. Just grab it and slide it. If it's stuck on there, you can take a hammer and just hit in these locations. It's stuck on the parking brake a little bit. Try to wiggle it. You can just take a pry bar, try to pry in here a little bit and get this off. I'm just gonna take two screwdrivers. Just try to wiggle this back and forth. There we go. Slides right off.
Now, I took all the brakes off of this side. I did the same on the other side. Now, to access the cover, I'm gonna pull this bar out of the way. I'm gonna use a 13/16ths wrench, or a 21-millimeter wrench. On the backside there's a nut on the other side of this bolt. And take that bolt out. Use a 21-millimeter socket. I'm just gonna use a bungee cord, and just pull this out of the way.
Now, it's always a good idea before you take the cover off to take the fill plug out. Otherwise, if you can't get the fill plug out, then you won't be able to add fluid to it after you're done. So, just use a 3/8 extension and a ratchet. There we go. Now, some of these cover bolts are pretty rusted, so I'm just gonna take a wire brush. Just try to clean up some of the rust. All right, now I'm gonna take the cover off. I'm gonna use a 13-millimeter socket, take all these bolts off. I'm gonna leave the top one in a little bit, just leave it loose, and then I'll pry the cover off.
This one has the brake bracket right here, brake hose bracket, or brake lines. Move it out of the way. Just be careful. If this looks really rusty, be more careful with it. Now I'll just loosen this one up. Let's leave it like that. Make sure you have a drain bucket underneath before you start taking those bolts out. And then just get a screwdriver or a pry bar. Just get underneath the cover, and just slowly pull it back. Let the fluid drain.
And once that's loose, I'm gonna take the bolt off, and just slide the cover out. There you go. You need to put the transmission in neutral and rotate the driveshaft, so that this bolt ends up right here, because we're gonna take that pin off. Now I'm gonna take this bolt out, which actually has a pin that goes through there, and I'm gonna use an 8-millimeter socket. You can try to use a wrench. Sometimes it's not so easy. And just take that off, loosen that up, and slide this out.
You're gonna have to go around the carrier and then try to push on the pin and slide this out. Now I'm gonna carefully rotate the drive shaft again. Just make sure the gears aren't turning, because you don't want them to fall out. That looks okay. Now I need to hit the axle. Use a rubber mallet or a dead blow. Just tap it in. What you're looking for is there's a clip in there, and you need to be able to access that clip. Right now I can't get to it, so we're gonna tap this in more.
All right. So, now the C clip is out far enough that I should be able to grab it with a magnet. Just use a magnet and grab it. You might have to rotate it a little bit. Slide it out like that. Now I can use a pry bar and just pry the axle out. Be careful. Just pry right where the parking brake mechanism is, right there. Once you pry out that far, then it should be easier to pull it out. There is a reluctor wheel in there that it presses on to, and it just drops down once you pull that out. And slide the axle out.
Now, you can use different types of seal pullers, or sometimes even just a pry bar works good. Just get underneath there, and just pry it out. Now I'm gonna take a bearing puller, and you just slide this in position. That lined up. This washer on and then tighten this nut down. Now I'm gonna use a slide hammer, with that all tightened up, and take the bearing out. There we go.
Now we'll take the bearing and a bearing installer, and just slide it in position. Take a hammer, tap it in. Now, you kind of wanna pay attention to where, how deep it was in there before you took it out. Take a look. A little bit further. It will eventually bottom out, and if you get to that point, that's okay. That looks good. Now I'm gonna take the seal. Just make sure you check the edges around here. You can wipe them with a towel or something, or a rag. And they look good. There's nothing wrong there. Just take the seal, put that on, and the best way to install this type of seal, use a block of wood. If you had a four by four, go this way, it works good. Just lie it flat like that. Use a hammer and give it a tap. That's good. Or you can use a seal installer as well.
Now, before we slide the axle back in, just take a little bit of your axle lube, your gear oil. You can check your owner's manual for the correct type, and just lubricate that bearing, and just spin it around a little bit. And slide the axle in. And then, you're gonna have to tip it up a little bit, just to get it... And you don't wanna twist it too much, because then you're gonna mess up the spider gears. And I'm gonna have to give it a couple more taps so that I can get the C clip in. That looks good.
And just take the clip, slide it in position. It's all the way in. Then just slide the axle out. Then you can do the same procedure on the other side. And after you've done that, then let's rotate the axle, rotate the drive shaft, I mean. And get the pin lined up. And you may have to move the bearings a little bit, I mean the spider gears. Make sure the hole's lined up with where the bolt goes. There we go. You can give it a little tap with something soft, and slide the pin back in, the pin bolt. And tighten that up.
Now I'm gonna torque this bolt to 27 foot-pounds. This vehicle has a 8.6 rear end. If you have a 9.5 rear end, you're gonna torque that to 37 foot-pounds. At this point, you can put the vehicle back in park. At this point, I can use a scraper, or even a razorblade, just be careful if you're using a razor blade, and just scrape off any excess gasket material. Now I'm gonna use a little brake parts cleaner and just wipe this down. Try not to spray directly into the gear.
Now I can take the gasket, and just line that in position. And take the cover, try to go over the gear. There you go. Just twist it a little bit. You don't have to take the sway bar links out, but you could, if you were struggling with that. And just line this all up, and get the bolts started. And I can move this brake hose bracket down, and brake lines, and put that bolt through. I'm just gonna snug these down before I torque them down. Now I'm gonna torque this to 30 foot-pounds, and make sure you torque it in a cross pattern. So we'll torque this one and then just go criss-cross. All right. That's all of them.
If you're not gonna use this fill plug to fill up the rear differential, you can use a 10-millimeter hex socket, and tighten that up. Just make sure it's snug. Now just hook this up, and torque this to 77 foot-pounds. With the fill plug out, I'm gonna add the limited-slip additive first. It's always a good idea to add it and do that first before you add the gear oil. And then add the proper gear oil. You can check your owner's manual. You can use a hose to get the fluid into the rear diff. All right.
Now, as you're filling this up, if you notice that it starts coming out the fill plug, then that's up to the ideal level. Certain vehicles, it doesn't have to go all the way to the fill plug. You wanna check your owner's manual and put the appropriate amount of fluid in. Now put the fill plug in, and snug this up. Not too tight. Once it starts getting a little snugger, just a little bit more. That's good. Take a little brake parts cleaner and clean it off.
Now take the caliper bracket, line it back up. Brake caliper bolts. Get those started. Now I'm gonna torque these bolts to 122 foot-pounds. Now I'm gonna put the brake pads on. Now, the warning indicators are gonna go to the top. So, on the inboard pad, goes at the top, and same with the outboard pad. Just slide them in position. And that's good. Now I'm gonna take the brake caliper off the hook, and just slide it over the brake pads. Put the caliper bolt it. Take a 17-millimeter wrench, and torque this bolt to 30 foot-pounds. Do the same on the top.
All right, put the wheel on, and put the lug nuts on. Now we're gonna torque these lug nuts to 140 foot-pounds, in a cross pattern, so that it tightens the wheel down evenly. And just go around and double check.
Shop Products


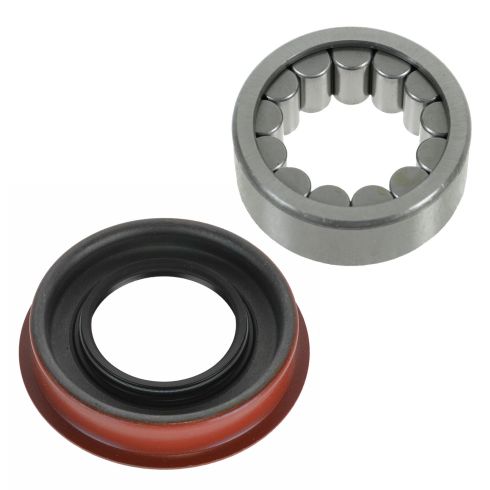
Rear 2 Piece Wheel Bearing & Hub Kit TRQ BHA53235
Part Details:
- Cylindrical Roller Bearing
- 2 Piece
- (1) Rear Wheel Seal
- (1) Rear Wheel Bearing

How to Replace Front Hub Assembly 2006-10 Ford Explorer
Learn how to replace a bad, failed, or noisy hub on the 06-10 Ford Explorer with the steps in this video
