How to Replace Rear Brake Caliper 2004-08 Ford F150
Created on: 2020-07-24
This video shows you how to install a new rear brake caliper on your 2004-08 Ford F-150.
Tools needed
-
Torque Wrench
Hammer
Socket Extensions
14mm Socket
Rust Penetrant
Pry Bar
Jack Stands
Brake Parts Cleaner
Safety Glasses
21mm Socket
Gloves
Hose Pinch-Off Pliers
Flat Blade Screwdriver
Socket Driver
Paper Towels
Copper Anti-Seize
Wheel Chocks
Chisel
Brake Grease
10mm Socket
Drain Pan
Ratchet
Floor Jack
Wire Brush
Okay, friends, one of the first things you need to do is safely raise and support your vehicle so your wheel's off the ground. Once you've done that, continue on by using a small pry bar or even a screwdriver, we're going to find the area on this little plate that we can remove it. You can see there's a little cutout, and that's all you do. Use your 21-millimeter socket and remove all six lug nuts. Remove your wheel. If your brake caliper looks like this, obviously, you're going to want to clean it down before you proceed. Okay, friends, before we get started on this job, I want to make sure that you have safety as your number one concern. Eye protection, hand protection, and, of course, you want a nice collection bucket because we're going to be dealing with chemicals. Let's get started. Now that we have most of the dirt out of the way, we need to make sure we have our collection bucket underneath the area where the fluid might come out of, which would be this general area.
Once you've done that, I'm going to continue on with a little bit of penetrant spray. If you were to look at this area right here, this is your caliper slider. If you were to look on the inside area where the pad/bracket is right there, you're going to be able to see the bolt for the slider coming through. I like to try to spray that down on both of them, just kind of as a little help me out in the long run type of deal. And I'll get the side right there and why not up here where the line or the hose actually goes into the caliper just because? All right. So, now before I go ahead and take the hose off of the caliper and I have fluid leaking out everywhere, I'm just going to loosen up these caliper sliders and make sure they're pretty much ready to come out. Using a 10-millimeter, let's see if we can get these to break free. There is one, I'm going to leave it in there just like that. Start the other one the same way. And I'm going to leave them both in there just a teeny bit so I can remove this one while it's still secured to the vehicle.
Moving along to a 14-millimeter socket, I'm going to remove the banjo bolt that holds the line or the hose to the caliper itself. Fluid's probably going to come out at this point. There we are. Right into our collection buckets so we can recycle it properly. Let's get these mounting bolts right out of here. Moving along, you can use your small pry bar. If you were to come right along your caliper and the bracket, you could try to pry a little bit. But what you're going to see is on the outer pad, it has a little piton that's supposed to hold it from coming off. First, I'm going to push right on this area. That's a little clip that holds the pad from moving. Then I'll use my pry bar to try to pry this away from the vehicle. Awesome. It's important to make sure you completely drain your caliper before you recycle it. If you have a pair of these hose pinchers, it's a great idea to use it. That's going to help you save all your brake fluid as much as possible. Once you have the caliper drained and you don't have any brake fluid on your hands, at least as much as possible, we're going to get the pads out of here.
Once you have your caliper completely drained and as much of the brake fluid off your hands as possible so you don't contaminate your pads, we're going to take our pry bar right here. And I'm just going to try to go right in between this area here and here. And you can see that there's a little piton that should go through that hole for the pad. Once you get it so it's pulled out of the hole, you should be able to lift out on the pad. There's the piton, there's the hole. Do the same on the other side, and then slide the pad out. Inspect your pad thoroughly and make sure it's still in good condition. If it looks like it needs to be cleaned, clean it. If it looks like it needs to be replaced, well, now's the time to do it. We'll do the same for this one. You just kinda grab it, wiggle it, and it should slide right out. These little pitons fit right inside that hole on the piston. Set that aside. There's our caliper ready for recycling.
At this point, you want to compare your new caliper to your old. You want to make sure you have the same one, right? If you were to look right here, you're going to see the sliders. That's perfect. Obviously, it needs them. Turning it over, you're going to see the area where your bleeder screw should be. You want to make sure that that's on the same side. If for some reason your bleeder screw is on this side, well, that just means that you have the caliper for the other side of the vehicle. With that said, this looks great. So I'm going to set this aside for recycling, and we're going to move along to prepping this new caliper. With the new caliper, what I like to do is I always try to peel this boot back and push on the slider so that I can get to this portion right here. We want to make sure that this is well lubricated. The reason for that is because, well, lubrication needs to be in there, otherwise, moisture can get in and then it's going to seize this up, and then your caliper won't function properly.
We'll get both of these up and ready. Now, we're just going to take some nice caliper grease here. And we're just going to lubricate the slider a little bit. You don't have to put very much on this area because as you push it in, you're going to notice that it kind of just pushes it away. But while I'm doing that, I'm also going to come on the inside of the slider boot. Go like that. And on the inside here, I like to put quite a bit. Make sure it's nice and lubricated right down inside there. Take your slider, wiggle it, push it on in there. It's going to start pushing through, just take your finger, go along the lip like that, and then make sure the boot's completely situated. That looks great. I'm going to get the rest of the lubricant that wasn't used all off of there. And why not just put it on this one? Slide that in just a teeny bit. Lubricate the inside of this boot as well, especially up along this area on the inside. That's going to be one of the main areas to make sure you have lubricant. Go ahead and slide that in all the way up. Bring it back and forth, that's going to work in the grease. That's awesome. Well, now we can't stop just there. We're going to continue on with that lubricant and we're going to go right along the piston here.
The reason why we're going along the piston and these ears right along here is to help with vibration dampening and noise reduction. Those look great. At this point, the caliper is pretty much prepped. I just like to kind of clean up whatever mess I might have on there. Make it neat and tidy. So, now that we have the caliper cleaned and prepped, we're going to continue on by cleaning and prepping this area where the caliper needs to mount to. If you were to look along this area, you're going to see that there's a metal tin. We're going to have to replace this, or at least clean it up. If you take a pry bar and a hammer, usually you can get them to break free. Just pry it right off of there. If you look inside here, a lot of times you're going to see rust and buildup. If you see rust and buildup in here, more than likely you're also going to have it on this. So, of course, you're going to need to clean this area up. We'll do the same to both. Looking all along here, I can see a whole bunch of raised areas. This is a lot of rot buildup. Like I said, that's going to cause an issue with braking, so we need to make sure we get it off of there.
If for some reason you have a hard time getting this off and you don't think that you can get it because your hammer just keeps bonking up against the rotor, it shouldn't be too much of an issue, you could just remove the rotor. And now you have a nice, clear area to be able to do anything you need. Sometimes trying to clean up this area with the hammer and the little chisel, you're going to get off the majority of it, but it's not going to be nice and smooth and clean. It needs to be. You can get yourself one of these tools with a little sand disk and try to clean it up as much as possible or even just use a nice sanding block. So, we've got this area nice and cleaned up on both of them. That's great. Now, assuming you took your rotor off, if you were to look behind it, you're probably going to see a whole big mess at this point. There's probably going to be a lot of rust and everything inside this area. You want to make sure you get out as much of that as possible because if any of it falls out and just kind of comes inside the rotor, you're obviously going to hear a brake noise. While we're in here cleaning this up, I always like to spray down this area right here. That's the area where your e-brake is going to pivot from the backside and it should spread the e-brake shoes. If it doesn't pivot here, obviously, you're going to have an issue.
Continuing on, it's time to clean up the hub area of the axle where the rotor is going ride. Looking at the hub area of your axle, you can see where it's going to go into the differential. Make sure you don't see any fluid coming out of here. If you do, your differential seal's leaking right there. Once you have this hub area cleaned up as much as possible, I always like to use a little bit of copper never-seize. Now, using a little bit of the caliper grease, we're going to coat the area where those tins are going to ride. I always like to put this on there. It's going to help with rust and everything. You don't want any more rust building up under there. And, of course, the inner edges there. Now we're gonna put on our tins. You'll notice that they're both the same. You look at the backside, you've got the slot where this is going to go. Go ahead and slide it on over that. If for some reason it just doesn't want to fit on there, you can use a small hammer and just help it along. Do the same to the other one.
Now, we're going to be replacing the rotors. But in case you're not, you want to make sure you clean up this area as well. This is the area that that hub area of the axle is going to ride against. Before we go ahead and get the rotor on there, you want to inspect your e-brake adjuster. Make sure it's nice and clean and spray it down with some penetrant so you can adjust it. Next, we're going to grab our rotor, put it on there. Test the e-brake to make sure that the e-brake shoes hold up against the rotor. Now, taking your nice rotor, let's go ahead and get it up on here. Should just slide right on. There we are. Give it a little spin. Make sure it's not dragging on those e-brake shoes. You also want to test your e-brake real quick just to make sure that it is actually going to grab the way that it should. If it doesn't, you need to adjust it a little bit. Now, if you were to look at your flex hose, you can see that the area where the gaskets are going to ride, that little circular area is full of debris. We need to make sure that that's cleaned up. You also want to double-check the other side as well.
Sometimes what could happen with this is you might leave one of your gaskets on there. So, you definitely want to make sure you check it with something like a small pocket screwdriver or whatever and make sure that both of them are off or, of course, you can look in your collection bucket because that's more than likely where they'd be. Now that we have the hose nice and cleaned up, we're going to take our caliper and we're just going to set it up on here so it's going to be approximately where it would be sitting if it was mounted in. Taking our banjo bolt with one of our gaskets already on it, we're going to grab onto our flex hose. You're going to see one side of that flex hose has a flat area and the other side has kind of a ridged area. Put the banjo bolt through from the side with the ridged area through to the side that's flat. Take your other gasket, and put it on there. Now, we're going to put this right onto the caliper, and we're going to start it in. You want to do this by hand because you definitely don't want to cross-thread this.
Once we have this so it's going in, we'll go ahead and just snug it up a little bit and then we'll completely tighten it down after we get the caliper fully mounted. Looking at our old pads compared to our new pad, what you're probably going to notice inside your kit is that it has a pad that looks like this with a little piton. One's going to be on this side and the other one will be on the other side. Just compare it to your original pads. That way there, you know which side you're dealing with. Now that we've figured that out, let's get the caliper of here and set it right up top there where we can easily get to it. You're going to start by installing your inner pad. Take the inner pad with the three prongs, and go ahead and put it right inside that caliper piston. Should slide right in. There we are. As you start sliding this in, you want to pay attention to those ears right here and then, of course, the pitons. Those pitons need to line up with the holes and the ears will hold it against. There we are. Double-check to make sure it's seated completely.
If it looks like it's kind of off at an angle, you probably just don't have your piton inside the hole there. This looks great. Now, we're going to continue on by installing the caliper starting with the bottom area first. Because if you look at the outer pad, you'll see that it has the double ear. Slide that right over both sides of the bracket area there, and then be careful for your slider. Slider area right here needs to be pushed so it's all the way facing towards the inside of the vehicle as much as possible. Slide it right down on and over, and then give it a nice loving bonk. And it should pretty much lock in. Now, we're going to put in our slider bolts. Now that we have both of our slider bolts, I'll call it your prerogative if you want to add a little bit of thread locker. Once you've done whatever you needed to do, go ahead and slide them both in and then start them both in by hand. That's super important. Once they're both started, go ahead and bottom them out. And then we'll torque them to manufacturer specifications.
Let's torque these caliper slider bolts to 22 foot-pounds. Now, we want to torque the banjo bolt to 26 foot-pounds. Let's go ahead and get our hose pliers off of here. Now, I'm going to remove my bleeder screw cover here. Just a little rubber cover. You can grab it with a small pocket screwdriver usually. Pop it right off. Now, the next thing we want to do is go check our master cylinder to make sure it's full. Once we know it's full, we're going to pump up our brake pedal. Once the brake pedal seems like it's fairly firm, we're going to come back here and we're going to open up our bleeder screw. All right. That looks great. Let's go ahead and open this now. You definitely want to make sure you're wearing your hand and eye protection and, of course, have a collection bucket underneath because there's going to be fluid coming out at some point. We're going to let this gravity bleed. There we are. So, it's definitely gravity bleeding now. I can see that there's fluid coming out and it's a steady stream. I don't see any more air coming out at the same time.
So, at this point, I'm going to close it back up. And then, of course, what we would need to do is an actual brake bleed at this point. Now that we have everything attached here, if you're doing both calipers, now's the best time to go ahead and do the other side as well. Once you've completed that, you would move along. Before you start manually bleeding your brakes, it's super important to double-check your master cylinder because at this point, more than likely you're going to be going through a lot of fluid. Make sure it's full with the manufacturer-specified fluid, which is DOT 3 fluid. Once you've done that, you're going to have a second person get inside the vehicle. What they're going to do is they're going to step on the brake three times very slowly. On the third pump, they're going to continue holding it and they're going to say, "Holding." At that point, you're gonna open up your bleeder screw and you're going to see fluid come flying out. You need that to go inside the collection bucket.
Once you close it back up, you'll tell them to pump, and you're going to repeat this process until you see no more air bubbles coming out of the bleeder screw. With all that said, let's get to work. Go ahead and pump it up, please. Once they're holding like I said, you just open up the bleeder screw slowly and you'll watch fluid come out. Every time I see that little spit of air come out, that's telling me that there are air bubbles still in the system. I'm going to close it up and then I'm gonna ask them to redo it. And we're going to keep going until we see no more spits of air come out. Go ahead and pump it, please. There we are. I'm just gonna make sure it's nice and closed up. You can release the brake. Now that we've done this, we're going to clean down the area so there's no more brake fluid on here. And then, of course, we'll put on our bleeder screw cover. That part is very important.
We'll get that right on here. Perfect. The next thing we need to do is go ahead and recheck that brake fluid. You want to make sure that it's 100% full. Once you're sure that, go ahead and put your wheel on. We'll torque it down to manufacturer specifications and then take it for a road test. Now it's time to get our wheel back up on here. We're gonna start on all of our lug nuts, we'll bottom them out, and then we'll torque them to 150 foot-pounds. Let's get these torqued to 150 foot-pounds. Now that we have them all torqued, it's important to make sure you get your cover back on there. There you are. Okay. Take it for a road test.
Shop Products


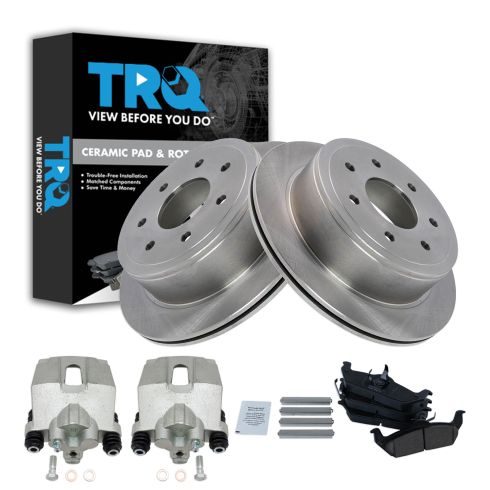
Ford F150 Rear Ceramic Brake Pad & Rotor Kit with Calipers TRQ BKA39496
Part Details:
- Ceramic
- (2) Rear Brake Calipers
- (2) Rear Brake Rotors
- (1) Rear Ceramic Brake Pad Set

How to Replace Front Calipers 2004-08 Ford F150
This video shows you how to install a new front brake caliper on your 2004-08 Ford F-150
