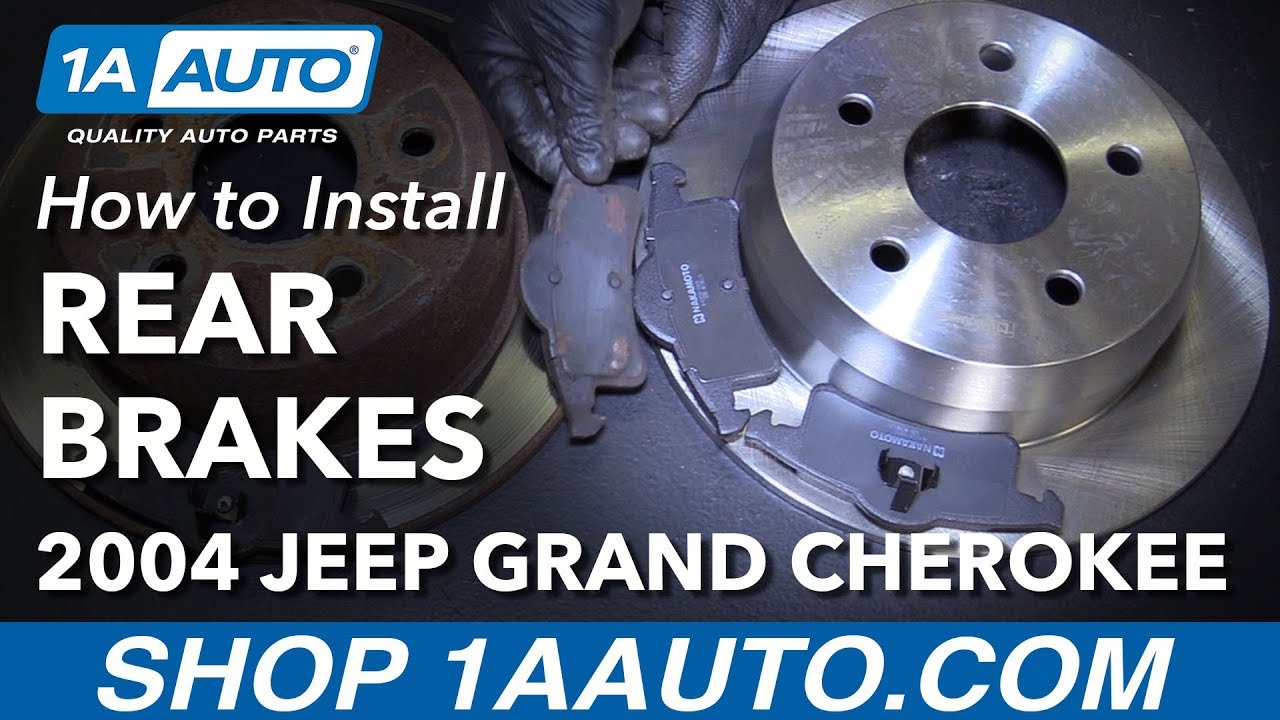
How to Replace Rear Brakes 1999-2004 Jeep Grand Cherokee
Created on: 2017-12-12
How to repair, install, fix, change or replace your own worn, squeaky, fading old rear brakes on 99, 00, 01, 02, 03, 04 Jeep Grand Cherokee.
-
step 1 :Removing the Wheel
- Loosen the lug nuts with the vehicle on the ground
- Raise the vehicle with a floor jack
- Secure the vehicle on jack stands
- Remove the lug nuts
- Pull off the wheel
-
step 2 :Removing the Brake Pads and Rotor
- Pull the caliper to the outside of the vehicle to apply pressure to the piston
- Pry out the spring clip with a flat blade screwdriver
- Remove the caps from the caliper bolts
- Loosen the captured T-45 Torx bolts from the caliper
- Slide the caliper off and secure it with a bungee cord
- Remove the brake pad from the caliper
- Remove the 18mm bolts from the caliper bracket
- Remove the two Phillips head screws from the rotor
- Remove the rotor, loosening the adjustor if needed
-
step 3 :Installing the Brake Pads and Rotor
- Clean both sides of the rotor with brake parts cleaner
- Place the rotor on
- Tighten the Phillips screws to the rotor
- Grease the caliper slides
- Place the caliper bracket on the rotor
- Tighten the 18mm bolts to the caliper bracket
- Clean the brake pads with brake parts cleaner
- Place grease on the brake pad tabs
- Insert the brake pad onto the caliper
- Insert a brake pad into the caliper bracket
- Compress the piston on the brake caliper
- Place the brake caliper on
- Tighten the bolts to the caliper
- Press the spring clip on
- Place the plugs over the caliper bolts
-
step 4 :Reattaching the Wheel
- Slide the wheel into place
- Start the lug nuts by hand
- Tighten the lug nuts preliminarily
- Lower the vehicle to the ground
- Tighten the lug nuts to 80 foot-pounds in a crossing or star pattern
-
step 5 :Testing the Brakes
- Pump your brakes repeatedly until they feel firm
- Test your brakes at 5 miles per hour and then 10 miles per hour
- Road test the vehicle
Tools needed
-
Large C-Clamp
Torque Wrench
Pry Bar
18mm Wrench
Jack Stands
Brake Parts Cleaner
Rubber Mallet
Flat Blade Screwdriver
Dead Blow Hammer
Paper Towels
Anti-Seize Grease
T45 Socket
Ratchet
Wire Brush
Floor Jack
1/2 Inch Breaker Bar
Hi, I’m Mike from 1A Auto. We’ve been selling auto parts for over 30 years!
The vehicle is still on the ground. I'm going to loosen the lug nuts. Most lug nuts are either 19 millimeter or 21. This particular vehicle happens to have a special lug nut tool, so we're just going to use that one. But basically use the appropriate size socket. I'm going to use a breaker bar to loosen these while it's on the ground. Raise and support your vehicle using jack stands and a jack. We're using our two post lift. The lug nuts are already broken loose. I'm just going to use the socket to finish removing them. Remove the wheel, and put it aside. Before I remove this caliper, I'm going to press the piston inside so it's easier to take off.
I'm going to take my pry bar. Put it up against the suspension arm, and then right against the back of the caliper, and just gently push it. And it's just going to compress the piston. That should help me remove the caliper. We're going to remove this spring clip from the caliper and bracket. I'm just going to use a small pry bar or a small flat bladed screwdriver will work. Just pry it out. It doesn't have much tension on it, it should come right out. I'm just going to work it out. Try not to bend it because we're going to reuse it. Looks like that.
There are two caliper bolts. There's one here and one up here. They actually double as slide pins. They’re underneath these rubber caps that you can just pry off with your fingernail or small screwdriver. I'm just going to work it off, just like that. Do the same for both. There is a T45 bolt in here. I'm going to remove both of those. I'll actually loosen them. They won't really remove fully from the caliper. They're captured. We can take them out afterwards and clean and lubricate them, but for now I'm just going to loosen them and back them out. I'm going to do both of them.
It's hard to get these bolts out because they're just into these little slides with friction, so just work them out a little bit. Might just have to work it back and forth. So that pad just sits in there, it might fall out. This pad is actually clipped into the cylinder. Put that aside for a second. These slide pins just sit in here. You can push them out.
To get this pad out we're just going to pull it straight off, right out of the clip. I'm going to put this caliper right here. Take our other pad out. There's a top and a bottom caliper bracket bolt, these are 18 millimeter, needs a box wrench to remove these. They're in there pretty tight. Get that one loose. Or can I get this one loose? If they don't come loose by just tapping it with your hand you can use a dead blow mallet on the end of the wrench. I'm just going to work on getting these out. I got the top one out. And I'm going to get the bottom one out. Hold on to the bracket so it doesn't fall, and pull that right out of the way.
Inside here is the parking brake assembly. Sometimes this rotor will come right off, other times it will get stuck on the parking brake assembly because it rusts. Try to tap it with a dead blow, see if it comes right off. If not, we'll have to loosen the adjuster, and it should pop right off after that. I'm just going to tap around it. Try this way. It's getting hung up on the parking brake assembly. See how far out it wanted to come? But it was getting hung up on the parking brake assembly. So rather than struggle with this, I'm going to put the Jeep up a little higher, pull of the rubber cap in the back, and release the parking brake, and this should come right off. At the back of the rotor and dust shield assembly is a little rubber boot here. And it should just pop right out. I'm just going to use a little flat bladed screwdriver to help me pop it out. Just keeps just and dirt out of there. And inside there is a start adjuster wheel, and that's what actually pushes the brake shoes in or out in the parking brake.
So I'm going to adjust the in using this flat bladed screwdriver. So actually just turning it up. And you can check your work because the brake rotor, if you're tightening it, will suddenly stop moving. So it can only go two ways, you can either tighten or loosen. And I'm going in the loose direction. So I'm just going to keep turning it until I feel it stop. I'll give you a better look at this when I take the brake rotor off. It feels like I got to the bottom of the adjuster. So this brake rotor should come right off without struggling. So when I'm adjusting it, I'm actually turning this wheel here, and I'm turning it this way. So it's turning against the spring, is what locks it. And as you pull the parking brake and these wear, this self-adjuster comes out. And then what happens is we're going to put this rotor back on. I'll pull the hand brake in a couple times in the interior, and it will self-adjust back out to where it needs to be.
While I've got the parking brake shoes accessible, I'm just going to look at them. They look pretty good. I'm going to spray them down with some brake parts cleaner. In an automatic transmission car, these really don't get used that much, so they stay in pretty good shape. At this point, you can reinstall that little rubber plug so you don't forget it. It just goes right back in the original opening.
Here's our original brakes that we took off our vehicle, and our brand new ones from 1AAuto.com. You can see they're an exact match, same style, come with new hardware and new shims. These have the same clips to fit in the piston of the brake caliper, just like the original. Same size and style rotor. It’s got the inside part for the parking brake, and non-ventilated. So this should fit great and work great in our vehicle.
Take our new brake rotor, I'm going to install it backwards first, and use brake parts cleaner to clean off the packing oil. Any greasy hand prints I got on it. Clean the inside too, because that's where the parking shoes are going to ride. Just wipe off any excess. And I'll grab the edges, flip it over, and do the same.
I'm just going to clean up our brake caliper bracket. There's no hardware on this one. Brake pads just kind of ride on the bracket. I'm just going to hit it with some brake cleaning and a wire brush. I just want to take off any prior grease and any dirt that's stuck to it. Put this brake caliper bracket back in place, install the bolts.
One thing I like to do to hold the rotor in place is just take one of the lug nuts, thread it down. This way you don't have to fight with the rotor when you're putting on the pads or the caliper bracket, it keeps it in place. I'm going to tighten up the bracket bolts. I'm going to lube up these slide pins/caliper bolts. I'm going to try to get them out, push them out, and wiggle them out. Take one aside, put that back, and put a little caliper grease on here. Reinstall that, push it right back in place, and just get it right there. And do the same for the other one.
Before we install the new pads I'm going to take one of the old pads, actually the one that goes in here, just pop it in here. Take our C-clamp and install it, and we're just going to compress the caliper a little bit. I see it's going in nice. This will just give us extra space to install the new pads. Pull this old pad out, place this down here.
Before we install our pad we need to make sure it's nice and clean. Take some brake parts cleaner, spray it down, and push this right into place. So it's going to sit right in there, snap in nice and easily. Take our outer pad, do the same, clean it, put some grease on the ears, because those are going to ride right in the caliper bracket. And that can sit right in here.
Pick up the caliper, the rear pad, and we'll do the same. Put a little grease on the ears. Then we're going to slide the caliper into place. Let it sit like that for a minute. Take my T45 Torx. And start by threading in the top one, same for the bottom one. Get it started by hand, and I'll take our ratchet. Finish tightening it down, and kind of go evenly.
Install our clip. I'm just going to push it into the holes. Put that under one side. Do the same over here. Feed it under the side first, push it into the holes, get it kind of close, take your mallet or small hammer, just tap it in place. I got to put our caps back in over these. And we can see how the caliper wants to move. It's because the piston is still retracted in here. It hasn't come out to meet these new pads. So we're going to put the wheel back on the car and torque it.
And then before we drive it, I'm going to push down on the pedal nice and easy. And what it's going to do is push that piston out to meet these pads, and then it won't have so much movement, it'll be ready to drive. I'm just going to remove this lug nut so I can put our wheel back on.
Reinstall the wheel and tire and torque the lug nuts once the vehicle's on the ground. Thread them on by hand first. I'm just going to get one caught. Get that bottom one caught. I'm just going to get these hand-tight. Then when I put the vehicle on the ground. I'll torque them to spec. And I'm just going to torque the lug nuts. Just going in a cross pattern.
Before we start the truck I'm just going to gently press down on the brake pedal, not all the way to the floor, build the pressure up, and push the caliper pistons back out to meet the pads. You'll feel it start to get firmer as they come out. It feels good. Put the parking brake up, and just kind of work the adjusters out. You'll feel it start to get tighter. All right.
Thanks for watching. Visit us at 1AAuto.com for quality auto parts, fast and free shipping, and the best customer service in the industry.
Shop Products
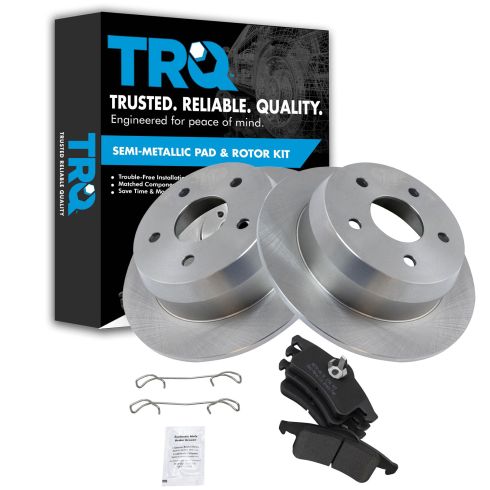
1999-04 Jeep Grand Cherokee Rear Semi-Metallic Brake Pad & Rotor Kit TRQ BKA10870
Part Details:
- Semi-Metallic
- Premium Posi
- Solid
- 12.01 in. (305mm)
- 5 Lug
- (2) Rear Brake Rotors
- (1) Rear Semi-Metallic Brake Pad Set

How to Replace Rear Brakes 2013-17 Honda Accord
Watch this video to learn how to install new engineered to fit TRQ rear brake rotors and pads on your 2013-17 Honda Accord.
