How to Replace Rear Brakes 2003-07 Honda Accord
Created on: 2019-06-25
Watch this video to learn how to replace the rear brakes on your 03-07 Honda Accord. 1A Auto shows you how with step by step instructions!
-
step 1 :Removing the Wheel
- Raise the vehicle with minimal weight on the tire
- Loosen the five 21 mm lug nuts
- Raise and support the vehicle
- Remove the five lug nuts
- Remove the hubcap
- Remove the wheel
-
step 2 :Removing the Brakes
- Loosen and then tighten the brake bleeder screw
- Remove the two 12 mm brake caliper slider bolts
- Remove the brake caliper, and set it aside securely with no tension on the brake hose
- Remove the two 14 mm brake caliper bracket bolts
- Remove the brake caliper bracket
- Remove the two Phillips brake rotor screws
- Remove the brake rotor
- Loosen the brake caliper bleeder screw
- Compress the caliper piston by rotating it clockwise
- Close the brake caliper bleeder screw
- Clean the wheel hub surface of rust
- Apply anti seize paste to the wheel hub surface
- Remove the brake pads from the caliper, taking note of differences between inner and outer pads
-
step 3 :Brake Cleanup and Prep
- Clean the wheel hub surface of rust
- Apply anti seize paste to the wheel hub surface
- Remove the brake pads from the caliper, taking note of differences between inner and outer pads
-
step 4 :Installing the Brakes
- Mount the rotor on the wheel hub, and clean it with brake parts cleaner
- Reinstall the rotor screws if they are still in good condition. If the screws are in poor condition, they can be left off
- Clean the brake pad tins in the caliper bracket
- Remove the brake pad tins and clean the grooves of the caliper bracket
- Clean the rear of the brake pad tins
- Remove the caliper slider pin, and the boot
- Clean the slider pin and boot
- Clean the slider channel in the bracket
- Replace the slider boots
- Apply brake grease to the boots and slider pins
- Install the slider pins
- Apply brake grease to the pad tin grooves in the bracket
- Reinstall the pad tins. Do not apply grease to the outer surface of the tins
- Install the caliper bracket with the two 14 mm bolts
- Torque the 14 mm caliper bracket bolts to 41 ft-lb
- Insert the brake pads into the caliper bracket
- Slide the brake caliper over the pads
- Install the 12 mm caliper slider bolts
- Torque the 12 mm caliper slider bolts to 18 ft-lb
- Open the bleeder screw to allow it to gravity bleed until the stream is steady
- Tighten the bleeder screw and replace the cover
-
step 5 :Installing the Wheel
- Slide the wheel onto the wheel studs
- Replace the hubcap
- Replace and tighten the 21 mm lug nuts by hand
- Lower the vehicle with minimal weight on the wheel
- Torque the lug nuts to 80 ft-lb in a star pattern
- Lower the vehicle completely
Tools needed
-
14mm Wrench
12mm Socket
Socket Extensions
Torque Wrench
14mm Socket
Jack Stands
Brake Caliper Piston Rewind Cube Tool
Brake Parts Cleaner
21mm Socket
Impact Screwdriver
Phillips Head Screwdriver
Brake Caliper Hanger
Brake Grease
Ratchet
Wire Brush
Floor Jack
1/2 Inch Breaker Bar
12mm Wrench
Hi, I'm Mike from 1A Auto. We've been selling auto parts for over 30 years.
Hey, everyone. Sue here from 1A Auto, and today we have an '07 Honda Accord in the shop and we're going to be doing rear brakes. If you need that part or any other part for your car, click on the link below and head on over to 1A Auto.com. Remove the protective boot on the bleeder screw. Set this aside, we're going to reuse that. And I'm going to break the bleeder screw free. Make sure it breaks free. And I'm just going to snug it because I'm going to loosen that up when it's hanging off. 12 millimeter wrench, we're going to disconnect the caliper to bracket, put them on that slider bolt.
Those look in good shape, making sure they're not cross threaded, there's no metal long. Now I'm going to take a small pry bar and just pry this caliper off. Do a quick visual, make sure I see no tears on the boots, the dust boot for the piston. There's no sign of any leakage. Check out the hardware, the anti-rattle clip is still one piece. It's got some good spring left to it. I'm going to move over to the slider bracket, feel my sliders. I'm going to be cleaning them up, but it's nice to see if they're frozen, which they're not, so I can just easily clean those up. Then I'm going to take a 14 millimeter now and break the bracket off the knuckle.
Get the top pulled out the rest of the way. Slide the bracket right out. Now with a pneumatic screwdriver, I'm going to put my Phillips head tip right into these mounting little ... they're just a little like flathead bolts that hold the rotor to the hub. I've never seen one do this. Almost feels like someone put thread lock on the threads. Wow, those are pretty rusted in there, that's all. I'm going clean those up. I might not re-install that second one because the next person's going to be really in trouble if I put that back in. They came out. That's good news.
So on these mounting screws, it's just basically to hold the rotor mounted flat to the hub so you can work and make sure it's seated properly so you don't have a misaligned hub. If this rounds off and you can't get it out, it is a flat surface. So what a lot of people will do is take a large drill bit and you drill that till the head of it comes off and then you can take your rotor off. Take a pair of locking pliers and work the thread out. If not, grind it down flat. It does not have to be re-installed, but you must pay attention that when you put the rotor on to make sure that you line up those bolt holes and that it is sitting flush. So if you need to put a couple of lug nuts on, you can do that while you assemble the brakes.
Now we're going to push back our caliper piston. First thing I'm going to do is open the bleeder screw with my 10 millimeter wrench. I'm just going to leave it on there. You don't want to ever push the fluid back. It can go in ... The dirty fluid will hit the ABS actuator and cause a lot of problems. So I'm going to be using this tool right here that has the four way kicked on it because the calipers back here are spring loaded. They're not just a straight piston, has to be twisted in. It's the design of it. I have a catch pan catching my brake fluid.
Nice and smooth so I know that this caliper is in good shape. There's no slow drag, there's no stickiness to this piston and no leaks coming out. I'm going to end this with the star pattern going like north, south, east, west, or 12:00, 6:00, 3:00, 9:00 because the brake pads have notches on them. So you want to end up with these in that design, just like that. Now I can close that bleeder screw and get ready to clean up. First thing I'm going to do is clean my hub surface. I'm going to spray it with some parts cleaner, brake clean to loosen up some of that rust and then I can take my brass brush to it.
The most important part is closest to the hub, that's where the rust will form. Then just re-clean it. I'm going to take a little bit of copper anti-seize and I'm going to put it right around that hub, and that stops any rust buildup, water, seepage, and just light brush around the rest of the hub. Now we're going to take our pads out of our bracket and I'm going to note where the inner pad was, where the silencer, or shall I say where the brake pad indicator was. So that's the inner for the driver's side and the outer is the same on both sides, but you want the clip where the factory set the clip, it's on the top of the bottom. It actually has to do with the rotation of the wheel and where they feel the closest point and the first point is that hits.
Here we have our brand new brakes from 1A Auto, the rear rotors and pads for our '07 Honda Accord. And you could see a nice cross cut. It is stamped with the manufacturer's specs. And the one that we took off is just old and worn out. I would say it's not original due to the mileage. The pads, quality pads, they have a nice beveled edge on them that stops the brake dust from building up and squeaking, inhibitor and a nice slot in the center there that keeps the cooling. If you need this part or any other part for your car, click on the link below and head on over to 1AAuto.com
So now I'm going to line up my new rotor with the mounting bolt holes, which are right there and on the other side, nice and flush. I'm only going to be using one of them because the other one's all kind of rounded off. And you need the pneumatic impact screwdriver to install it also, just to make sure that it's seated properly. You hear the sound difference. Perfect. Now we're going to clean up our bracket, get it ready to install the pads So the hardware, I'm not going to replace it. It looks in good enough shape. It looks like I can just get away with cleaning it, so I'm going to end up taking it off, but before I do that, it's easy for me to hold it in the bracket and take my wire brush and clean the flat surface part of it and you'll see the difference in when I'm cleaning off.
You want it as shiny as possible and smooth. You don't want any caliper grease on it, no silicone paste on this surface. You want it on the other surface. I'm going to do both surfaces top and bottom the same way. Now I can remove it from the actual caliper bracket and just put a small screwdriver in there, pry it apart. See the mounting surface, the rust on it, where it meets the actual bracket. We're going to clean that up. Now we're going to clean the actual caliper bracket. I'm just using the rotor box because it's here and it's a good way to keep everything in one spot so then when I use my cleaner and spray cleaning them up, spraying in on the ground.
That's what we're looking for, a nice smooth surface.You don't want any rust peaks that are risen, and you can use a flathead screwdriver. The smoother the surface, the longer your pads are going to last in the better braking. We'll let that dry and then I'll show you how I'm going to clean the mounting surface part of the tin. If you didn't buy new tins, this is must do.
That's before and after. Now we're going to clean the slider pin. You just pinch the boot. See it has a lip on it and the slider has this groove on it. That's where the boot sits inside there. So it's a matter of just pinching the boot down and just twisting the pin out. And that's got the old grease in there, or a paste. It's all kind of dirty. We're going to clean that up. Examine the boot ... I mean the boot and the pin. Some of these pins will get a groove marked in them. And that's obviously something you don't want. It goes down the road, heaven forbid it should break some day. Don't say, "Oh, it was just a small little groove in that metal." It's not worth it.
So the pins good and we can look at the boot. Just pull the boot, stretch it. There's no pin holes. You do not want water getting in there. Water gets in there, this will seize up and it could seize up, extended out or all the way in. And then that brake pad is going to go right down to nothing, or it's not going to apply because the pin is stuck out here because it seized up. Take my little pocket screwdriver. I'm just going to dig in there, see if I can get some of that old grease out. You can use a caliber honing brush. Let me get one for you.
So I'm going to show you how to clean out the inside of these caliper boring, where the slide. So we're going to take the boot out. Just pinch it out. It comes right out. Now you can get these at your hardware store, make sure you get the right diameter one. That is getting all the old grease out. If there was rust in there due to water damage, that'll take that rust out for a smooth sliding surface. You can let that air dry. So now we're going to reassemble, pretty simple. I'm just going to take any grease off the outside here of this boot because I want it to make sure it sits and locks in there. So you have a lip on this rubber boot that's going to sit right inside that lip. Just guide it around.
You might have to use a pocket screwdriver. Nope, I got it. Perfect. Now with our ... You can use caliper grease or I have a silicone paste here that is water resistant and high temp. Sometimes I like to use the clear paste. I'm just going to really put that on the inside of the boot. I want it to sit in all those ridges. Now we're going to take the slider pins, give them a slight, light coat. I'm going to put a dab heavier on the bottom. When I assemble that, I like to spin and twist in, seat it all the way down. If there's air in it, see how it ... Just squeeze it and let the silicone paste come out and the air come out.
Do the same to the other side. Our last step is I take some of that paste and I put it on the actual surface where those caliper tins are going to sit, and this'll keep the water out and hopefully stop it from rusting and building up a rust lip, which would push the tins up. So you've got the locking ear tabs that go right in the center. Snap it down in. Just like that. Do not put any silicone paste on the flat surface in which the pad is going to ride on. It'll only collect road dirt and brake dust and drag the pads. That kind of defeats the whole point.
Now let's mount our caliper bracket to the knuckle. Start the caliper bolts by hand. We're going to torque that to manufacturer's specs. Manufacturer's specs is 41 foot pounds. Double check it. Now we're going to install our pads on the bracket. And this is the inner pad and there is that pin notch that I was talking about that's going to sit right in that caliper slot. Just slide them right in. See how smooth those slide? Now they're not going to make any noise, but they slide. So perfect wearing type of brake pad. Now we can easily slide our caliper over.
I'm going to put the top bolt in first so that I can, once that's threaded and secure, I can push down on the spring and mount the bottom one. See how it wants to push out? And that's because of the E-brake cable. I'm going to snug this with my 12 millimeter wrench and then I'll torque it to manufacturer's specs. The torque specs for the caliper bolt to bracket is 18 foot pounds.
Now that our brakes are assembled we're ready to gravity bleed because we've had the bleeder screw open, so I just want to pop that open, catching bucket underneath, and I want that to gravity bleed and make sure there's no air in that. We're going to close up the screw. I've got a steady stream with no air bubbles. Make sure I just snug that down and clean that surface with the brake clean. Don't forget to reinstall your boot cover on that bleeder screw. Let's put the rear tire back on. 19 millimeter socket. The wheel torque on this particular model is 80 foot pounds. Make sure you do it in the star pattern crisscross, and then double check.
Thanks for watching. Visit us at 1AAuto.com for quality auto parts, fast and free shipping, and the best customer service in the industry.

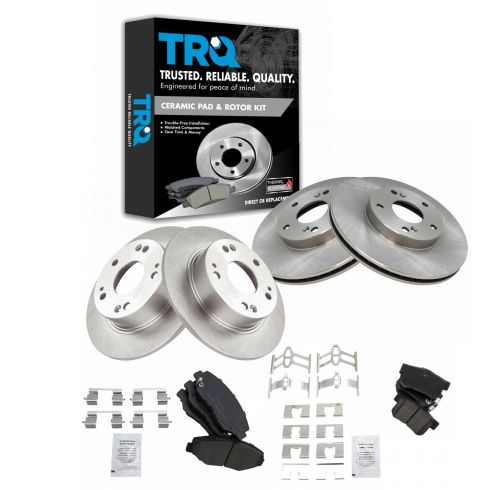
2003-07 Honda Accord L4 2.4L Front & Rear Ceramic Brake Pad & Rotor Kit TRQ BKA11290
Part Details:
- Premium Posi
- Solid
- 10.23 in. (260mm)
- Ceramic
- 5 Lug
- (2) Front Brake Rotors
- (2) Rear Brake Rotors
- (1) Front Ceramic Brake Pad Set
- (1) Rear Ceramic Brake Pad Set

How to Install Front Brake Pads Rotors 2006-07 Mazda 6
How to repair, install, fix, change or replace your own worn, squeaky, fading old brakes on 06, 07 Mazda 6
