How to Replace Rear Brakes 2003-11 Honda Element
Created on: 2019-07-25
Learn how to do your own brakes! This 1A Auto video breaks down the process to show you how to do it yourself!
-
step 1 :Removing the Wheel
- Raise the vehicle with minimal weight on the wheel
- Loosen the 19 mm lug nuts
- Raise and support the vehicle
- Remove the lug nuts
- Remove the wheel
-
step 2 :Removing the Brakes
- Loosen and tighten the brake bleeder screw to ensure it's not stuck
- Remove the 14 mm brake caliper slider pins
- Remove the brake caliper
- Open the brake bleeder screw
- Compress the brake caliper piston
- Close the brake bleeder screw
- Hang or support the brake caliper
- Remove the two 19 mm caliper bracket bolts
- Remove the caliper bracket
- Remove the brake pads from the caliper bracket
- Remove the Phillips rotor screws
- Remove the rotor, using a hammer if necessary
-
step 3 :Installing the Brake Rotor
- Transfer the brake shoe adjuster access boot to the new brake rotor
- Clean the rotor surface
- Clean the wheel hub surface
- Apply anti-seize grease to the wheel hub surface
- Adjust the parking brake shoes if necessary
- Install the rotor onto the wheel studs
- Remove the shoe adjuster access boot from the rotor
- Align the access hole to the adjuster
- Adjust the shoe tightness to cause light drag on the rotor
- Replace the access boot
-
step 4 :Servicing the Brake Caliper Bracket
- Remove the brake pad tins from the brake caliper bracket
- Clean the caliper bracket pad surface
- Coat the caliper bracket pad surface with brake grease
- Install cleaned or new brake pad tins
- Remove and clean the brake caliper sliders
- Apply brake grease inside the slider boots and onto the slider pins
-
step 5 :Installing the Brake Caliper
- Install the brake caliper bracket
- Install the 19 mm bracket bolts
- Torque the 19 mm bracket bolts to 41 ft-lb
- Replace the caliper anti-rattle clip if necessary
- Install the brake pads into the caliper bracket
- Install the brake caliper
- Install the 14 mm brake caliper slider bolts
- Torque the 14 mm caliper slider bolts to 16 ft-lb
- Open the brake bleeder screw to bleed the fluid until there is a steady stream, then close the bleeder
- Pump the brake pedal to seat the pads
- Check the brake fluid reservoir and top off the DOT3 fluid if necessary
-
step 6 :Installing the Wheel
- Install the wheel onto the wheel studs
- Install the lug nuts and tighten them by hand
- Lower the vehicle with minimal weight on the wheel
- Torque the lug nuts to 80 ft-lb
Tools needed
-
Large C-Clamp
Socket Extensions
Torque Wrench
14mm Socket
Hammer
Rust Penetrant
Jack Stands
19mm Socket
Brake Parts Cleaner
Impact Screwdriver
Flat Blade Screwdriver
Anti-Seize Grease
Chisel
Silicone Paste
Brake Grease
Ratchet
Wire Brush
Floor Jack
1/2 Inch Breaker Bar
Hi, I'm Mike from 1A Auto. We've been selling auto parts for over 30 years.
Hi, everyone. Sue here from 1A Auto, and today on our '06 Honda Element I'm going to show you how to replace the rear brakes. If you need those parts, or any other parts for your car, click on the link below and head on over to One A Auto.com.
19 millimeter socket, and we're going to break free the lug nuts. You got the pressure of the vehicle on the tire still, so it doesn't turn.
I use the two post lift. At home you can use a jack and jack stands. I'm going to take all the lug nuts off and remove the tire.
Let's break the bleeder screw open, make sure that we can push that piston back. We know it moves when the fluid comes out. Just snug it back up. Now I'm going to dismount the caliper from the caliper bracket. The caliper slider pins, bolts, are 14 millimeter socket or a wrench. Now the little pry bar, I'm going to pry this right off. There we go.
So now I've got to push the piston back. I like to use a little pair of C-clamp pliers, so I'll set it right in there, get it ready to snug ... But I'm not going to compress that piston until I loosen up the bleeder screw. Grab my 10 millimeter, break that free. Have a good catch basin with some pads underneath. Now the bleeder screw's open and I've got my adjusters now. I'm just going to squeeze this. You never want to reverse the brake fluid on an ABS system, plus this gives you your chance to really check out your caliper, make sure it's in working order. That went right back really nice and smooth. So now I'm going to snug that bleeder screw up, remove my pliers. Now I can examine the actual caliper boot and piston and make sure that everything looks good.
I have no moisture around the seal. Everything looks in good shape there. I'm happy with that. I'm just going to set that aside, make sure it's out of my way.
Let's take that bottom bolt out. Now we can pull the caliper bracket off and see what we got here. We have no pad, no pad there, and very little bit of a pad left on the ear. about a quarter of a pad left there. So we're going to see where this failed.
So for some reason the sliders work, slider pins work, and for some reason that outer pad wore off, or the bonding came undone and slid off. Let's see if we have any swelling underneath the hardware, which eliminates the pad from doing its job and sliding back and forth freely.
Now it's time to take the rotor off, and these rotors have mounting ... little screws on them. So we're going to use a pneumatic screwdriver that acts like a puncture, so you hold it taut and hit it with a hammer. So if you get one where the Phillip's head is all worn out, I'm going to use a chisel and literally try to turn it with a chisel. There we go.
And you don't need these. They're just there to help keep the rotor flush while you're adjusting the E brakes. I'm just going to give it a quick little spray down on the hub area, see if we can ... pray this comes right off. Give a quick hit of the hammer. Okay, let's get it off the rest of the way. Wow.
Here we have our new rotor from One A Auto and brake pads. This is the old one that we took off. See the thickness difference. Obviously this is new. The pads from One A Auto come with a nice cooling vent, an angled, so there's no brake dust build up. The rotor is a solid motor with a nice cross cut. They even mill the inside where the E brake shoes go, and a cutout for the backing plate to water, so water can distribute out. So if you need these parts or any other parts of your car, click on the link below and head on over to One A Auto.com.
Here we have our new rotor and the old rotor, and we have to cross over the rubber boot that covers up the slot for the self adjuster on the E brakes. Don't forget to transfer that silver because you don't get a new one with anything. I didn't get one with the hardware either. So it's the slot that has the seat on it. You can just install that right there. We'll be taking it back out when we go to adjust the brakes. Now I'm going to clean the new rotor, getting the packaging oil off of it, the anti-rust oil.
I'm going to put some anti-seize around the hub here on the surface. I already took a wire brush to it. So you're going to line up the adjuster hole and the mounting bolt holes. So with that we have ... it's going to go like this. So now we need to undo the adjuster a little bit. The E brake shoes will not fit inside the rotor housing, it's the hat of the rotor. So I'm backing off on the adjustment. There we go, perfect.
At this point I want to adjust E brake, and by doing that the the rotor has to be flush on the hat, the hub. So where we had ... this screw hole hasn't been used for a while, it's all rusty, and this one was stripped. So I'm going to use two lug nuts. If you have the two mounting screws and they work, you don't have to use the lug nuts, you can use those, and you just want to make sure it's tight to the hub and if you have to bang on it ... You want to be able to spin this and adjust the E brakes, and turn it.
Okay. Now I'm going to take that adjuster cover off. I might back off a little bit on that. You're going to use the window, line up where the star adjuster is, and this way you can adjust it.
I have a high spot right there that I'm not a fan of.
You don't want the brakes to beat snug because if they're too snug, when it goes down the road ... brakes expand ... the wheels start to smoke obviously because it will be almost as if you have the E brake on. There we go.
This backing plate is pretty bad. That's where I'm going to leave it. Now we're going to install the boot.
So now comes the time where we're going to clean up our caliper bracket in silicone and get it ready for the brake pads. Take the old hardware off ... and that's reusable, but you'd have to clean it up. Like I would take a wire wheel to it, or a wire brush if you don't have one, clean the pad surface that it's going to slide on. But I ordered new hardware from One A Auto. This comes coated. It's got a neoprene coating on the back so rust cannot attach itself to the tin, and a new pad spring that goes on the caliper side, that keeps the pads from clanking and making noise.
So we're going to clean the caliper bracket. Take a wire brush to the surface. Do that on both sides. Clean it. Get a little caliper grease, put a thin coat on the metal wherever the tin's going to sit. We don't want water building up in there. Then we're going to take the tins and put them back on. If you use the old ones definitely clean both sides of the tins so that ... See that tab? It's like a butterfly tab there. So that's going to go down and sit right in there. You can take a pair of pliers if you want, squeeze them down, and repeat the process on this side.
Now we're going to clean the caliper pins. Take that out and wipe off the old paste. Look at it: there's no rust. It looks good. The boot: examine it. Make sure there's no tears. And with this I like to use a silicone paste. You can use caliper grease. I'm going to put the silicone paste in there. It's a water base. I like to put it on the inside of the boot grooves. Then I'll take the slider pin and lube up the flat side, or all the way around lightly, with a little glob on the end. That's a glob to me. So then I'm going to slide it in there and work it around, get any air out, squeeze it down.
Okay, it needs to go down more so we're going to get the air out. I'm going to use a pocket screwdriver. Just hold the boot open, squeeze it all the way down. There we go. Repeat the process on this side.
Make sure you get the air out. Do not puncture the boot. Now we're ready to install that bracket. We're going to start the bolts by hand, and I'm just going to snug them down and then get the manufacturer's specs, and torque them down. Let's get the caliper itself out of the way. So a size 14 socket in case you forget. Okay, snug those up. Get our torque wrench. The manufacturer's specs on this is 41 foot pounds.
So now I'm going to put in the new caliper hardware for the anti-rattle clips. I'm just going to take a screwdriver and, poke in there, pry this down again. That's what it looks like. A new, new one, itt's going to have more tension to it. So to start you put this in, bring it all the way over to one side. There it is. So I just kind of did that fast, but I brought it all the way to one side, clipped it in, and then just pushed my finger down on this side: snapped right in.
Now we can install our pads. The one with the indicator goes on the inside, and the one without it goes on the out. They just basically sit right in. like that. And then we're just going to slide the caliper on, get our two slider bolts. It's a 14 millimeter socket. The torque on that is 16 foot pounds. Now we're going to gravity bleed because we did open up that bleeder screw, so I'm going to put a 10 millimeter on there, break it open. Got my catch pan down there. Didn't really get any air bubbles so we're just going to snug it off, get a nice steady drip, clean that up.
Now we're going to put the bleeder screw cover back on. Ready to pump the brakes up.
... Front. I'm going to seek the pads and pump up the brakes. So the manufacturer recommends Dot Three, which I'm going to put in, and this is the diaphragm. It goes down by suction when the brake fluid is low, so just push it gently back into place. Make sure there's no chunks of dirt or anything, or debris. So it's Dot Three brake fluid. I'm going to fill it up to the full line which is on the side here. You can see it starting to come up. I'm going to reinstall the cap. It's got these offsets ... see how they're angled ... so they lock them down and then it just kind of sucks it down. So then they're good.
Now let's put the lug nuts back on. It's a 19 millimeter socket. Just going to tighten them all down and then I can lower it down and torque it. So I'm going to torque the wheels to manufacturer spec, which is 80 foot pounds, and always do it in a star pattern. Double check.
Thanks for watching. Visit us at OneA Auto.com for quality auto parts, fast and free shipping, and the best customer service in the industry.
Shop Products


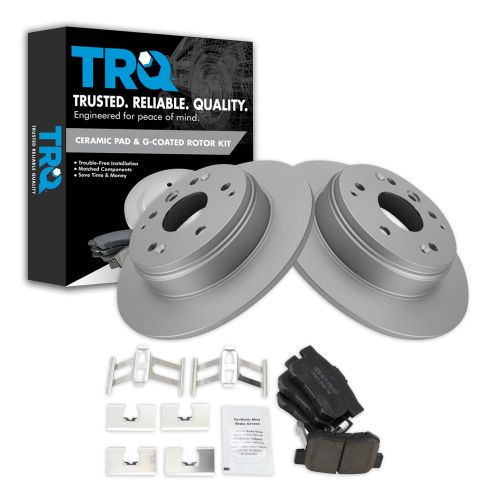
Honda Element Acura TL Rear Ceramic Premium G-Coated Brake Pad & Rotor Kit TRQ BKA24138
Part Details:
- Solid
- Premium G-Coated
- Premium Posi
- 11.10 in. (282mm)
- 5 Lug
- Ceramic
- (2) Rear G-Coated Brake Rotors
- (1) Rear Ceramic Brake Pad Set

How to Replace Rear Brakes 1994-2002 Dodge Ram 1500
Watch this video to learn how to replace the rear drum brakes and hardware on your 94-02 Dodge Ram.
