How to Replace Rear Brakes 2009-14 Chevy Traverse
Created on: 2018-03-02
How to repair, install, fix, change or replace your own worn, squeaky, fading old brakes on 09, 10, 11, 12, 13, 14, Chevy Traverse.
-
step 1 :Removing the Wheel
- Loosen the lug nut covers with a 22mm socket
- Pry off the center cap with a flat blade screwdriver
- Loosen the lug nuts with the vehicle on the ground
- Raise the vehicle with a floor jack
- Secure the vehicle on jack stands
- Remove the lug nuts
- Pull off the wheel
-
step 2 :Removing the Brake Pads
- Pry the brake pads into the caliper with a flat blade screwdriver to push in the pistons
- Remove 14mm bolts from the brake caliper
- Pull the caliper aside
- Pry the brake pads off with a flat blade screwdriver
- Remove the brake pad slides
- Clean the slides with a wire brush
- Apply anti-seize fluid or white grease to the slides
- Push the slides on with a flat blade screwdriver
- If only changing the pads, continue to Step 6 and install the new pads
-
step 3 :Removing the Brake Rotor
- Remove 21mm bolts from the brake caliper bracket
- Pull off the brake caliper bracket
- Remove the T30 Torx screw from the rotor
- Pop the rubber plug out of the rotor
- Turn the adjustor to push out the rotor
- Pull the rotor off
- If the rotor will not come off, thread the lug nuts and strike the hub area of the rotor with the ball end of a ball peen hammer
-
step 4 :Installing the New Brake Rotor
- Clean both sides of the rotor with brake parts cleaner
- Slide the rotor on
- Thread on one lug nut to hold the rotor in place
- Adjust the emergency brake
-
step 5 :Preparing the New Brake Pads and Rotors
- Place grease onto the caliper bolts
- Put the caliper bracket back into place
- Tighten the bolts to 129 foot-pounds of torque
- Use a large C-clamp and the old pad to push the pistons back
- Put an old pad in the caliper
- Install the new brake pads into the bracket
- Put the caliper on
- Thread 17mm bolts by hand
- Tighten bolts to 20 foot-pounds
- Clean the rotor with brake parts cleaner or mineral spirits
-
step 6 :Reattaching the Wheel
- Slide the wheel into place
- Start the lug nuts by hand
- Tighten the lug nuts preliminarily
- Lower the vehicle to the ground
- Tighten the lug nuts to 140 foot-pounds in a crossing or star pattern
- Reattach the center cap
- Tighten the lug nut covers with a 22mm socket
-
step 7 :Testing the Brakes
- Pump your brakes repeatedly until they feel firm
- Test your brakes at 5 miles per hour and then 10 miles per hour
- Road test the vehicle
Tools needed
-
14mm Wrench
Large C-Clamp
Socket Extensions
Torque Wrench
14mm Socket
17mm Wrench
Rust Penetrant
17mm Socket
Jack Stands
Brake Parts Cleaner
Liquid Thread Locker
Rubber Mallet
Flat Blade Screwdriver
T30 Driver
Paper Towels
Ratchet
Wire Brush
Floor Jack
Cloth Rags
1/2 Inch Breaker Bar
Hi, I’m Mike from 1A Auto. We’ve been selling auto parts for over 30 years!
Use a breaker bar and a 22 millimeter socket to loosen the lug nuts of the vehicle on the ground. Just go around and loosen them all. Raise and support the vehicle. We're using a two post lift. You can use a jack and jack stands. We'll use a socket to finish removing the lug nuts. Take the wheel and tire off.
Wheel and tire is stuck to the brake rotor. I'll put a lug nut on it and put a second one on the opposite side here just lightly. Take a dead blow. We’ll just break it free. Might take a couple hits, might take one hit. Lug nuts keep it from falling off. Let's put the wheel and tire aside. I'm going to use a large flat-bladed screwdriver. Wedge it in here and then push against the caliper to compress the piston in slightly. Just pull it slowly, this way when I loosen the caliper slide pin bolts the caliper will slide off without much resistance from the pads. Perfect. Got two 14 millimeter slide pin bolts here.
I'm going to use a 14 millimeter box wrench. Start with the bottom one, loosen it. If you need to, you can counterhold the pins here with a 17 millimeter wrench. Usually they come free but if you need to, you can do that. I'll hold on to the caliper while I remove the bottom one so it doesn't fall. Slide it up and off. We can just put this right here. Pull the old pads out of the caliper bracket, and just push them out. Same for both of them.
It needs a long ratchet and a 21 millimeter socket to remove the two caliper bracket bolts. Could also use a breaker bar and then a small ratchet once they're loose and we get them both broken free before I remove one. Once they're loose, I'll just take them out with my fingers. I'll hold on to the bracket so it doesn't fall. I'll take the bracket out.
I need to remove the T30 Torx screw that's holding the rotor to the hub, using a T30 Torx bit on an extension and a ratchet. These shouldn't be in there very tight, come right out. I'm going to spray some rust penetrant between the rotor and the hub and then some down the wheel studs. Parking brake assembly is inside of here and the rotor may be stuck on it. Sometimes these rotors will come right off. Put a lug nut on so the rotor doesn't fall off, and I'll tap it with a dead blow.
I'm going to use this flat bladed screwdriver. I'm going to pop this rubber plug out, and I need to look for the parking brake release mechanism. There's a star adjustment wheel in here that needs to be turned and it will collapse the brake shoes in for the parking brake. I'll pull them away from the rotor. A rust ridge can build up inside here making it difficult for the rotor to come off so we need to relax those parking brake shoes and bring them in.
All right, so we're going to go in and we're going to push this star wheel down. Feel it start to get looser. Then adjust it all the way out until it doesn't seem to want to adjust out anymore. Feels like it there. Seems pretty loose. I know it's not hanging up on the parking brake shoes, so it might be stuck around the hub. I'm going to hit the rotor some more with a mallet. Give it a couple good hits with your dead blow, the lug nut keeps the rotor from falling all the way off and you can remove the lug nut. Take the rotor off. This is what you're doing. You're turning this adjuster wheel down and it's pulling these brake shoes in releasing them from the rotor and then when you adjust it out it's threading this out and pushing them further against it. You'll have to reset the tension on this after we put the rotor on.
Here's our original pads and rotors from our vehicle and our brand new ones from 1AAuto.com. Rotor has the same lug pattern, same screw opening to mount it to the wheel hub, and same opening to access the parking brake adjustment. The pads are identical in design. These ones weren't in bad shape but I want to show you how to change them anyways. Comes with new shims on there. These will fit great and work great for you.
I'll put the rotor on backwards. Take spray parts cleaner. I'm going to clean off the oil that the rotor is shipped in so it doesn't flash rust. Just wipe it down with a rag. I'm also going to spray the inside where the parking brake shoes ride. Flip it around. Line up the opening in the rotor for the screw with the opening in the hub. I'm going to reinstall the screw. Not a lot of torque on that, just so it's tight. That's perfect.
Clean the outside face of the rotor now using brake parts cleaner. Same thing, it has oil on it. It's shipped, so it doesn't flash rust, and we just want to get rid of that. I'm going to adjust the parking brake. So the inside of this rotor is a little thicker. Kind of hear it dragging a bit. I'm going to open it up, kind of do this just by feel. I might have a little bit of drag but not too much. This is just so that when you actually use the parking brake inside the car it grabs pretty early in the engagement. You don't have to go all the way to the full extension of the parking brake handle or if it's a foot pedal all the way to the floor. It feels good there. Don't forget to put the little rubber plug back in. It keeps debris out of there.
We can reuse the caliper hardware. It's stainless steel. It just needs to be cleaned with some brake parts cleaner, a wire brush, and a rag. Just scrub it and do the same for both sides. You could also check the caliper slide pins. They should move nice and freely. These are in good shape. I'm going to leave them alone. You also need to clean inside these threaded part of the caliper bracket.
Factory uses a thread locker, so you just want to clean it out use some brake parts cleaner. We could reuse our caliper mounting bolts. You just need to clean off the old thread locker. We're going to use some brake parts cleaner, spray it down, and the wire brush. Clean up both of them. Just make sure you get it all off of there. If you have access to it, you can use a 14 by two thread die, and we'll thread this in here. It'll clean the threads out.
But the other method, you can just use a wire brush. This should thread in pretty easily. You may need to put a socket on it but it will clean all of the junk out of the threads. That's clean all the way, old thread locker out of there. You can see it's all in the die now. Apply some medium thread locker to the bolts. Do this for both of them, install the caliper bracket. I'm going to torque these to 129 foot-pounds. It clicks, there's no need to go any more. Lightly spray the brake pads with some brake parts cleaner.
We don't want any dirt, oil, or grease in the brake pad material. You don't have to soak them, just give them a light spray. Little bit of caliper grease on the ears. This larger curve on the pad is going to match the curve in the rotor. Just slide them in place, push them into the clips. Just like that. Do the same for the outside pad. We've got our caliper here. When you compress this piston back into the caliper so that will fit over our new brake pads because they are thicker than the old ones because they wore out. I'm going to put this on here, the old brake pad. Take a large C Clamp. Shouldn't take much effort, we'll just push the piston back in there.
This one's not even that far out. That should be good there. Make sure that this line's not twisted up when you try to do it. Slide it right over the pads. Make sure it gets over the pins. Install the upper bolt, install the lower one. I'm going to use a 17 millimeter open ended wrench to counterhold the slide pin bolt and I will torque this bolt to 20 foot-pounds.
Reinstall the wheel and tire. Thread the lug nuts on by hand. Going to lower the vehicle to the ground and torque the lug nuts. Torque the lug nuts to 140 foot-pounds in a cross pattern. Before you start and move the vehicle gently press on the brake pedal. This will bring the caliper, the cylinders out that we've compressed to meet the pads. You'll feel it start to build up pressure. You don't need to smash it to the floor. Just gently pump it till it builds up pressure. Just like that.
Thanks for watching. Visit us at 1AAuto.com for quality auto parts, fast and free shipping, and the best customer service in the industry.
Shop Products


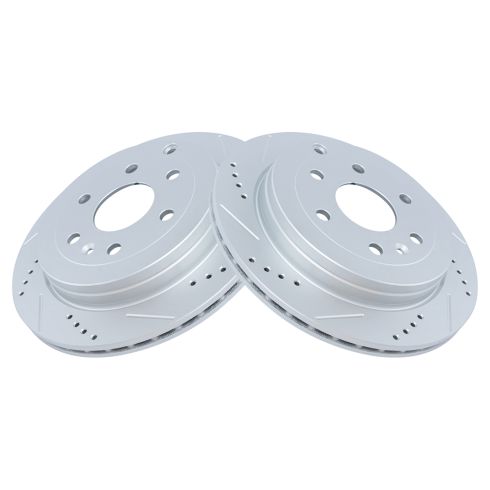
Chevrolet GMC Buick Saturn Rear Driver & Passenger Side 2 Piece Premium G-Coated Performance Brake Rotor Set TRQ Performance BRA74779
Part Details:
- Performance
- Premium G-Coated
- 2 Piece
- Drum-In-Hat
- 6
- 13.03 in
- 331 mm
- Vented
- 53 mm
- Cast Iron
- 132 mm
- 20 mm
- Slotted X Drilled
- 0.79 in
- 0.63 in
- Yes
- Performance
- (1) Passenger Side G-Coated Performance Brake Rotor
- (1) Driver Side G-Coated Performance Brake Rotor
- 0.71 in
- No
- No
- Drum-In-Hat
- 2.09 in
- 5.20 in
- 18 mm
- 16 mm
- 76 mm
- 2.99 in

How to Install Front Brake Pads Rotors 2006-07 Mazda 6
How to repair, install, fix, change or replace your own worn, squeaky, fading old brakes on 06, 07 Mazda 6
