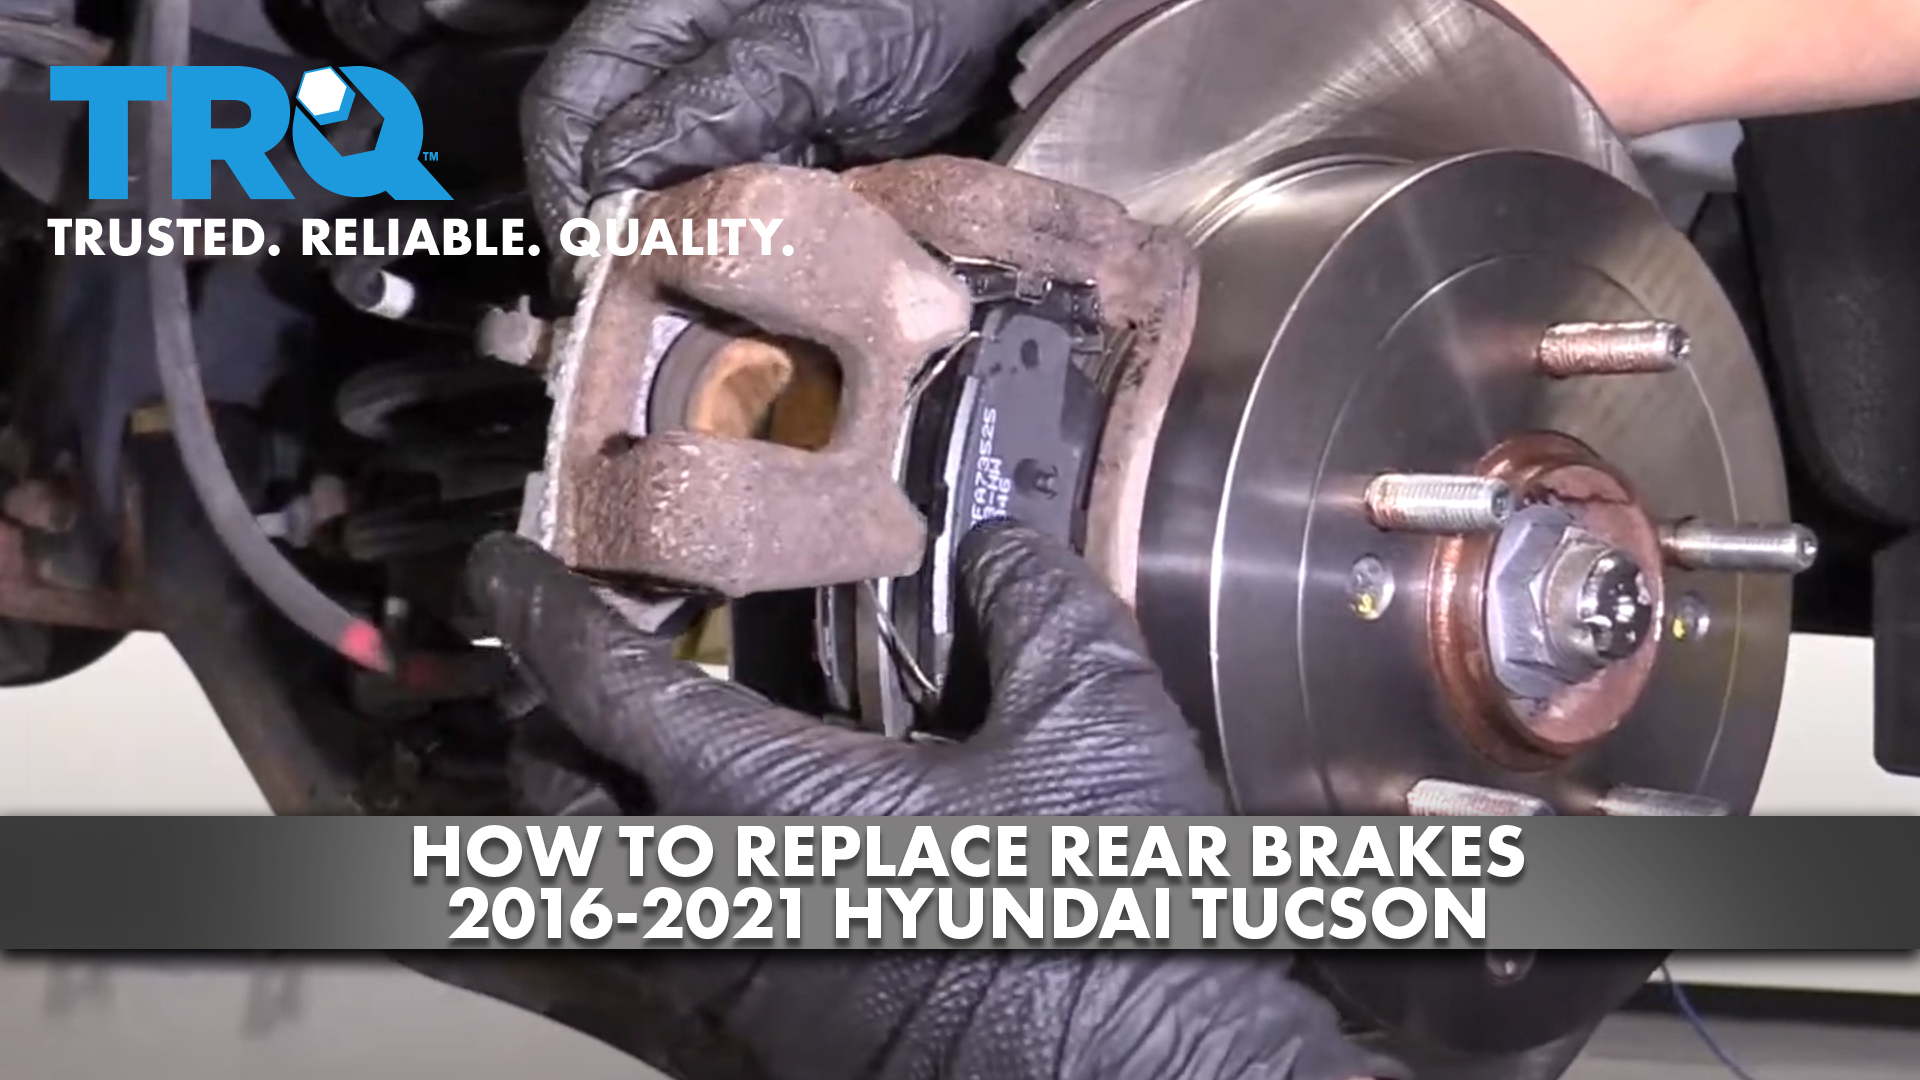
How To Replace Rear Brakes 2016-21 Hyundai Tucson
Created on: 2020-11-18
This video shows you how to install new, quality TRQ brake pads and rotors on your 2016-2021 Hyundai Tucson.
Tools needed
-
14mm Wrench
Torque Wrench
Hammer
14mm Socket
17mm Wrench
Pry Bar
Brake Parts Cleaner
21mm Socket
Angled Die Grinder
Flat Blade Screwdriver
Brake Caliper Hanger
Phillips Head Screwdriver
Sledge Hammer
Copper Anti-Seize
Brake Caliper Compressor Tool. Single Piston. Screw Style.
Air Compressor
Drill
Brake Grease
Wire Brush
Cloth Rags
Needle nose pliers
1/2 Inch Impact Gun
We're gonna remove the wheel. I'm gonna use a 21-millimeter socket, take the lug nuts off. I'm gonna pull the wheel off. Now I'm gonna use a 14-millimeter wrench and take these two bolts off. If the studs start spinning, you can use a 17-millimeter wrench just to hold that from spinning and loosen these up. Same on the top one. Now I'm gonna grab the caliper and just slide it out. Use a caliper hanger and just put it on the coil spring just to make sure there's no tension on the brake hose.
Now I'm gonna take these pads springs off, just use some needle nose pliers, just slide these out. Now I'm gonna use a pry bar or a straight blade screwdriver, just pry these pads out a little bit. Do the same on this one. This one's on there pretty good. There you go. Now I'm gonna use a 14-millimeter socket and take these two caliper bracket bolts out. Grab the bolts and slide the bracket right off. Now we're gonna take the rotor off and use a Phillips-Head screwdriver, and take these two screws out. And if they're on there pretty good, then you can use an impact driver. And just take a hammer if this is stuck on, if it doesn't come right off, just hit in these locations. Just be careful of the studs. Don't hit the studs, and slide it right off.
Now we'll just take a wire brush, just clean any of the rust stuff on the hub surface. You could also use a die grinder. Now we're just gonna take a thin coat of anti-seize, and just put it on the hub surface. This is just gonna prevent rust. I'm gonna take the rotor, install it backwards first. Take some brake parts cleaner, just gonna wash the rotor down. Wipe it down with a rug, and flip the rotor around. Underneath here, there's an adjuster for the parking brake. If you have to adjust it, whether you have to tighten it or loosen it, you can adjust it right there accordingly. And then take this rotor, slide this in position. Make sure those holes line up with the threaded holes. That's good.
And take the screws. Get the screws started, and snug those up. You might take this plug off the old rotor. You can use a pick or a screwdriver. Just get underneath there and pry it up. I'm gonna install that in the new one. That's good. This is also a way you can access that parking brake adjuster. You can pull that plug off and then adjust it right there.
Now we're gonna clean up the brake caliper bracket. Just use a straight blade screwdriver. Just get under this pad slider right here, or anti-rattle clip. Slide that up, and use a wire brush, and just clean this up. Clean up most of the rust, and just take some brake caliper grease, and just put it in those locations. Take the new anti-rattle clips, and take a little more brake caliper grease, and then we can do the same on the other side.
Now we're gonna take these caliper slide pins out. Just slide those out, take a rug, some brake parts cleaner, and just wipe them down. And if they are extremely rusty and dirty, you gonna want to take some brake parts cleaner and clean out the bore as well. These weren't too bad. And just grease these up, some brake caliper grease. Slide these back in, just make sure it seals on the boot. Do the same on this side.
Now slide the caliper bracket over the rotor, and put the bolts back in, get those started. Now we're gonna torque these to 43-foot pounds. Now we're gonna install the brake pads. The brake pad with the warning indicator is gonna go down on the inside, and then the one that doesn't have the indicator is gonna go on the outside. Now we can install these springs. Now we're just gonna take the brake caliper off the hanger. We're gonna compress this brake caliper piston so you're gonna need a brake caliper tool. Just get this lined up, and just slowly compress the piston. As you're compressing this slowly fluid's going through the hose, through the lines, back up to the master cylinder, into the reservoir. Just go nice and slow.
It's all the way down, take the tool out. Now take the caliper, make sure the hose is not twisted, and just slide it over the pads. Now take the caliper bolts, install those. And we're gonna torque those to 23-foot pounds. Now we'll install the tire, put the lug nuts on. Now we're gonna torque the wheel to 80-foot pounds in a star pattern or a cross pattern to tighten the wheel down evenly. Just go around again to double-check. And then we're gonna pump the brake pedal. There is gonna be an air gap between the brake caliper, piston, and the brake pads. So pump up the brake pedal a couple of times, and that's good. And now we're gonna check the brake fluid level at the master cylinder reservoir. And there's a max line right on the side right here, just to make sure the fluids up to that line and that looks good. There's a min line down here, so adjust accordingly.
Shop Products


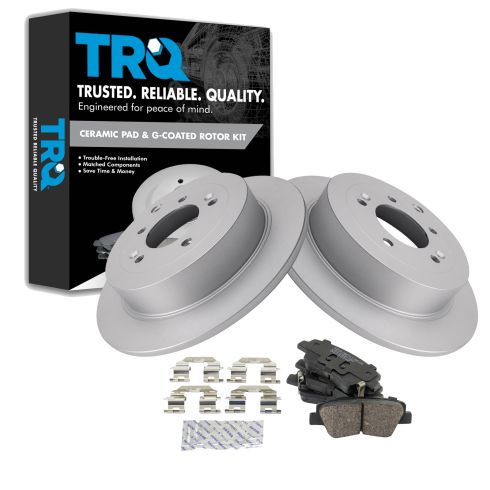
Hyundai Tucson Kia Sportage Rear Ceramic Premium G-Coated Brake Pad & Rotor Kit TRQ BKA24760
Part Details:
- Solid
- Premium G-Coated
- 11.89 in. (302mm)
- Premium Posi
- 5 Lug
- Ceramic
- (1) Rear Ceramic Brake Pad Set
- (2) Rear Premium G-Coated Brake Rotors

How to Replace Rear Brakes 2011-14 Hyundai Sonata
How to repair, install, fix, change or replace your own worn, squeaky, fading old brakes on 11, 12, 13, 14 Hyundai Sonata
