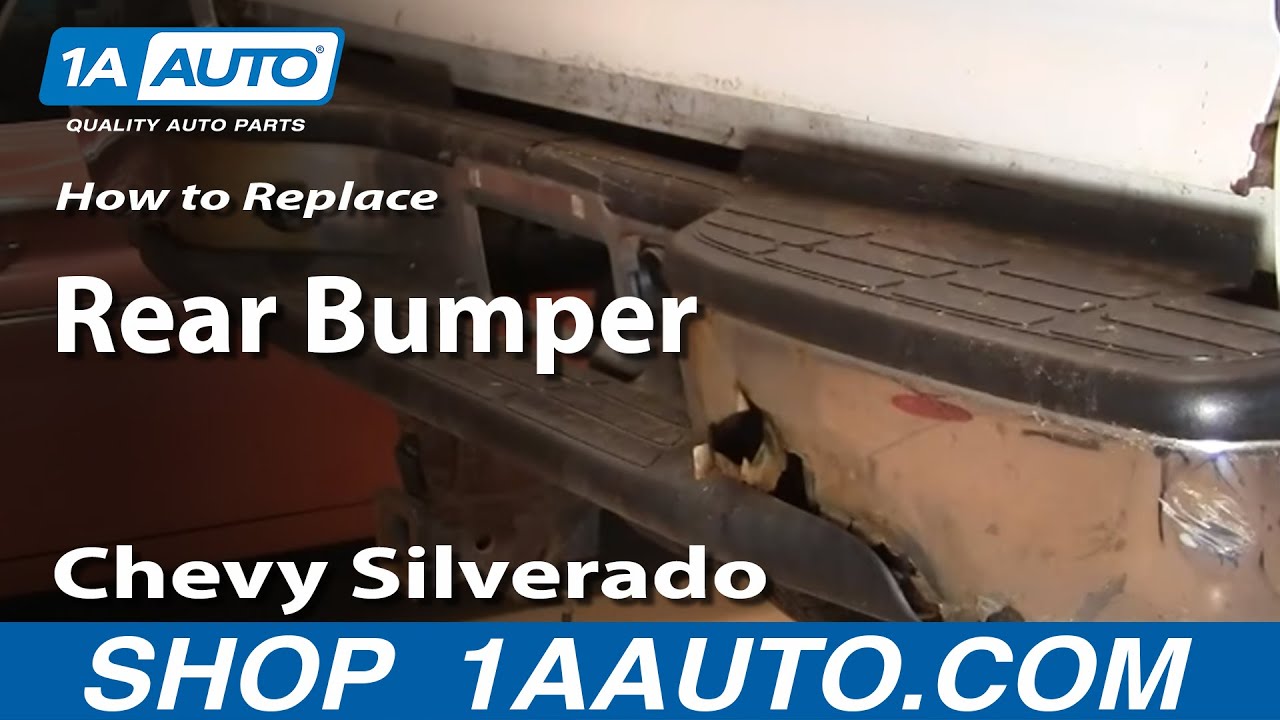
How To Replace Rear Bumper 1999-2006 GMC Sierra
Created on: 2011-06-29
If your 99-06 GMC Sierra has a rusted or dented rear bumper, you can replace it yourself! Check out this video to learn how.
-
step 1 :Removing the Bumper
- Remove the two 18mm nuts, and two 15mm bolts per side
- Remove the two 21mm bolts underneath the bumper
- Disconnect the license plate light wiring harness
- Remove the spare tire lock bexel
- Pull the bumper off
-
step 2 :Disassembling the Bumper
- Remove the plastic pin using a screwdriver or pliers
- Use pliers to pull the bumper pad tabs
- Pull off the bumper pad
- Tap the license pad lights out with a screwdriver
- Use a hammer and chisel to remove the spare tire tube retaining ring
- Remove the spare tire tube
- Remove the license plate clips with pliers
-
step 3 :Removing the Brackets and Reinforcement Bar
- Apply penetrating oil to the bolts
- Remove the bolts
- If you cannot remove the bolts normally cut them off with a sawzall or a torch
-
step 4 :Assembling the New Bumper
- Paint the backside of the bumper to prevent rusting
- Sandblast and repaint the reinforcement bar to prevent further rusting
- Put the reinforcement bar in place
- Attach the carriage bolts by hand with their washers, lock washers and nuts
- Begin preliminarily tightening the bolts with the socket and ratchet
- Tighten all the bolts
- Slide the bumper brackets into place
- Tighten the bracket bolts preliminarily, allowing the brackets to move somewhat
- Put the side braces into place
- Tighten the brace bolts preliminarily, allowing the braces to move somewhat
- Step 5: Attaching the Bumper [9:48]
- Put the bumper into place
- The reinforcement bar goes above the hitch
- The brackets go inside the frame
- The braces go outside the frame
- Start the 21mm bolts by hand
- Tighten the 21mm bolts preliminarily
- Push the brace against the frame
- Insert the 15mm bolts
- Tighten the 15mm bolts preliminarily
- Insert the retaining bolts
- Start the 18mm nuts
-
step 5 :Adjusting the Bumper
- Measure the distance between the bumper and the frame on each side
- Make sure the distance is even on each side
- Adjust as necessary
- Tighten the 15mm bolts
- Tighten the 18mm nuts preliminarily
- Tighten the bumper brace bolts
- Reattach the license plate light wiring harness
- Measure the distance between the bumper and the tailgate on each side
- Make sure the distance is even on each side
- Adjust as necessary
- Tighten the 18mm nuts
- Tighten the bracket bolts
- Tighten the 21mm bolts
-
step 6 :Attaching the Pads and License Plate
- Reattach the plastic bumper pads
- Insert the plastic pins by hand
- Reattach the license plate lights
- Reattach the spare tire lock bezel
- Reattach the license plate brackets
- Reattach the license plate
-
step 7 :Attaching the Pads and License Plate
- Reattach the plastic bumper pads
- Insert the plastic pins by hand
- Reattach the license plate lights
- Reattach the spare tire lock bezel
- Reattach the license plate brackets
- Reattach the license plate
Tools needed
-
21mm Socket
Reciprocating Saw
Hammer
Flat Blade Screwdriver
15mm Socket
Rust Penetrant
18mm Socket
Chisel
Slip-Joint Pliers
Ratchet
Brought to you by 1AAuto.com, your source for quality replacement parts and the best service on the Internet.
Hi, I'm Mike Green. I'm one of the owners of 1A Auto. I want to help you save time and money repairing or maintaining your vehicle. I'm going to use my 20-plus years experience restoring and repairing cars and trucks like this to show you the correct way to install parts from 1AAuto.com. The right parts installed correctly: that's going to save you time and money. Thank you and enjoy the video.
In this video, were going to show you rear bumper replacement on this 2002 GMC Sierra. As you may know, the bumpers on these trucks are prone to rusting out. Basic tools are needed. You need 15, 18, and 21mm sockets as well as some screwdrivers and pliers for doing various little things. If your bumper is as rusty as mine was, you will need a sawzall or a torch to cut some of the bolts off.
Okay, to remove your bumper, on each side, you need to remove four bolts. There are two 18mm bolts here. Actually, they're nuts on the end of the bolt. There's a 15mm right here and then underneath, there's a 21mm bolt right there.
Once you've got the four bolts out of each side, then you just have to remove these two 21mm bolts and now I'm not going to mess around with these, I'm just going to go right ahead with the air tools. We need to get our plastic pads off the old bumper. It's held on by a few different fasteners. Down on the bottom here, is a pin that you are probably just pretty much going to ruin by pulling it out. Use a screwdriver and also just start taking a pair of pliers and easing it. The middle of it comes out and this pulls out.
Now here on the bumper, there are these tabs that come through and you just squeeze them with a pair of pliers and then pull on the plastic itself. So squeeze, and pull. There's a lot of rust around some of them. I don't need them actually. Okay, you can see that the plastic pad comes right off.
Now, you're going to need to get your license plate lights out, which is pretty easy. Just take a screwdriver, kind of tap them down and then tap them out.
Okay, the next thing is this tube for the tire, I'm just taking a cold chisel or you could probably use a screwdriver or something. There are a few little teeth here. I'm just going to fast forward here as I beat on it from all different angles and the retaining ring was just so rusted that it really wasn't worth saving so I just basically you'll see me break it right off of here. Then I substituted another retaining ring later on. It comes out.
Another small thing is just these license plate clips. I'm just going to grab them . it looks like mine is going to fall apart. Try to be as careful as you can to get them out, because they're all pretty dry. These are pretty easy to find at a hardware store though or something. Pry it on the back side a little bit. They come out, if you do break them, you can usually find these in a hardware store in the specialty section.
Probably one of the hardest things is going to be getting these bolts out, because the bolts are actually held by the bumper and there's nothing left of the bumper but what you want to do is coat them really good with penetrating oil first. Okay, I'm going to stop the action right here, and make an admission: I was not able to get any of these bolts apart. My bumper was rusted so badly that I just couldn't use wrenches; I ended up having to cut them off with a torch. There are 10 of these bolts in all. There's two each holding each of side brace brackets that you see here and then the large reinforcement bar that goes across the middle has six holding it.
So I just purchased new galvanized bolts from the hardware store. Like I said I ended up cutting off the other bolts with a torch. You'll need a torch or sawzall or something like that to get those out if your bumper is as rusty as mine was.
I got my new bumper laying down on its face. Here's my main brace that goes underneath. I did take some black paint and recoated the back side of the bumper. Put a nice thick coat on it and didn't worry about it running at all, since that's where these things, they usually get salt and stuff caught up in here and they rust from the back side. Hopefully that will make last as long as the truck anyways. This main bar goes in there like that. I probably should have sandblasted and repainted this bar but that's okay. I'll use half inch galvanized hardware, right from my local hardware store and a washer, lock washer, and nut
Okay, we'll fast forward as I do the other five. So there's six bolts total and what I do first is just put the carriage bolts through, put on a large flat washer, a lock washer and then a nut and then hand tighten them. Now using my socket and ratchet, I'm just going to snug them all first. If you just snug them all first . you don't tighten them up all the way , it just gets everything set right and then once you have all six of them snug, then you can go around and tighten them all up and nice and tight with the ratchet like that. There's no real need to do any kind of torque specification or anything on these.
Now these are the main bumper brackets. Okay, top of the bumper, these slide inside of this bracket here and then I like to take the bolts and go from the inside and out. You want to put those on and then tighten the bolts enough so they . you still want to be able to move those brackets around a little bit while you're installing it on the truck. Okay, we'll continue with the fast forward here as I install the side braces, which just requires two of the carriage style bumper bolts. You want to put these on and just like the other brackets, leave them. You just kind of tighten them up snug with your wrench, leave them so that you can flex them back and forth.
Okay, now take your bumper, lift into place, make sure that the main reinforcement bar slides up over the hitch and then it's just kind of a matter of reaching in there, make sure that the main brackets go inside the frame and then those diagonal braces go outside the frame.
Then after that, I put in the two large 21mm bolts that connect the hitch to the bumper and just tighten them. I don't tighten them all the way. I just get them in there more with the air ratchet so that they will keep things steady.
Now, let's start these 15mm bolts right in here. Make sure before you start these 15mm bolts that you push the brace in against the frame.
Okay so I now have it on with these two bolts started and then 15mm bolts started and the brace is right against the frame. This bracket on the other side, it's not too easy to see, and the same thing over here. The 15mm bolts started, the brace is right up against the frame.
Okay, now you want to put your retaining bolts through and start the nuts on, and then you want to get them snug, because after you do that and then you want to adjust the bumper and tighten start tightening some of those up to get it in the right place.
Okay, what were going to do, is, on each side, were going to measure the distance, top of the bumper, 4cm on that side. Now we can take and tighten up those 15mm bolts, don't make them extremely tight but that will keep the bumper from moving in or out, but you'll still be able to move it up and down. Once you tighten up those 15mms then you want to make sure that these 18mm bolts are snug, they don't have to be tight, you just want them snug. Once you have these snug, now you can tighten up your bumper brace bolts here. Okay, we'll use a little fast forward here. You're tightening those bolts up really nice and tight and obviously were showing you everything on one side but repeat the same steps on both sides.
While were still under here, put this wire harness back in place. We're going to measure this right up to the tailgate, 7cm on this side, a little over seven on this side. Seven there, just over seven there so I'm going to tighten up this side some so it's less likely to move. Okay, seven there. What I'm tightening up here are the 18mm nuts. Close enough. Now, I'll hit fast forward, you've got your back bumper at the height that you want it as far as we already measured how far in or out it was, so now you can tighten up all the bolts. You want to make sure you tighten the two 18mm nuts then the bolts on the inside that hold the brackets to that main crossbeam and then you want to put your large, 21mm bolts that hold the bumper also to the frame and to the hitch and I always check those hitch bolts and do them by hand and make sure they're nice and tight.
Now we put these plastic pieces back on. This has some tabs so you need to make sure when push it on, you push it down. Okay, I'm going to fast forward it as I finish that up. I use a little hammer and screwdriver to get some of those pins in. Now I'll do the top right one, which is pretty easy. It has locating pin and then just snap it down, make sure you put the little pin in the end and then the left one, same thing, snaps right down. Put your license plate on, your license plate lights in and then your spare tire lock bezel and license plate light and then the little things for the license plate and then your license plate and you are all set to go.
We hope this helps you out. Brought to you by www.1AAuto.com, your source for quality replacement parts and the best service on the Internet. Please feel free to call us toll-free, 888-844-3393. We're the company that's here for you on the Internet and in person.

Road Side Tire Change Using tools supplied with car
How to remove, install, replace, or change a flat or punctured tire with the tools supplied with your car.
