How to Replace Rear Door Lock Actuator 2007-13 Toyota Camry
Created on: 2017-10-26
New Door Lock Actuator & Integrated Latch from 1AAuto.com How to repair, install, fix, change or replace a broken or snapped power door lock actuator on 07, 08, 09, 10, 11, 12, 13 Toyota Camry
-
step 1 :Removing the Door Panel
- Pry the trim panel out of the door handle with a trim tool
- Remove the Phillips screw inside the door handle
- Pry the trim panel off the door pull with a trim tool
- Remove the two Phillips screws inside the door pull
- Pop out the door panel clips
- Lift the door panel up and off the door
- Pull the door handle out of the back of the door panel
- Disconnect the window switch electrical harness
- Remove any push clips stuck in the door with a trim tool
- Slide the push clips into the door panel
-
step 2 :Removing the Interior Door Handle
- Push the cables up and out
-
step 3 :Removing the Door Lock Actuator
- Peel off the water shield
- Slide the cables out of the water shield
- Disconnect the electrical connector
- Pop off the clip from the rod on the door lock actuator
- Remove the T30 Torx bolts from the actuator
- Unclip the cables from the clip
- Lift the actuator out
-
step 4 :Installing the Door Lock Actuator
- Transfer over the cables to the new actuator
- Slide the cable into place
- Tighten the T30 Torx bolts to the actuator
- Clip in the cables to the door
- Clip on the hook to the actuator
- Press the water shield on
-
step 5 :Reinstalling the Interior Door Handle
- Connect the white latch to the lock
- Connect the green latch to the door
-
step 6 :Installing the Door Panel
- Pop the door handle into the door panel
- Connect the window switch electrical harness
- Line up the door panel with the door
- Push in the door panel clips
- Insert the Phillips screw into the door handle
- Clip on the door handle trim
- Insert the two Phillips screws into the door pull
- Clip on the door pull trim piece
Tools needed
-
Razor Blade / Gasket Scraper
Gloves
Flat Blade Screwdriver
Phillips Head Screwdriver
T30 Driver
Trim Tool Set
Hi, I’m Mike from 1A Auto. We’ve been selling auto parts for over 30 years!
I’m working on the rear passenger door. I’m going to remove it. We're going to use these plastic trim tools. You can get these from 1AAuto.com. Pry out this plastic piece that's behind here. Pop the trim tool in here. I’m just going to hold open the door handle. That pops it right out. Put that aside. Remove the screw with a Phillips head screwdriver.
Use our plastic trim tool again. Slide it under here. Pop this handle cover off. Just kind of work it underneath. Put that aside. There's two screws, Phillips head. Remove those. If that screw stays in there, that's fine; we can grab it after we pop the door off. With the three screws removed, we can pop the door off the clips. There's a bit of a lip here, just on the inside of the door. Pull behind it, and I can reach underneath. You just want to reach around the edge of the door, and we pick the door panel up and up from the door. There's the screw that fell out.
Pull the door handle and lock mechanism out, just pops it out, and it'll sit there. Unplug the harness for the window switch. Push in on the lock. Put the door panel aside.
These push clips, they're not damaged; they just popped out. One stuck in the door. I'll use a trim tool to pop that one out. This one went down here and came out, so I'm just going to put it back in. It just slides back into place. It can be reused. I've just got to get that one out of the door.
Going to disconnect the handle that opens the door. Also has the door lock on here. Just going to push the cable up and out and slide that little lead weight. Pop it right out. Same for the other one. Take note that the white was on the top, the green was on the bottom so when you go to put it back together, you don't reverse them.
We need to pull this vapor barrier off the door. It's got butyl tape around it that's sealing it. I can be reused. This is where you're going to want to wear gloves because this stuff is very, very sticky and it kind of gets everywhere but you basically just carefully peel this back. You can have a razor blade with you with you, and you can just kind of cut it. It helps on a warmer day to do this. If it peels off, don't worry about it because this stuff is incredibly sticky and we should be able to reuse this piece without much issue. I'm just going to carefully cut that. Try not to stretch the pink plastic too much.
As you're moving along, so this harness is kind of in this opening here. I'm going to feed the harness back through, and I'm just going to keep peeling it. I'm going to feed these wires out, actually these are the cables. They kind of sit there. I'm going to put this aside, obviously sticky side up so that we can reuse it.
To get to this door lock actuator you can probably peel back the weather barrier or the vapor barrier just to here. It's really sticky though and just in general we remove the whole thing. It's just easier to work, because I'm going to be going in this way to get to it. That way it's not sticking to me and stuff.
Start by disconnecting the electrical connector here. Take a small flat blade screwdriver, push the lock in, and just gently pull out on it. Working inside the door panel, you need to pop off the little control rod that goes to the outside door handle to the door lock actuator. You need to reach up in here in this little blue sort of a fork looking thing. You need to pop it off of that silver rod. This comes off like that. Now we're ready to unbolt the actuator and pull it out.
Remove the T30 Torx bolts that are holding the actuator in. These are all loose. Push the door lock actuator in and pull it out. I also need to unclip these cables from this clip. Then clip these. The door actuator already wants to come out, just slide it right out of the door opening. This is our door actuator from our vehicle.
Here's a brand new one from 1AAuto.com. This is the driver side rear door. This would be the passenger side rear door. So it's just a mirror image. But as you can see, they are identical. You just have to swap over these cables and this would work great for you.
To swap over these cables take a small flat bladed screwdriver, just kind of push in on this lock tab, pop it up. Pull the cable straight out. Slide it out of that little arm.
To reinstall it, slide the little lid weight part back into the opening. Feed it over, clip into place. Push this little door closed. This is the same thing. Push the flat bladed screwdriver in here. Work it out. Open them up. Push the cable up and pull that ball out of its little holder. Reinstall the ball into the little holder, push it in place, and slide in the blue part of the cable in. Snap that down. We'll push the lock right over, and lock it down in place.
We're going to reinstall our door lock actuator. Just be careful of the child safety lock. You don't want to break it off. Slide it into the door opening. There's this—that blue clip here. Just kind of get beyond that, and slide it up. We actually slide it into that blue little capture that captures that little control right there. There's plenty of space for it. Make sure your child safety lock pushes through this little grommet, just like that. It just needs to sit over here. That's in place. Reinstall the Torx bolts. With these lined up this looks like this. Captured. They've got a little cone shape to them, so just kind of push it into place, but I can reach back here and move it where I want it.
Just make sure you reconnect the part of the door handle that was on that blue fork piece, which I did while I maneuvered this into place. You should have your child safety lock where you want it, either locked or unlocked, and then pull your door actuator back in. Clip your control cables back in place. Get our original vapor barrier here—it still has a lot of the butyl tape left on there. If you need to get more butyl tape, it's pretty easily to get, and you can just put some more on there. But first I'm going to feed the cables through, just kind of get them through, just kind of let it hang on the cables. I'm going to feed the harness up and through and everything.
I'm just going to kind of line it up roughly where it was before and just push it back into place. Don't worry too much about any wrinkles. Just push it down and it'll seal. In this car the white cable went on top, the green one went on the bottom. You can kind of tell by the length of the cable, which one fits better, because they will both fit in both spots, but you'll end up crossing them. So this will want to open the door, and this will want to lock the doors, which you don't want that. You want this to open the door. You want this to lock the door. The white one's going to go in the top, put that little lid weight on the cable like that, and put it over. The green one in, just like that. That works the door.
Now we're going to need to install our door panel. Take our door panel, make sure all of our clips are okay. Take this, it's going to slide in like that. There's two pins in the top and the bottom that match this. It pops into place. Don't forget to plug in your window switch. Nothing like putting this together and then having to take it back off to plug it back in. There's a groove in here with some clips. They're going to snap into place in here so I'm going to start with the door panel kind of on the high end. It might be easier with the window down but you can do it with the window up. I'm just going to snap it down into place. Then we're going to go down, push all the clips in. Start with the small screw that's behind this. Put the plastic cover back in. You'll start by pushing that clip in first, then it'll snap in the back ones, so open the door handle, snap that into place. We have to do the other two screws in the door handle. Just kind of goes straight on.
Thanks for watching. Visit us at 1AAuto.com for quality auto parts, fast and free shipping, and the best customer service in the industry.
Shop Products
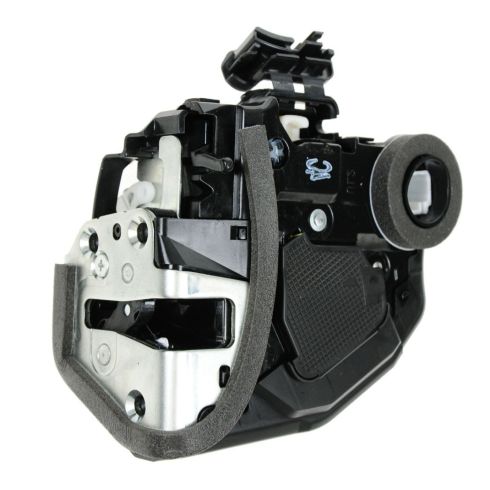
Toyota Lexus Scion Rear Passenger Side Door Lock Actuator TRQ BDA30823
Part Details:
- Integrated Latch

How to Replace Door Lock Actuator 2002-06 Chevy Trailblazer
Check out this video to learn how to replace the door lock actuator on your 02-06 Chevy Trailblazer, or GMC Envoy.
