
How to Replace Rear Door Wiring Harness 2002-08 Dodge RAM 1500
Created on: 2020-11-03
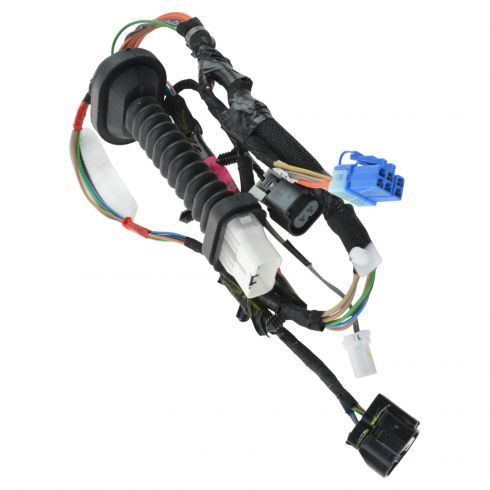
This video shows you how to install a new rear door wiring harness in your 2002-2009 Dodge Ram 1500.
Tools needed
-
Socket Extensions
Socket Driver
Phillips Head Screwdriver
T45 Socket
Trim Tool Set
Pocket Screwdriver
Pick
With the door open, use a nice 90 degree pick like this. And we're going to, basically, come along this edge right here, push in, and then pull out. Do the same on the other side there. Might, of course, push this in, so I'll start from the other side. Push in, pull out. Keep that separated. Do the same right here, and pull this out. Right in the center, you're gonna see a little squeeze tab. Go ahead and press on that. And then separate these two pieces.
Underneath your handle, if you were to lift it, you're gonna be able to see a T40 screw. Remove that. There we are. Remove your Phillips head screw right here. Now we're just gonna grab on to this door panel. Lift it straight up. There we are. Let's disconnect our wiring. Now let's go ahead and remove our speaker mounting screws. Grab onto that speaker. Give it a little wiggle, remove it from the door, and of course, unplug it.
Now let's go ahead and pull back this vapor barrier here. Just be careful for the black butyl tape. It's very sticky, and it will actually ruin your clothes. Now let's disconnect our window motor here. If you come along this edge of the gray and the black, you should be able to move this lock. We're gonna push on the center tab and draw this off. Always inspect your electrical connectors. Make sure they're in good condition.
Now we need to get all the wiring off of the door here. Just use a little forky tool, or whatever you've got, get in between and separate it. Okay, that leads us to here. We want to come from the backside. Hold this out as well. There we are. And if you were to continue following it, it's gonna lead you to the backside of your door latch here. So what we need to do is remove these three mounting screws.
Let's reach inside. Grab that door latch. Now we can move this around, and we should be able to access the wiring. Get our fingers onto it, so we can relieve it, and separate the wiring. There it is. Now let's continue getting this out of here. At this point, it's gonna be stuck in the edge of the door right here. So what we want to do is just kind of push this rubber in all the way along the whole edge. Now we'll draw it through. We've got a little push clip right here. So if you just go ahead and pull on that. Let's not forget about the one for the speaker wire here. Push that through.
Okay, let's go and pull this out of here now. There it is, friends. Let's go ahead and put this back in here now. Let's get that in through there. There we are. This looks pretty good. So now let's continue on by pushing this from the inside, and try to get this, so it's seated where it needs to be. Okay, let's just make sure it's sitting all the way around. This looks very good. Bring our speaker wire inside here. That's going to go up and in through there.
So now let's go ahead and put this little clip right here inside this hole from the backside. Let's go ahead and put this in here like this. This is gonna continue on down this direction, and this one is gonna go in this direction. Make sure you lock it. Give it a nice tug. That feels secure. Now let's go ahead and put in the push clips for this one. The wiring is gonna go straight up right here, and then straight along there.
This is gonna come through here. This piece is gonna go right inside there. But first, let's connect in this to the latch itself. Okay, that just clicked in. Give it a nice tug. It feels good. We can start in these bolts real quick. Let's get that little push clip in there. Let's get our vapor barrier back on here. We want to line it up with approximately where it was prior. That's good. Move along here. That goes inside there where the speaker is supposed to go. This comes along. We've got it tacked on all the way around. Let's go ahead and grab our speaker and get it connected. Give it a nice wiggle. Line it up. Start in all three of your bolts, and snug them up.
Pull this up through here. This looks pretty great. Let's grab our door panel. Let's go ahead and pop the lock bezel out of here. That's gonna start with that switch. Push it right on in there. That feels good. Now that that's connected, let's go ahead and push this up against the door, while it's up high. And then just go ahead and slide it down. Wanna make sure it's sitting all the way around. If it isn't, like mine isn't right here, just lift it back up, push it in, and try again.
Let's get our lock bezel back on here. Center our Phillips head screw. And of course, let's get our door handle back on here using our T45. Nice and tight. Now that we have the door panel back on, let's go ahead and connect this in. And then, of course, put it into where it belongs along this area. Okay, latch it in. Make sure it's secure. Now all you have to do is give it a test.


Damaged Connectors How to Splice in New Car Electrical Connectors
How to repair an electrical connector on your vehicle.
