How to Replace Rear Ground Effects Spoiler 1982-92 Chevy Camaro IROC Z
Created on: 2011-09-02
How to remove, replace and install the rear ground effects and spoiler on a third generation Chevy Camaro IROC Z. This video applies to year models 82, 83, 84, 85, 86, 87, 88, 89, 90, 91, and 92.
-
step 1 :Removing the Rear Panels
- Remove the four plastic trim pieces on the rear panel with a flat blade screwdriver
- Remove the two Phillips screws on the top of the panel
- Pry out the courtesy light
- Disconnect the light
- Remove the rear panel
- Disconnect the wiring harness
- Pry off the rear side panel
-
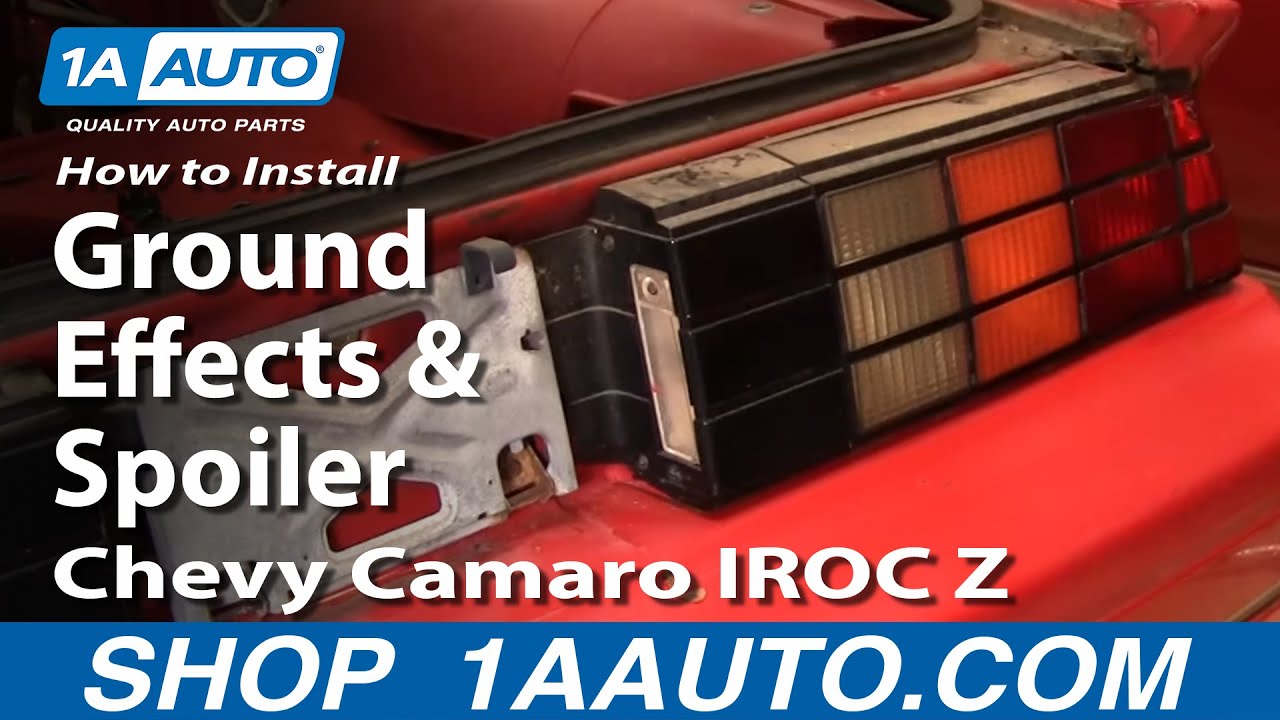
step 2 :Removing the Tail Light
- Remove the five thumb screws
- Pull the license plate down
- Pry out the rear tail light
- Push on the tab and turn the socket counter clockwise to remove them
- Remove the screws from the hatch lift struts area to remove the side trim panels
-
step 3 :Removing the Rear Air Foil
- Remove the two 7/16" bolts from the rear air foil
- Pry off the rubber boot under the air foil with a flat blade screwdriver
- Remove the 7/16" nut from the rear air foil
- Pull off the rear air foil
-
step 4 :Removing the Lower Side Trim
- Remove the 7/16" bolts from the lower side trim
- Remove the 9/32" bolt on the end of the lower side trim
- Pull off the lower side trim
Tools needed
-
Socket Extensions
Flat Blade Screwdriver
Phillips Head Screwdriver
9/32 Inch Socket
Ratchet
7/16 Inch Socket
Brought to you by 1AAuto.com, your source for quality replacement parts and the best service on the Internet.
Hi, I'm Mike Green. I'm one of the owners of 1A Auto. I want to help you save time and money repairing or maintaining your vehicle. I'm going to use my 20-plus years experience restoring and repairing cars and trucks like this to show you the correct way to install parts from 1AAuto.com. The right parts installed correctly: that's going to save you time and money. Thank you and enjoy the video.
In this video, we show you how to remove the rear spoiler eye brow and the rear ground effect on the quarter panel on this 1986 Chevy Camaro IROC-Z. This is a pretty easy thing to do. You need a Phillips screwdriver, flat blade screwdrivers, and 9/32" and 7/16" sockets with ratchet and extension.
First, take a flat blade screwdriver. There's four of these plastic pins. You can see I've already taken the trim out of this side. I'll fast-forward as I pull those out. You can see I'm actually missing two. Our car's obviously been apart before and somebody didn't put those back in. Phillips screwdriver, there are two screws on top. We'll fast-forward again as I remove those two Phillips screws.
Before I can actually take this light out, just gently pry out one side. It comes out like that. Then, just pull the connector off. It has a couple of ears, you want to gently pry those because this is usually pretty brittle. Gently pry and pull at the same time. That light comes off. The switch is still hooked up. I'm just going to pull the switch and connector right off. There's the switch connector. This can stay just like that. I want to slide the panel out as well. You can just pull that away.
Now there are five thumb screws: one, two, and then once you pull this out of the way, there's another one there. There's one back in here and one right there. I'll speed up as I take those thumb screws off. I was able to do them all with my hand. They do have, I believe, like a 10mm to 12mm bolt head on them. If you need to, use a wrench to get some extra leverage. Pull your plate down. Pull the inside out first and pull it straight back.
Then, your tail lights all have a little tab on them. Push on the tab counterclockwise. The bulbs come out. Get the little side marker light. Your back up light, you can either take the screw out and undo it that way. It's probably actually easier. I'll reach in with both hands here, twist, and remove. There's the tail light off the car. I don't show it here, but additionally, you'll need to take the screws out around the area where your hatch lift struts go into the side of the car and that allows you to pull the side trim panels all the way out.
To remove the small rear air foil, first there are two 7/16 bolts or nuts inside the quarter panel. There is a little plug. Using the screwdriver pry that plug out of the way. I'm not sure if I can film it or not, but up in there, there's another 7/16" nut. Ratchet and 7/16" socket and extension with a ratchet. Switch to a smaller extension and these come off.
For this lower side trim, there's a couple of smaller bolts up underneath. One right there, and then one right there. You've got two 7/16 nuts: one there, and one further forward. You probably just barely see right there. There's also a bolt on your rear bumper cover that goes right up through here, probably 9/32" or 7mm or 8mm.
Less room to work so you may want use a 7/16" wrench to get to these speed nuts in here. We'll fast-forward here. Generally, with the style of nut that holds these on, once you get them a couple of turns, they come off pretty easy by hand. These two small bolts underneath are 9/32s. Fast-forward here again as I pull out those two bolts. There is a third one that goes into the bumper cover. My vehicle was missing them. Must have been taken apart previously and no one put those back in, but there is a third bolt up underneath. Once the two bolts inside are off, and the three bolts underneath, it comes right off.
This one's actually in good shape. Here's all my pieces apart. Looks like we're going to look to source a new passenger side ground effect because that's broken. Both of the lower tabs are broken. Also, just as a note, make sure you keep all your hardware. Put it into a plastic bag and label properly so you can find it, and even put the broken or bad stuff that you're not going to reuse. Keep it in there, that way you can have something to reference when you need new hardware.
We hope this video helps you out. Brought to you by www.1AAuto.com, your source for quality replacement parts and the best service on the Internet. Please feel free to call us toll-free, 888-844-3393. We're the company that's here for you on the Internet and in person.

How to Remove Front Bumper 2014-19 Chevy Silverado
Check out this video to learn how to remove and replace an old, dented, rusty or ugly front bumper on your 14-19 Chevy Silverado.
