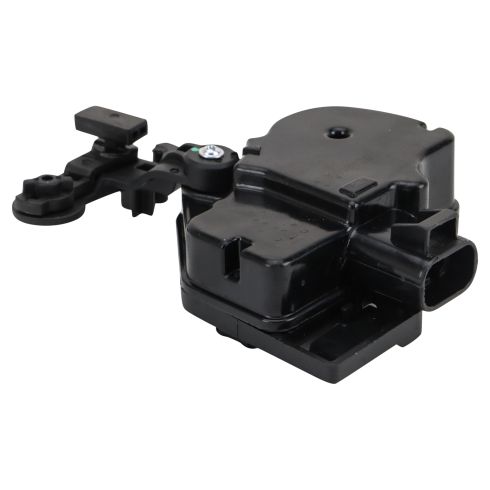
How To Replace Rear Liftgate Actuator 2000-06 Chevy Tahoe
Created on: 2020-06-11
Watch this video to see how to install a new liftgate actuator in your 2000-06 Chevy Tahoe.
Tools needed
-
Socket Extensions
T15 Torx Driver
Socket Driver
7mm Socket
10mm Socket
Ratchet
Needle nose pliers
Trim Tool Set
And just open the liftgate glass, push that button. There should be two push pins right here, you wanna take those two push pins out. And you can slide this open. All right. I'm gonna pull this handle out. I'm gonna use a 7-millimeter socket to take this bolt out. Grab the handle and just slide it down.
Now, just use a trim tool and just pop this off just like that. And the push pins slide in like that. Slide those up, then this whole piece should slide down. Just watch your fingers.
Keep that glass up a little bit, and just slide that up. All right. Then take the trim tool, just go around here. Get this panel off. Looks good. And then it slides forward, this little lever right there. All right. Disconnect the electrical connectors right here. Slide this tab up, disconnect it. And this tab right here, push down, slide it up.
Now, I'm gonna take these cables off. Start with the bottom one and just slide this side of the cable out, where that ball retainer is, and take some needle-nose pliers and just squeeze this just like that. Slide it up. This one might be easier to slide this out first. Just slide it off like that. And do this one the same way. And slide it up. Now, I'm gonna take these bolts out. There's two right here and one right there.
Use a 10-millimeter socket. All right. Now, from the outside, I need to release the glass. So, I'm just gonna pull this down. I'm gonna push the button, that's gonna release the glass just like that. And then actually, push the whole thing in. It comes right out.
All right. From the backside of this, I'm gonna use a T15 to take the screw out right here. Flip this over. So, from this side, we have to move this lever. Just move this to the side a little bit just like that so that that's unlocked. Flip it over. There's a little lock tab here, just push down on that lock tab, and then just slide this whole thing up just like that. Then we're gonna slide this piece outward like that.
Now, this piece is gonna slide off. You're gonna take the new one, slide this on, slide this back in position over here. Now, you don't want that triangle lined up with that other triangle right there, so make sure it's like this. Flip this over, line all these tabs up. There we go. And make sure that locked tab gets pushed in position just like that. That looks like it's all set. You can reposition those arrows to line up and take that screw. Put that back in that hole where that goes and snug that up. And everything looks good.
All right. Now, take this assembly and line it back up. And you might wanna open the window a little bit. Take the bolts, get the bolts started. And just snug these all up. Try to do it evenly. And then just double-check the glass. Make sure it opens and closes. Push the button from the outside. Looks good. And reattach the cables. Lock it in place just like that. And connect the electrical connectors. Line it up, lock it in place.
Now, take this panel. Now, line these two clips right here and right there. And push those push pins in. All right. That looks good. All right. Now, take this panel. Let's line the top clips up. Watch out for the wires. This wire is broken on this vehicle, but there is a little spot where that's supposed to go. So, get those lined up. We're gonna push these forward. All right. That's lined up.
Now, I'm gonna slide this down, pop the window, and grab this panel right here and just slide it over here just like that. Now, before you push those push pins in right there, make sure you slide these clips in. Make sure they're lined up. All right. Looks good. Now, if you have those push pins, push those in. Now, just take this handle, get it lined up. Get the screw back in and tighten it down. And just snug it up. Looks good.
Shop Products

How to Replace Front Door Lock Actuator 2003-08 Dodge Ram
Watch this in-depth video on how to replace the front door lock actuator on your 03-08 Dodge Ram.

