
How to Replace Rear Parking Brake Shoes 1999-2013 Chevy Silverado
Created on: 2020-06-17
Watch this video to learn how to install new parking brake shoes on your 1999-2007 Chevy Silverado.
Tools needed
-
Torque Wrench
Hammer
Socket Extensions
Rust Penetrant
Pry Bar
Jack Stands
18mm Socket
Brake Parts Cleaner
Flat Blade Screwdriver
Brake Caliper Hanger
Socket Driver
Copper Anti-Seize
Wheel Chocks
Brake Grease
Ratchet
Floor Jack
Wire Brush
1/2 Inch Impact Gun
Okay, friends. One of the first things we have to do is safely raise and support the vehicle. Once you have your wheels off the ground in the rear, we're gonna go ahead and remove all six of these lug nuts. Remove your wheel. One of the next things that we need to do is take a nice small pry bar like this, we're gonna come in between the caliper and the pad and we're just gonna apply a little bit of leverage. What we wanna do is just push in that caliper piston just a teeny bit to take the pressure off of the brakes. The next thing we need to do is remove our two 18-millimeter mounting bolts for our caliper. Just take a wrench, can use a socket with a ratchet if you'd like. There's one bolt. I'm just gonna start that in just a couple threads to hold the caliper for me while I remove the second. There it is. Let's get that other one out of there. Next, we're gonna take the caliper and we'll just set it up here where it's gonna be nice and safe. Just make sure you put it somewhere that it's not gonna potentially fall down and hopefully not hurt you in any way.
Now it's gonna be time to remove your rotor. You might need to give it a couple light bonks. The next thing we're gonna do is use our 8-millimeter and we're gonna remove this small bolt right here. Just be careful because very often it's frozen in there and it might break off. Nice long ratchet did the trick. That little bolt out of there. Grab this out of here. Set those aside. Just gonna grab onto this. You'll notice it can move around now. If you were to look under here, you're gonna see the adjuster. If you just take that shoe, move it kinda closer to the axle and then give it a loving bonk down, it should come free from the adjuster. Go ahead and grab that shoe. At this point you can try to weasel it off the axle. There we are.
The next thing we're gonna have to do is take out this area right here. This is gonna be the adjuster and it should separate. We'll just spray it down with some penetrant. That looks good. Grab my little pry bar here. We need to separate the cogged area from the base area. Okay, starting to come up. Get this side out of there too. Right inside this area is where the adjustment's supposed to be for the emergency brake shoe. If you take it apart and you happen to notice that this part right here is frozen, the part that has a little cog, this part right here should spin in there. If it does not, you need to completely separate these, clean them up, re-lubricate them and then, of course, put them back together. This piece right here has like a little bobble. Believe it or not that's not one piece. It actually does come apart so you wanna be careful not to lose this. It's a great idea to clean all this up as well. That's just about good right there. This flows smoothly. It's looking great. You wanna make sure that this area right here is nice and clean, free of debris or anything that might obstruct it from being able to spin because that's gonna go inside this hole right here. How can I tell that this goes inside of this hole and not in the bottom hole? Because of this little clip right here. That clip is gonna line up with the notches on this and it's gonna prevent it from spinning on its own. We're not gonna put that in yet though. What we're gonna do, grab some more of that caliper grease and we're gonna put it right inside the hole on the other piece. All right, this is gonna be the other end. Just try to fill it right in there if you want. Get some more. More the merrier. Put it right in. Now I'm gonna grab my nice, clean pin. I inspected it. It's in good condition. I'll just put it right in there. Now we need to put a nice coating of that grease all along the areas where it's gonna rub up along the unit right there.
Now that those are nice and coated, let's continue on with the grease a little bit more and we're gonna go directly to where the adjuster is gonna be. You can go ahead and put in as much grease as you want. If you put in too much, it's not really that big of a deal but what you will notice is it will kinda come out and if that was to happen, you would just kinda clean it up so you don't get any mess on your emergency brake shoe. Now we're gonna take our pieces. Should slide right in there. Make sure it spins like it should. Do the same to the other side. You're gonna need a little bit more of that caliper grease or whatever type of grease you're using and you're gonna put it on the contact points of this bracket where the emergency brake shoe is gonna ride. The reason for that is of course for vibration dampening and noise reduction. So, we'll come right down here because we know it's gonna ride right along the outside there. Right here. This is a spot right there. If you were to come up here, you're gonna have this whole area. It hits up against there. And then if you come along the other side, you can clearly see exactly where the emergency brake shoe was riding before.
There we go. Now it's time to get the emergency brake shoe back up on here. To do this, you're gonna have to do a little bit of contortioning and just a little bit of wiggling and I'm sure over a period of time you should be able to figure out how to get it right over there. There we are. Nice light bonk. No big deal. We'll go ahead and line these tabs up with where it's supposed to sit on the adjuster there. Should slide over. If it doesn't, you can just kinda go past. Line up the adjuster ends so they're straight up and down so they'll line up with the way that the shoe needs to go on. Once you've gone past, like I said right here, you should be able to just kinda stretch it and draw it straight up on there. That looks great.
Now it's gonna be time to get the mounting bracket on there. It's a kind of funny looking thing, but if you were to look at it, you would see that it has an indented area right here. That's gonna ride right on this bracket right there. You want it to be kinda facing in this general direction so that the black part is gonna be riding up against the inner portion or the inner ridge of this shoe. Put it up on there. Line up your screw hole and then put in your screw. All right, so that's pretty much bottomed out right there. At that point, you definitely don't wanna go too much further because it is just a very small bolt, but something that I would like to mention is you also don't wanna go tight enough. With that said, once it's bottomed out, just give it a teeny bit more. Make sure it doesn't feel as though it's super loose to you. Give this a nice little wiggle. Make sure you don't see any movement between this and the bracket itself. I think that that looks great.
The next thing that we need to do is clean up the mating surface where the rotor is gonna match up against the axle. If it's all bumped up like this or rough in any way, just go ahead and sand it down with something. Now that the majority of the area is nice and clean and sanded down, we need to continue on by getting in between the lug studs and the rest of the hub area here, right in there. If you notice there's a large build up, you can use something like this, maybe a scraper or even a flathead screwdriver, just kinda get the majority of it up. Then you can take a nice brush, just work at the rest. Now we're gonna spray down the mating areas with some copper never seize.
Go ahead and put your rotor back on there. Look at the backside. This is the area that's gonna meet up against the axle. You need to make sure that's nice and clean as well. Now that we've cleaned up the backside of the rotor, we're just gonna place it over the axle like this. Push it all the way in and it should go over the emergency brake shoes. If it doesn't go over the emergency brake shoes, de-adjust your adjuster. If it does go over but you feel as though there's no drag at all, you're probably gonna wanna adjust it up a little bit. What you're actually gonna wanna do right now is get it so it's a semi-close so you can hear the shoes just barely dragging in there. Okay, that's the sound of the shoes hitting up against the inside drum portion of this rotor. If it's too tight and you try to turn it and it just doesn't wanna turn, then you know that it's over-adjusted. If your brakes are over-adjusted, they're gonna overheat and you're gonna have major braking issues.
Now it's gonna be time to get the caliper back on the vehicle. Before you go ahead and do that, you need to make sure that you clean all the existing thread locker off of these bolts, and I always like to replace it with some new thread locker of my own. Caliper around here. Make sure that your pads are situated inside the brackets as they need to be. They might keep wanting to fall out if they're like mine. Go ahead and grab those caliper mounting bolts. Start them both in. Now we'll snug them up and we'll torque them to 148 foot-pounds. We got our torque wrench. The next thing I always like to do at this point is to make sure I pump up the brake. Now it's gonna be time to get the wheel up on here. Let's start on those lug nuts and then we'll bottom them out and we'll torque them to 140 foot-pounds.
Let's the torque them. Double-check them if you want and if you have a center cover, put that on as well. Let's make sure we double-check that brake fluid. Give it a wiggle. It looks as though this is low. There's the maximum line. Open this up. We're gonna add some DOT 3 brake fluid. Bring it right up to that maximum line. Make sure you close it back up. Down the road you go.
Shop Products


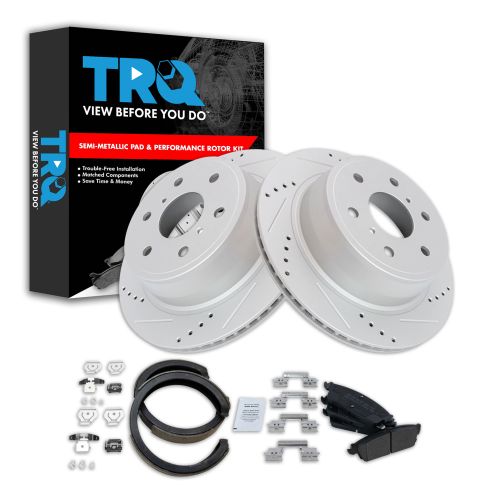
Chevrolet GMC Cadillac Rear Semi-Metallic Premium G-Coated Performance Brake Pad & Rotor Kit TRQ Performance BKA52082
Part Details:
- Performance
- Premium G-Coated
- Semi-Metallic
- Premium Posi
- (1) Rear Parking Brake Shoe Set
- (1) Rear Semi-Metallic Brake Pad Set
- (1) Rear Premium G-Coated Performance Brake Rotor Set

How to Replace Parking Brake and Hardware 2002-10 Ford Explorer
How to repair, install, fix, change or replace your own worn, squeaky, fading old emergency or parking brakes on 02, 03, 04, 05, 06, 07, 08, 09, 10
