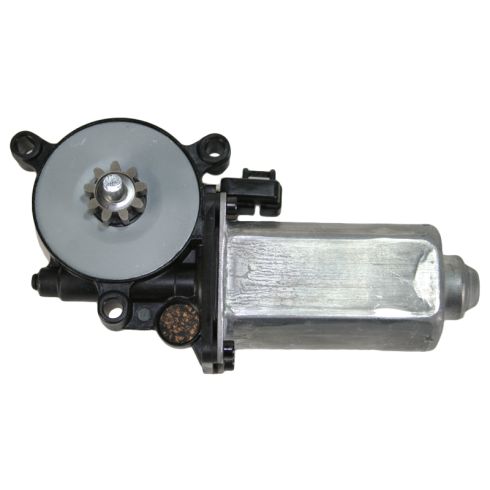
How To Replace Rear Power Window Motor 1993-99 Buick Lesabre
Created on: 2013-06-15
How to repair, install, fix, change or replace a weak, noisy, damaged or defective power window motoron a 1993-99 Buick Lesabre.
-
step 1 :Removing the Door Panel
- Pry up the switch panel
- Disconnect the window switch wiring harness
- Remove the Torx 25 screw from the door handle
- Pry off the door handle bezel
- Pry off the reflector on the edge of the door panel
- Remove the 10mm bolts inside the edge of the door panel
- Remove the 10mm bolts in the door pull
- Pry out the door panel
- Lift the door panel up and off
- Disconnect the wiring harnesses
- Carefully peel off the water shield
-
step 2 :Removing the Window Motor
- Disconnect the window motor wiring harness
- Remove the three 10mm nuts from the window motor
- Pull off the window motor
-
step 3 :Installing the Window Motor
- Put the window motor into place
- Fasten the three 10mm nuts onto the window motor
- Connect the window motor wiring harness
-
step 4 :Inserting the Door Panel
- Put the water shield into place
- Connect the wiring harnesses
- Lift the door panel into place
- Push in the door panel clips
- Insert the 10mm bolts in the door pull
- Insert the 10mm bolts inside the edge of the door panel
- Push on the reflector on the edge of the door panel
- Push on the door handle bezel
- Insert the Torx 25 screw from the door handle
- Connect the window switch wiring harness
- Push on the switch panel
Tools needed
-
Socket Extensions
Flat Blade Screwdriver
10mm Wrench
10mm Socket
Ratchet
T25 Torx Driver
Brought to you by 1AAuto.com, your source for quality replacement parts and the best service on the Internet.
Hi, I'm Don from 1A Auto. I hope this how-to video helps you out, and next time you need parts for your vehicle, think of 1AAuto.com. Thanks.
In this video we're going to show you how to replace a rear window lift motor in a '97 Buick LeSabre. It's going to be the same to do from the left door to the right rear door and it's going to work and apply to the '97-'99 model year.
Use a flat blade screwdriver and pry off the back, remove my switch by prying off the two plastic connectors, and be careful not to break them, or the two plastic tabs. Pulls this up and out of the way. The Torx 25 screw right behind the door handle. Get that out, and pull the plastic out. You may have to pull on the door handle a little bit to help get that plastic out from behind. Use a small pocket screwdriver to remove this reflector. Pressing in and down with the screwdriver helps get those clips that are on the top and bottom of that out. Now, we're going to take out four bolts one is right in here, one is straight in, and then you have two under where your switch pad was. I'm going to fast-forward this as I remove those four 10mm bolts. Now, I'm just going to get the rest of those clips off by prying between the door panel and the door itself. The clips I'm talking about are on the inner edge of the door panel. Just pop them, pull it out. Disconnect your harness by pulling the tab on the side. Go ahead and plug back in the connector there, place this one up through the back.
Use a flathead screwdriver to pry out this green clip, and then you can press in and disconnect the window motor. I'm using a 10 millimeter wrench to remove the three nuts that hold the window motor to the regulator. I'm going to speed it up as I remove those three nuts.
Re-installing the window motor, I'm going to fast-forward as I re-tighten those three nuts that hold the window motor to the window regulator. Go ahead and plug back in and then your green clip.
Just fast forward here as we put the water shield back on. Just make sure you pull the harnesses through and everything, get it back on there as best you can and we did miss filming taking that off earlier in the video, so obviously, if you have that, you'll pull it off and then put it back on before you put your door panel on. I'm going to go ahead and plug back in the connector there and fish this one up through the back.
Here, I'm just hanging the door panel on the sill of the door and then pressing in those yellow clips that I used my fingers on the inside of the door panel to pull apart and just making sure that the bolt holes are lined up. Then install a 10mm screw here. Here, I'm just installing the switch back into the switch plate, and pushing it down into the door panel. With the door handle cover, you're going to want to make sure that the notch where your lock and unlock fits up on the lock and unlock yellow rod there, and you have to pull handle out, play with that, and make sure that's centered. I'm reinstalling the Torx 25 screw.
We hope this video helps you out. Brought to you by www.1AAuto.com, your source for quality replacement parts and the best service on the Internet. Please feel free to call us toll-free, 888-844-3393. We're the company that's here for you on the Internet and in person.
Shop Products

How to Replace Front Window Regulator and Motor 2007-12 Nissan Altima
How to remove an old, worn, or broken power window motor from your 07-12 Nissan Altima, and replace it with a new, quality, engineered to fit part from TRQ.


