How to Replace Rear Shock Absorbers 2007-16 GMC Acadia
Created on: 2018-06-04
How to repair, install , fix, change or replace your front shocks with their loaded struts. This video is applicable 07, 08, 09, 10, 11, 12, 13, 14, 15, 16 GMC Acadia
-
step 1 :Removing the Wheel
- Use a 22mm socket and breaker bar to break the lug nuts loose
- Raise and support the vehicle
- Remove the lug nuts
- Remove the wheel
-
step 2 :Removing the Old Shock Absorber
- Use an 21mm socket and ratchet to loosen the lower nut up
- Remove the nut
- Raise the control arm with a jack
- Remove the bolt
- Use the 18mm wrench to remove the upper nut
- Hold the bolt with a 15mm wrench
- Remove the nut and the bolt
- Pull the shock absorber off the car (using a pry bar, if necessary)
-
step 3 :Reinstalling the New Shock Absorber
- Line up the new shock
- Insert the shock into the upper bracket (use a hammer if necessary)
- Insert the bolt and thread on the nut by hand
- Line up the bottom of the shock and insert the washer between the shock and control arm
- Insert the bottom bolt and the nut
- Snug up the top and bottom nuts and bolts
- Torque the bottom bolt to 74 ft-lbs
- Remove the jack from the control arm
- Torque it to 52 ft-lbs
-
step 4 :Reinstalling the Wheel
- Line up the wheel
- Thread the lug nuts on by hand
- Lower the car
- Torque the lug nuts in a star pattern to 140 ft-lbs
Tools needed
-
21mm Socket
21mm wrench
Torque Wrench
18mm Wrench
Jack Stands
18mm Socket
Floor Jack
1/2 Inch Breaker Bar
22mm Socket
Hi. I'm Mike from 1A Auto. We've been selling auto parts for over 30 years.
In this video, we're going to be removing and replacing rear shocks in a 2010 GMC Acadia. If you need this part or other parts for your vehicle, click the link in the description and head over to 1AAuto.com.
Take the tire off. We're going to use a 22 mm socket and a breaker bar. You can use a 7/8, also. I'm just going to break all the lug nuts free. Raise and support the vehicle. We're using a two-post lift, but you can also do this with a jack and jack stands. Take the lug nuts off. We use our socket to twist them out. Take the wheel off.
So, here's the shock and, as you can see, all this stuff on here. This is all oil and dirt that's been because the shock is leaking.
I'm going to take this 21 mm nut off and this bolt. We're going to loosen it up with a 21 mm wrench and a socket and a ratchet. All right. We're going to loosen this nut. We're not going to take it off completely. I'm going to leave it right there.
Now, you can support underneath the control arm. We're going to use a screw jack. You could just use a floor jack if you're working on the ground. I'm just going to bring this up a little bit so that our shock is loose. Now, our shock bolt is loose. You can unscrew the nut, take the nut off and the washer, and then our bolt should come right up. Maybe a little bit more. Just like that.
Now, I can lower this back down. If you're working on the ground, you could leave it the way it is, but we have to lower the vehicle down to gain access to the upper shock bolts. I'm going to use and 18 mm wrench on this 18 mm nut, and then a 15 mm ratchet wrench on the bolt side. If your bolt's really rusty, you can use some penetrating oil. Ours doesn't look too bad. Pull the nut off, pull the bolt straight through, and take a medium pry bar and get in behind here and just pull it straight out. And there it is.
This is our old part. This is our old shock. This is our new shock from 1AAuto.com. As you can see, all the oil leaked out of this one, and that's what keeps the shock's ability to do its job. So, this one is not performing up to optimum level. As you can see, the design is very similar. Slight differences like this upper dust shield is metal, whereas the old one was plastic. It still has the same configuration up top, same down below. There is a washer that can go on this side. If you're doing the other side, you can put it on that side. It comes with this tie on here. You can take that off. You can do it in the car or take it off before you put it on. Get your part at 1AAuto.com, and you'll be ready to rock and roll.
All right. We're going to install our new shock in the back. It's a little tight right here. So, we can either loosen up some of these bolts and get it lined in, or you can take a little hammer and give it a little tap. Pull the brake line out of the way a little bit. Take the nut and stick the nut on.
Then, we're going to support our lower control arm again. If you were doing this on the ground, you could have left this supported before. Bring it up to the level of the shock. And then, take our bolt, and then that special washer is going to go in-between. It's got a angle side to it that's going to go towards the control arm, so stick that in first. Line our bolt up. I'm going to have to go up a little bit more. That's lined up. I'm going to take our washer, set the washer on, and then the nut and tighten that up.
Now, we're going to snug up this bolt with a 21 mm socket and a 21 mm wrench and ratchet. Now, we're going to torque the bolt to 74 foot-pounds. Now, we'll lower our lower control arm. Right.
Now, we're going to tighten this bolt and nut down on the 18 mm nut with a wrench and a ratchet wrench. 15 on the bolt side.
Now, we're going to tighten this bolt and nut down to 52 foot-pounds. Install our wheel. Put the lug nuts on.
Now, we're going to torque the lug nuts down to 140 foot-pounds. You're going to want to torque them in a star pattern so that the wheel will go flush to the rotor evenly.
Thanks for watching. Visit us at 1AAuto.com for quality auto parts, fast and free shipping, and the best customer service in the industry.
Shop Products


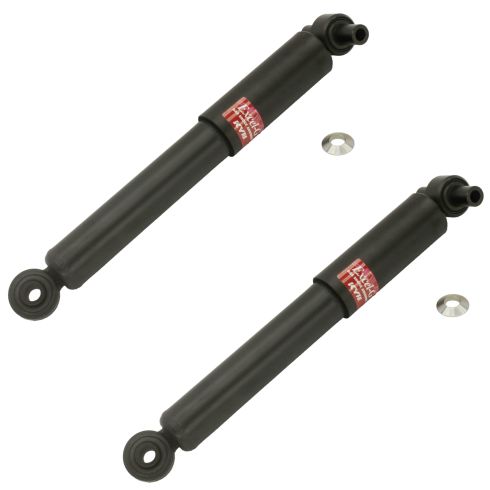
Chevrolet GMC Buick Saturn Rear Driver & Passenger Side 2 Piece Shock Absorber Set KYB Excel-G KYSSP00033
Part Details:
- 2 Piece
- (1) Rear Passenger Side Shock Absorber
- (1) Rear Driver Side Shock Absorber

How to Replace Shock Absorbers 2007-16 Chevy Silverado
You can learn how to change the rear shocks on your 07-13 Chevy Silverado or GMC Sierra. Watch this video where 1A Auto experts show you step by step!
