How to Replace Rear Shocks Strut Spring Assembly 2005-09 Subaru Outback
Created on: 2018-05-23
How to repair, install , fix, change or replace your rear shocks with their loaded struts on 05, 06, 07, 08, 09 Subaru Outback
-
step 1 :Loosening the Rear Strut
- Remove the trunk flooring
- Pry up the trunk floor siding
- Fold down the back seats
- Remove the two upper strut mount nuts with a 14mm wrench
-
step 2 :Removing the Wheel
- Loosen the 19mm lug nuts with the vehicle on the ground
- Raise the vehicle with a floor jack
- Secure the vehicle on jack stands
- Remove the lug nuts
- Pull off the wheel
-
step 3 :Removing the Rear Strut and Spring Assembly
- Loosen the 19mm lower strut bolt
- Support the suspension with a floor jack
- Punch the 19mm bolt through with a hammer and a punch
- Remove the strut
-
step 4 :Installing the Rear Strut and Spring Assembly
- Reinstall the strut into the vehicle
- Hand-tighten the top nuts
- Support the lower part of the strut with a floor jack
- Hold the strut against the frame with a pry bar
- Tap the lower bolt in with a hammer
- Tighten the 19mm lower bolt with a wrench and socket and ratchet
- Torque the bolts to 46 foot-pounds
-
step 5 :Reattaching the Wheel and Torqueing the Strut
- Slide the wheel into place
- Start the lug nuts by hand
- Tighten the lug nuts preliminarily
- Lower the vehicle to the ground
- Torque the lug nuts in a crossing or star pattern to 90 foot-pounds
- Torque upper nuts to 22 foot-pounds
- Raise the seat
- Replace the side trunk flooring
- Replace the trunk flooring
Tools needed
-
14mm Wrench
Hammer
Socket Extensions
Torque Wrench
17mm Wrench
Jack Stands
19mm Wrench
Center Punch
Ratchet
Floor Jack
1/2 Inch Breaker Bar
Hi, I’m Mike from 1A Auto. We’ve been selling auto parts for over 30 years!
In this video, we are replacing rear struts in a 2008 Subaru Outback. If you need these parts or other parts for your car, click the link in the description and head over 1AAuto.com.
Open the back. Pull this up and out. Pull this up. See the clips underneath here. Fold down the back seats, push that down, and push that one down. This folded up here like that. And then take these two upper strut mount nuts off, and then put a 14 millimeter wrench on. And we'll break these free with a 14 millimeter wrench. Going to take off the lug nuts. It's a 19 millimeter socket and a breaker bar. I'm just going to crack them loose before we lift the vehicle off the ground. Take the lug nuts off.
From the side grab the wheel, pull it off. All right, then we're going to take the shock bolt out here, with a 19 millimeter socket and a 19 millimeter wrench. Pull the nut off. It's a good idea to support the lower suspension with… we're using a screw jack, but you could use a floor jack or a piece of wood or something underneath. The suspension may fall or go up once we pull that bolt out. To pull that out, I'm going to use a punch. Punch it through. As this goes through the shock is going to fall, so I'm going to try to support it. Be able to pull it down. Pull it straight down. We could have left a, one of the nuts on top so that it wouldn't fall all the way—you can also do that.
This is our old spring and strut assembly. This is our new spring and strut assembly from 1AAuto.com. As you can see, they are almost identical. It doesn't matter left to right—they're both the same part number.
On here you're going to see this warning. It tells you not to touch this nut underneath here, because it could be dangerous. It's safer to install the strut spring assemblies as a whole, versus removing the strut and taking a compressor and putting a new strut on. You don't have to mess around with it—it's good to pop right in. Order your part from 1AAuto.com and you'll be ready to rock and roll.
As you can see, when we took our strut spring assembly out, the suspension actually raised up. Most of the time when you're doing that, the suspension will kick down. For this vehicle it went up. All right, I'm going to install the new strut, this way and then I'm going to line up the holes on top. As that's in there, while I'm holding up I'm going to take one of the nuts and go around, get that nut started so it holds it up in place first.
So we're going to support the lower part of the shock strut assembly, but we also want to pry down on the suspension. I'm going to use a pry bar. Feed it through there and hold it against the frame. And while we're pulling down, try to get the bolt in. There we go. Once you get it started, you can take this down. Get this out of your way. And just tap it with a hammer. Put the nut back on.
Another way to get that bolt in for the lower strut: You could also put in a jack right here, if you had like a scissor jack. Could have stuck it in there and then be able to push the control arms down and then fish that bolt in and you'd be good. Now we're going to tighten the bolt up, the nut. 19 millimeter wrench and a 19 millimeter socket and ratchet. Now we're going to torque this bolt to 46 foot-pounds. That's good.
Install our tire. Put the lug nuts on. With a torque wrench, we're going to torque the lug nuts down to 90 foot-pounds going in a star pattern. You want to go in a star pattern so that you torque the wheel to the hub evenly. The struts come with new nuts, they're 15 millimeter instead of 14 millimeter. So I'm going to put these on. It's kind of hard to get underneath here. And the torque on these nuts is 22 foot-pounds. It's hard to get a torque wrench in there, so I'm just going to use a wrench.
And reinstall this. This piece comes up and over like that. There's a little push pin that goes right there, like that. Push the back seats up. Install the back panels. These two little clips go in there. Line them up and push them down. This one actually popped out over here. Put that clip in there first. Put this on here. Push it down. Just going to line those two tabs up in the back, and push that down. Close the deck lid.
Thanks for watching. Visit us at 1AAuto.com for quality auto parts, fast and free shipping, and the best customer service in the industry.
Shop Products


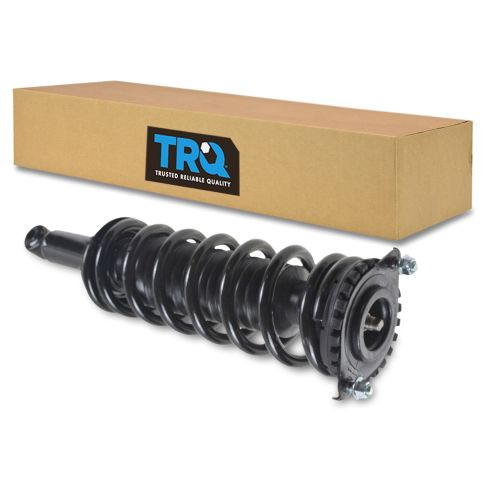
2005-09 Subaru Outback Rear Strut & Spring Assembly TRQ SCA57986
Part Details:
- No specialty tools required
- Easy install - Pre-assembled, loaded struts

How To Install Replace Remove Rear Shocks Struts 2002-06 Nissan Altima
If the rear shocks on your 02-06 Nissan Altima are bouncy or clunking, it's probably time to replace them! Watch this video to learn how to do it yourself!
