
How to Replace Rear Strut Assembly 1997-2001 Toyota Camry
Created on: 2016-09-12
Watch this video to learn how to replace the rear strut assembly on your 97-01 Toyota Camry.
-
step 1 :Removing the Wheel
- Pull off the hub cap by hand
- Loosen the lug nuts with the vehicle on the ground
- Raise the vehicle with a floor jack
- Secure the vehicle on jack stands
- Remove the lug nuts
- Pull off the wheel
-
step 2 :Removing the Strut
- Remove the 12mm bolt from the brake line
- Remove the 10mm bolt from the ABS sensor
- Pull the brake line off the strut
- Pull the ABS sensor off the strut
- Attach locking pliers to the upper sway bar ball joint
- Remove the lower sway bar link nut with a 14mm socket and ratchet
- Remove the sway bar link from the strut
- Remove the two 19mm nuts and bolts that connect the strut to the wheel spindle
- Lift the rear seat off its ancho points
- Push the seat belts through the rear seat cushion
- Pull the rear seat out through the door
- Remove the 12mm bolt from each rear seat bolster
- Pull out the rear seat bolsters
- Pull the seatbelt aside
- Pull back the sound-deadening material
- Remove the three 12mm bolts from the top of the strut
- Pull the strut down and out
-
step 3 :Installing the Strut
- Lift the strut into place, lining up the studs
- Start the 13mm nuts onto the strut mount
- Insert the 19mm bolts that connect the strut to the wheel spindle
- Start the 19mm nuts onto the bolts
- Tighten the 19mm nuts to 83 foot-pounds of torque
- Put the ABS sensor bracket into place
- Insert the 10mm bolt into the ABS sensor bracket
- Put the brake line into place
- Insert the 12mm bolt into the brake line bracket
- Put the sway bar link into place
- Attach locking pliers to the upper sway bar ball joint
- Fasten the 14mm nut onto the sway bar link
-
step 4 :Reattaching the Wheel
- Slide the wheel into place
- Start the lug nuts by hand
- Tighten the lug nuts preliminarily
- Lower the vehicle to the ground
- Tighten the lug nuts to 76 foot-pounds in a crossing or star pattern
- Reattach the center cap
-
step 5 :Securing the Strut and Reinstalling the Rear Seat
- Fasten the three 13mm nuts onto the strut mount
- Push the rear seat bolsters into place using the locating tabs
- Insert the 12mm bolt into each rear seat bolster bracket
- Push the rear seat cushion into place
- Pull the seatbelts through the rear seat cushion
- Pop in the seat cushion clips
Tools needed
-
14mm Wrench
12mm Socket
13mm Socket
Socket Extensions
Torque Wrench
14mm Socket
Jack Stands
19mm Wrench
19mm Socket
10mm Wrench
21mm Socket
21mm wrench
10mm Socket
Ratchet
Floor Jack
1/2 Inch Breaker Bar
12mm Wrench
13mm Wrench
Brought to you by 1AAuto.com, your source for quality replacement parts and the best service on the Internet.
Hi, I'm Mike from 1A Auto. I hope this how-to video helps you out, and next time you need parts for your vehicle, think of 1AAuto.com. Thanks.
In this video, we're going to be working with our 1998 Toyota Camry. We're going to show you how to remove and replace the rear strut assembly, which means that our new part from 1A Auto is going to come with a new strut, a new spring and a new strut mount. What happens is, over time, these wear out and sag or become soft, which can cause our vehicle to ride lower than it's designed to. We can get a softer ride or a harsher ride. We can have poor handling, some noises in the back like some clunking over bumps, as well as having some suspension and alignment issues, which can cause odd tire wear patterns.
Fortunately, this new part is much easier and safer to replace than the old-style struts. If you like this video, please click subscribe. We have a ton more information on this car as well as many other makes and models. If you want this part for your vehicle, you can follow the link down in the description and get it from 1AAuto.com. Here are there items you'll need for this repair.
Grab onto the hub cap and remove it from the wheel. We're going to use a 21 mm socket and breaker bar to remove all five lug nuts. We'll crack them loose now, raise and support the vehicle, and then finish removing the lugs. We've put our vehicle on a lift to make it easier to film for you, but this job can be easily done with a jack and jack stands. Remove the wheel and tire.
Remove the 12 millimeter bolt, holding the brake line in place and the 10 millimeter bolt, holding the ABS sensor in place. We use a 12 millimeter socket for the brake line and a 10 millimeter socket for the ABS sensor. We'll remove both of these things. Be careful of the brake line and the sensor. We'll remove them from the strut.
Place a pair of locking pliers around the back side of the sway bar. Use a 14 millimeter socket and ratchet to remove the nut on the other side. Remove the sway bar link and the locking pliers. Remove the two 19-millimeter bolts, securing the bottom of the strut to the spindle with a breaker bar, 19 millimeter socket, and a wrench. You may need to use a cheater pipe on the breaker bar to get the leverage you need to break the nut loose. Once it's loose, we can remove the rest with a socket, ratchet and a wrench. Remove the nut and bolt, lift up on the spindle, and remove the nut. Remove the spindle from the bottom of the strut.
Find the anchor points under the seat and lift up firmly. Push the seatbelt buckles through the holes in the base of the seat cushion and remove it from the vehicle.
Using a 12 millimeter socket and ratchet, we'll remove the bottom bolt on the sides of the seat bolsters on both sides of the vehicle. We'll use a 12 millimeter socket and ratchet. Fold the seat back in. Pull some slack onto the seatbelt and push the bolster up to remove it. Again, we'll repeat this step on the opposite side.
We'll move the seatbelt out of the way. We'll wrap it around the headrest here just to give us some room to work, fold up this sound-deadening and remove these three 12 millimeter bolts with a socket and ratchet. When doing this on the ground, we'll support the strut and finish removing the last nut on our strut mount inside the vehicle. Once the nut has been removed, hold the strut and remove it from the vehicle.
Here we have our old strut that we removed from our Camry and our new part from 1AAuto.com. As you can see, these parts are exactly the same with the same mounting locations for the sway bar link, the ABS sensor and the flexible brake hose. They have the same size spring as well as the same size strut tube here. These parts are directional. You can see that these are the right side. The left would be a mirror image of what we see here. These new quick struts are already assembled with a new spring and a new strut mount, meaning that it's going to eliminate any strut-related noises we're hearing and restore our vehicle to it's factory ride height and original ride quality. These parts are simpler to install and eliminate the headache and hassle as well as the need for special tools like the old struts did where they would be replaced as a single piece as opposed to an entire assembly. If your struts are making noise, bouncing, aren't sitting at the proper ride height, or are causing you alignment issues, these new parts from 1A Auto are going to go in direct fit just like your original equipment and fix you up right.
Our new quick strut assembly comes with some new hardware. This hardware is 13 millimeters so the 12 millimeters we used to remove the nuts on the top of the strut mount inside the vehicle will now be reinstalled with a 13 millimeter socket and ratchet.
Insert the quick strut back into the strut tower in the rear of the vehicle. Line up the studs with the holes at the top. Once you have it lined up, push up and start a nut onto the strut mount to keep it in place. Lift up and realign the spindle into the base of the strut. Send your 19 millimeter bolts through and start the 19 millimeter nuts. Tighten the bolts down with a socket and ratchet. Torque these bolts to 83 foot-pounds.
Reinstall the ABS sensor bracket and the 10 millimeter bolt. Tighten that down with a 10 millimeter socket and ratchet. Carefully bend the brake hose back into place. Reinstall the 12 millimeter bolt and tighten that down with a 12 millimeter socket and ratchet. Reinstall the sway bar link into the strut. Start the 14 millimeter nut. Clamp onto the backside of the link with your locking pliers and tighten the nut with a 14 millimeter socket and ratchet.
Reinstall the wheel and tire. Get all the lug nuts down as tight as you can by hand. Lower the vehicle carefully back onto the wheel and tire. Since we've started the nuts on our strut mount, this will push the strut fully into its position and make it easier for us to tighten down the nuts at the top. Torque the lug nuts to 76 foot-pounds in a cross pattern. Line up the notch in the hubcap over the valve stem, and tap the hubcap back into place.
We'll tighten down the nuts at the top of the strut mount. Remember the new ones are 13 millimeter. We'll use a 13 millimeter socket and ratchet. This spot can be pretty tight so if you have access to gear wrenches, stubby wrenches, a short ratchet, extensions, U-joints, anything like that, do whatever you can to make it work and make these easier to access.
This slot here is where we're going to install this plastic tab on the back of the side backrest. Push in and down. Grab the back of the backrest and pull toward you to make sure it's locked into place. Now we'll reinstall our 12 millimeter bolt at the bottom. Reinstall the bottom seat cushion. Once you've got it laid into place, you'll have to reach through and pull the bottom of the belt buckles back in. There are two on the passenger side and one on the driver's. Slide the back of the seat into place. Line up the brackets and knock them in at the front and you're good to go
Thanks for tuning in. We hope this video helps you out. Brought to you by www.1AAuto.com, your source for quality replacement parts and the best service on the Internet. Please feel free to call us toll-free, 888-844-3393. We're the company that's here for you on the Internet and in person.
Shop Products


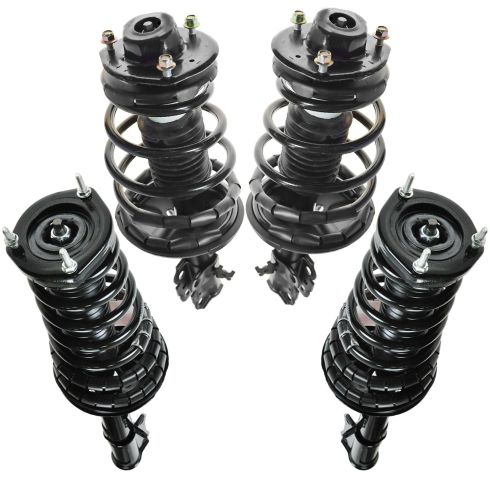
Toyota Camry Solara Front & Rear 4 Piece Strut & Spring Assembly Set TRQ SCA56949
Part Details:
- 4 Piece
- (2) Front Strut & Spring Assemblies
- (2) Rear Strut & Spring Assemblies

How to Replace Strut Assembly 2000-05 Chevy Cavalier
Watch this video to learn how to replace the front strut assembly on your 00-05 Chevy Cavalier.
