
How to Replace Rear Struts 2003-07 Honda Accord
Created on: 2019-02-04
How to repair, install , fix, change or replace your front shocks with their loaded struts on 03, 04, 05, 06, 07 Honda Accord
-
step 1 :Removing the Rear Seat
- Pull out on the T-handle on either side and pull the seat up
- Remove the 10mm bolt from the seat on each side pillar
- Insert the key to the lock to unlock the seat
- Lay the back seat down
- Remove the side pillar on each side
- Unclip the black seat trim from the plastic tabs
- Remove the two nuts from the strut tower mounting bolts (not the spring-loaded center bolt)
-
step 2 :Removing the Wheel
- Loosen the 19mm lug nuts with the vehicle on the ground
- Raise the vehicle with a floor jack
- Secure the vehicle on jack stands
- Remove the lug nuts
- Pull off the wheel
-
step 3 :Removing the Rear Strut
- Loosen the bottom 17mm nut from the strut
- Remove the 17mm bolt
- Remove the 14mm bolt from the upper sway bar link bracket
- Set the bracket to the side
- Pry the shock down and out with a pry bar
-
step 4 :Installing the Rear Strut
- Remove the two upper nuts from the strut
- Using a pry bar, set the rear strut into place
- Place the upper nuts on by hand
- Tighten the upper nuts with a 15mm socket and ratchet
- Torque the bolts to 37 foot-pounds
- Insert the lower end of the strut into place and put the bolt in by hand
- Tighten the 17mm lower bolt to the bottom of the strut
- Tighten the 14mm bolt to the upper sway bar link bracket
- Torque the bottom strut bolt to 43 foot-pounds
-
step 5 :Reinstalling the Seat
- Reinstall the top black trim to the back seat
- Clip the pillar trim to both sides
- Tighten the 10mm bolt to the trim on both sides
- Press the back into place
- Line up the seat belts and snap the bottom of the seat in on both sides
-
step 6 :Reattaching the Wheel
- Slide the wheel into place
- Start the 19mm lug nuts by hand
- Tighten the lug nuts preliminarily
- Lower the vehicle to the ground
- Tighten the lug nuts to 80 foot-pounds in a crossing or star pattern
Tools needed
-
Torque Wrench
14mm Socket
15mm Socket
Pry Bar
17mm Socket
19mm Socket
10mm Socket
Ratchet
Hi, I'm Mike from 1A Auto. We've been selling auto parts for over 30 years!
Hey, everyone. Sue here from 1A Auto, and today we have a 07 Accord in the shop, and we're going to do rear strut assemblies. If you need this part or any other part for your car, click on the link below and head on over to 1aauto.com.
There's two pull taps located for the bottom seat. There's one here and one there right in that area. So you reach your fingers and you can see feel like a little "T" handle. Pull out on the handle and pull out. And then do the same on that side. I'm going to grab mine from the center here and keep a firm hand and pull down. Once this is up, you'll see a little head of a bolt right here 10mm socket. I'm going to take this one off and the same on that side.
Take my 10mm socket. And then I'm going to do the same thing on the other side. Now you take your ignition key and you put it in the lock back here and you hit unlock. Pull the seat down. And now we have the side pillar that's unbolted from the bottom. I'm going to lift up on it and push that aside. Do the same to the other side. Now with the trim tool, I'm just going up in here and just pull up on the plastic tabs.
Here we go. With a 14mm socket, I'm going to disconnect the tops of the strut tower mounts. I'm not going to touch that center that is the spring load. I had to get a quarter-inch set to get to that back one because of the plastic in the way. 19mm socket to loosen up the lug nuts. I'm to use a two-post lift to raise my vehicle. You can use a jack and jack stands at home. Now I can take my 19mm socket. Now that I've raised it up, I can remove the lug nuts to take the tire off.
To remove the bottom mount of the strut the 17mm socket. I'm just going to put a socket on there with an extension, get my long ratchet and break that free.
There we go. The next thing I do is I'm going to remove this bolt that holds the bracket to the upper sway bar link, and that way I get more bottom throw out on the bottom of the strut housing. It's a 14mm socket that takes that bolt right out of there. I can just set that aside and move that way so I got more throw here for my lower shock. And there you have it. Just had to get a better angle. There it is.
Here we have the new rear start to our '07 Honda Accord from 1A Auto, and here we have the original equipment we just pulled out. They're both the same link as you can see. Coils are the same diameter, comes with new bumper and dust boot. Comes with two new locking nuts on the strut mount for the top and a new rubber seal that will get nice and compressed in there to stop any road noise. If you need this part or any other part for your car, click on the link below and head on over to 1aauto.com.
I'm going to dismount the two locking nuts for the strut cap for the inside of the cab with the compartment. Set these aside. I'm going to fish this back in. It's going to go between the link. Get my pry bar. So pull down on the suspension, and then you're going to fish the new strut into the link and the bracket.
Pry this down, and get this in the fender well. Now with the strut in the fender well, I can lift it up and line it up in the top. Let's see if I can hook that through. See if I can now pry this down far enough. It looks like I got enough on there. Now I'm going to lower the vehicle and put the two top nuts on the mount so I can work down below and not have this fall down. So now I'm gently going to put the nuts on by hand only because I don't want the whole strut assembly to fall back down through.
Sweet. Now I'm going to get my socket and tighten that down. So the new nuts to the strut mount are at 15mm socket. I'm just alternating it back and forth and tightening it down snugging it. The torque specs for this are 37 foot-pounds. Okay, we're ready to go down below again.
So now with my long pry bar I'm going to pull down on the suspension and see if I can get the bottom part of the strut at least started before I remount the sway bar link bracket on the other side. There we go. So now that part is lined up. I can put the bracket on and thread that bolt through. So now I'm going to line up the sway bar link bracket to the knuckle and start this bolt. I'm not going to tighten that up until I've threaded this bolt completely through and started it.
I'm leaving that bracket loose. It was easier for me to start the threads. Just in case if you tighten that bracket up and it's just a 1mm off of the threaded hole, you can end up stripping that nut and ruining the bolt. It's easier to make sure the main bolt is threaded through and then tighten up that bracket.
Now I'm going to tighten up that bracket with a 14mm socket. Now we can torque the main bolt on the bottom of the strut. So now I'm going to torque it and the factory specs is 43 foot-pounds. It's a 17mm socket.
Reinstall the top piece trim. Move the seatbelt out of the way. Actually it doesn't have to go away. Line this keyway up with the latch that releases the seats, and the lip goes on the top of that plastic piece. You can guide them right in, and you'll see where the plastic clips go and just push down. All set.
So you have to make sure you get this bottom eyelet in the middle bracket and this top one in that bracket. With the seatbelt out of the way, now the bottom on is in. There we go. Now it's lined up. You can see the trim better on the door casing. Now we're going to have to repeat that process on that side. Okay, seatbelts are all lined up. Except for this side.
Push it back and snap it down in. That side's down. Now repeat the process on the other side. 19mm socket. Now we're going to torque the wheels up. The wheel torque on this particular model is 80 foot-pounds. Make sure you do it in a star pattern--crisscross. And then double-check.
Thanks for watching. Visit us at 1aauto.com for quality auto parts, fast and free shipping, and the best customer service in the industry.
Shop Products


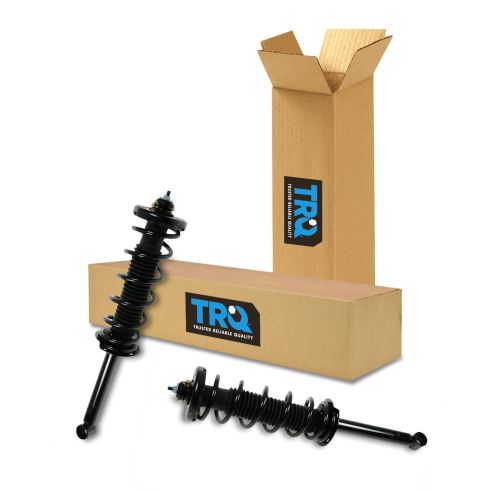
Honda Accord Acura TL Rear Driver & Passenger Side 2 Piece Strut & Spring Assembly Set TRQ SCA57029
Part Details:
- 2 Piece
- (1) Rear Driver Side Strut & Spring Assembly
- (1) Rear Passenger Side Strut & Spring Assembly

How to Replace Front Struts 1994-97 Honda Accord
Learn how to replace clunking or bouncy struts on your 94-97 Honda Accord by watching this tutorial video from 1A Auto.
