How to Replace Rear Sway Bar Link 2007-11 Honda CR-V
Created on: 2018-08-14
How to remove, replace, and install a sway bar end link on 09 Honda CR-V
-
step 1 :Removing the Front Sway Bar Links
- Loosen the upper sway bar link bolt with a 14mm socket and ratchet and locking pliers
- Remove the upper portion of the sway bar link
- Insert the upper portion and gently tighten the nut
- Loosen the lower sway bar link bolt with a 15mm socket and ratchet and locking pliers
-
step 2 :Installing the Front Sway Bar Links
- Insert the upper portion of the sway bar link in place
- Insert the lower portion of the sway bar link in place
- Counter hold the upper portion with locking pliers
- Tighten the upper nut with and 15mm socket and ratchet
- Repeat for the lower portion
- Tighten the top and bottom nuts 29 foot-pounds of torque
Tools needed
-
Socket Extensions
Torque Wrench
15mm Socket
Jack Stands
19mm Socket
Ratchet
Wire Brush
Floor Jack
1/2 Inch Breaker Bar
Hi, I’m Mike from 1A Auto. We’ve been selling auto parts for over 30 years!
So we had a rattle in the back of this 2009 Honda CRV, when we were going over bumps. We noticed that this sway bar link on the right, rear side is actually broken. You can see, it actually came out, the socket came out, and this is the rattling that we're hearing. So if you have a rattle in the rear of your vehicle, yours could be broken like this.
So, if you need sway bar links, or other parts for your vehicle, check out 1aauto.com. Alright, before I take these nuts off, I'm going to spray them down with some rust penetrant. They're a little bit rusty. All right, now that I sprayed that down for a while and let it sit, I'm going to take this nut off. I'm going to use some locking pliers first, on the back side of this, so that the stud won't spin. You could put an Allen or a Torx in, but this is very rusted, so it's just easiest if I use some locking pliers.
All right, so with those locked on, then I'm going to take a 14mm socket. I'm going to loosen it up. So I'm clamping these lock, I got some bigger locking pliers and I'm clamping them to this little washer looking thing, right there, and it's preventing my stud from spinning like that.
To do these, you don't have to take the rear tire off. You could to help you gain access to it, but it's not necessary. Then we'll pull that stud right out. Now we're going to do the same for the other one. Just get the locking pliers on the backside. That's too loose. Use our 14mm socket and a ratchet. Want to make sure the socket's all the way down. Got that nut off, then we can pull the stud and the link out all together.
This is our old sway bar link. This is our new sway bar link from 1aauto.com. If you look at the shapes, the shapes are the same. They have the same stud configuration. Actually, right here you could actually put a wrench, so it's going to be easier for installation. They come with new nuts. Get yours at 1aauto.com, and you'll be ready to rock and roll.
All right, now we're going to line these up. Start the bottom one, then we can push on the sway bar itself. Line the top one up. Once those are both in there, then we can install the nuts. Get that one started. Get this one started. We can use a 15mm wrench on the backside of the stud to hold it from spinning. We can use a 14mm socket with a ratchet to tighten down the nut. Snug that down. Then we'll snug the other one down.
All right, with the wrench still on there, I'm going to torque the top nut to 28 foot-pounds, using the 14mm socket and this torque wrench. We actually sell this torque wrench at 1aauto.com. So the top nut was 28 foot-pounds. The bottom nut is 29 foot-pounds. So we'll torque that one to 29 foot-pounds, and we're all set.
Thanks for watching. Visit us at 1AAuto.com for quality auto parts, fast and free shipping, and the best customer service in the industry.
Shop Products

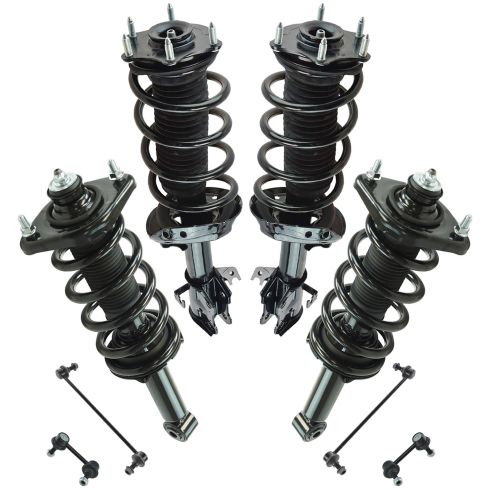
2012-14 Honda CR-V Front & Rear 8 Piece Suspension Kit TRQ SCA65570
- 8 Piece
- (2) Front Sway Bar Links
- (2) Rear Sway Bar Links
- (2) Front Strut & Spring Assemblies
- (2) Rear Strut & Spring Assemblies

How to Replace Rear Sway Bar Links 2010-15 Chevy Camaro
How to repair, install, fix, change or replace loose, worn, or rattling sway bar links on 10, 11, 12, 13, 14, 15 Chevy Camaro


