
How to Replace Rear Sway Bar Link 2003-11 Honda Element
Created on: 2018-12-18
How to remove, replace, and install a sway bar end linkon 03, 04, 05, 06, 07, 08, 09, 10, 11 Honda Element
-
step 1 :Removing the Wheel
- Loosen the 19mm lug nuts with the vehicle on the ground
- Raise the vehicle with a floor jack
- Secure the vehicle on jack stands
- Remove the lug nuts
- Pull off the wheel
-
step 2 :Removing the Sway Bar Link
- Turn the wheel by hand
- Hold the lower nut on the sway bar link with a 5mm Allen bit
- Remove the lower nut from the sway bar link with an 15mm wrench
- Hold the upper sway bar link stud with a 5mm Allen bit
- Remove the upper nut from the sway bar link with a 15mm wrench
- Remove the sway bar link
-
step 3 :Installing the Sway Bar Link
- Push the sway bar link into place
- Start the 18mm nuts by hand
- Hold the upper sway bar link stud with a 5mm Allen wrench
- Fasten the upper nut onto the sway bar link with a 15mm wrench
- Hold the lower sway bar link stud with a 5mm Allen bit
- Fasten the lower nut onto the sway bar link with a 15mm wrench
-
step 4 :Installing the Wheel
- Slide the wheel into place
- Start the 19mm lug nuts by hand
- Tighten the lug nuts preliminarily
- Lower the vehicle to the ground
- Tighten the lug nuts to 80 foot-pounds in a crossing or star pattern
Tools needed
-
5mm Hex Wrench
15mm Wrench
Socket Extensions
Torque Wrench
Rust Penetrant
Jack Stands
19mm Socket
Ratchet
Floor Jack
1/2 Inch Breaker Bar
Hi, I'm Mike from 1A Auto. We've been selling auto parts for over 30 years!
Hi, everyone. Sue here from 1A Auto, and today on our '06 Honda Element, I'm going to show you how to remove and replace the rear sway bar links from 1A Auto. If you need that part or any other part from your car, click on the link below and head on over to 1aauto.com
19 mm socket and we're going to break free the lug nuts. You got the pressure of the vehicle on the tire still, so it doesn't turn. I use the two-post lift. At home, you can a jack and jack stands. I'm going to take all the lug nuts off and remove the tire.
I'm going to the spray the rear sway bar links, nuts, rusted nuts. 15 mm wrench, and I'm going to break free the lower sway bar mounting nut. And then the actual stud for the sway bar links, that's to spin. So what we have to do now is get a allen socket, and it's a 5 mm. I'm going to use a ratchet wrench, and then I'm going to put my 5 mm allen head socket on there. Holding it the opposite way, I'm going to start ratcheting that. It will get harder as it gets towards the edge of there, 'cause it's trying to push that rust out on the threads. So don't get discouraged.
And hopefully, that doesn't happen. So if the allen head falls out, sometimes that might get rounded. Let's see if we can get it to go back in. I'll take hammer, see if I can get it to go in there a little. See if I can hopefully get it to hold. If your allen head strips out, you're going to have to use some locking pliers and hold the back of the stud from spinning so you can get that mounting nut off. There you go. Okay.
We're going to do the same thing for the top. We're going to use a longer wrench to see if I can break it free. There you go. I can put my allen head in there with a ratchet wrench, see if we can get this to go a little faster. There we go.
Now we can just discard that. And then, here's your rear sway bar link. Here we have the new rear sway bar link from 1A Auto, and here we have the one we just removed. The new one from 1A Auto comes with self-locking nuts. It does have the allen head inverted so that you can tighten it. And they're both sealed, same length. If you need this part or any other part for your car, click on the link below and head on over to 1aauto.com.
Now we're going to install the rear sway bar link. We're going to put the top in first and then line up the bottom. Put them right through the mounting hole. I've got two self-locking nuts. 15 mm wrench, I'm using a ratchet wrench.
The nice thing is that the 1A Auto link comes with the allen head. So once that starts to spin, I can use it to hold it. Some of the manufacturers come with allen or a Torx bit, or they have the cutout of a hex, like a nut, on the back. And then you have the ones that have nothing, and you have to put a pair of locking pliers back there. That's great if you're taking it out, the old one. But to replace it like that, I don't know, I'm not a fan. You could damage the boot.
So there are no torque specs for this rear sway bar link, so I'm just going to snug it. Going to use my extra long ratchet, get a little bit better leverage, bottom that right out. Going to do the same with the bottom. Same size 15mm and 5mm allen head. I just don't want this to rattle and bang, the suspension to make noise. So it's important to make sure that's really bottomed out.
Let's put the lug nuts back on. It's a 19mm socket. Just going to tighten them all down, then I lower it down and torque it. So I'm going to torque the wheels to manufacturer's spec, which is 80 foot pounds. And to always do it in a star pattern. Double check.
Thanks for watching. Visit us at 1aauto.com for quality auto parts, fast and free shipping, and the best customer service in the industry.
Shop Products


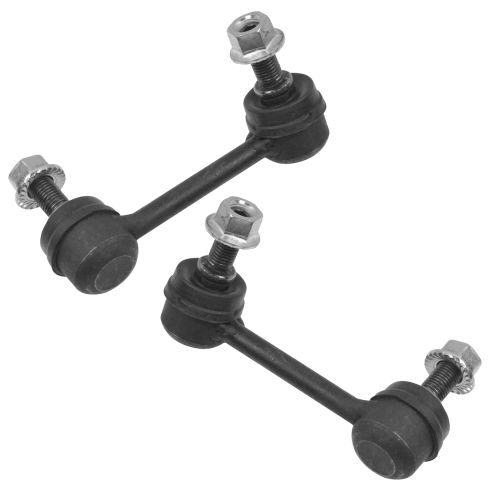
Honda Element Prelude Nissan Murano Driver & Passenger Side 2 Piece Sway Bar Link Set TRQ PSA55846
Part Details:
- 2 Piece
- (1) Passenger Side Sway Bar Link
- (1) Driver Side Sway Bar Link

How to Replace Sway Bar Link 2001-06 Hyundai Elantra
If the sway bar link is rattling or broken, this video will show what steps and tools are needed to replace it
