How to Replace Serpentine Belt 2005-16 Toyota RAV4
Created on: 2019-09-24
Watch this video to see how to replace the serpentine belt in your 05-16 Toyota RAV4. 1A Auto shows you how to do it yourself with step by step instruction
Tools needed
-
21mm Socket
Torque Wrench
Serpentine Belt Tensioner Tool
Plastic Fastener Remover
Ratchet
1/2 Inch Breaker Bar
What's up guys? I'm Andy from 1A Auto. In this video I'm going to show you how to replace the serpentine belt on this 2010 Toyota RAV4. If you need parts for your vehicle, click the link in the description and head over to 1aauto.com.
All right, I raised and supported the vehicle. I'm going to remove the wheel. I'm using a 21 millimeter socket and an air gun. If you don't have an air gun, you can use a breaker bar. Just crack the lug nuts free while the vehicle is still on the ground. All right, now I want to take the tire off. This one's stuck on there pretty good, so I'm going to put one lug nut on so the tire doesn't go flying and just hit it on the back side of the tire with a hammer. Break it free. Reason you leave the lug nut is so the tire doesn't go flying. Now take the lug nut off and pull the tire off.
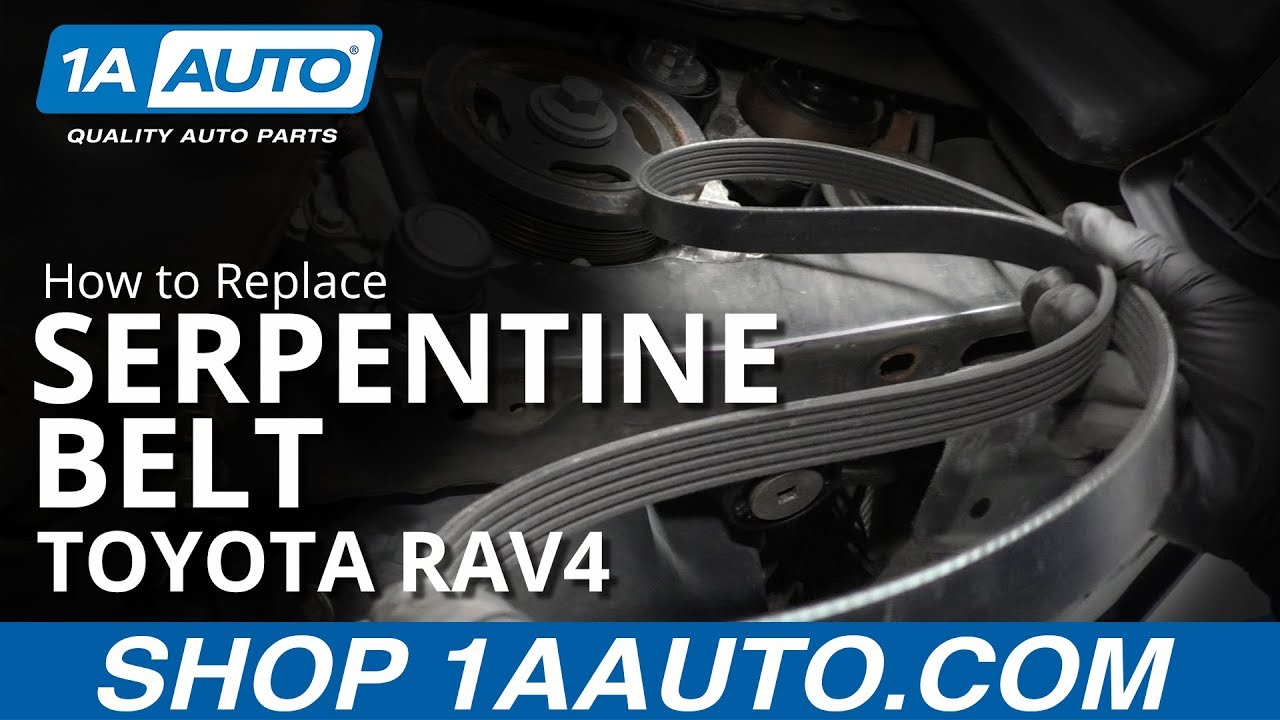
I want to take this pushpin out here, here, there's one here, and normally there's probably one here. This vehicle doesn't have that. I'm just going to use a trim tool. Pop these out. Pop the center out first. Pop those out just like that. Now we can take this panel off. Just slide it towards the back of the car. Now I'm going to use the belt tensioner tool with a 14 millimeter bit on the end of it and a socket. You can try to use a socket and a ratchet, but there's not a lot of room in here, so a belt tensioner tool would be more ideal. We're going to loosen this, pushing it towards the back of the vehicle. Then I'm just going to slide the belt off the water pump. Then loosen up on the tensioner and slide the tool out. Now I can slide the belt off the alternator, it's kind of hard to see up there, and off the A/C compressor and off the crank pulley, and pull the belt out.
We want to install this belt pretty much the same way the old one came off. I'm going to start with the alternator up top. Just make sure you get that over the alternator. You can try to do this from up top, but it's really, it does not seem like it's that easy to do from up top. Have this come down next to the tensioner and next to the crank pulley. You want it to go around the crank pulley right here. Coming down from the water pump. I'm just going to hold the excess belt right here next to the A/C compressor. I'm going to get the tensioner tool. Put this on the belt tensioner itself and loosen the tension on the belt and try to wrap it around the A/C compressor. All right, we're able to get that around there. Just make sure it's all around all the pulleys. Loosen up the tensioner and just double check. Everything looks good.
Now it's a good idea to just bump the starter real quick and just make sure, or start the vehicle and shut it off real quick, and just make sure that belt's all set. Then you can put the cover right on. We'll just take this panel, slide this back in position. Just like that. Take the pushpins, put the pushpins back in. Right there. Right here. Right here. Then if you had that one, put that one in there. Then you can put the tire back on.
Now install the tire. Take the lug nuts, install the lug nuts. Now I lowered the vehicle down to the ground so that the tire is just touching the ground. I'm going to torque these with a 21 millimeter socket and a torque wrench to 76 foot pounds. I'm going to do this in a star pattern. The reason you do it in the star pattern is so that the wheel gets tightened down evenly. Then I always like to go around again just to double check. Then you're good to go.
Thanks for watching. If you want the parts to do it yourself, check out 1aauto.com, the place for DIY auto repair.

How To Install replace The Air Conditioning Compressor Belt 2001-06 Hyundai Elantra 2-0L
Watch this video to learn how to replace the AC compressor belt on your 01-06 Hyundai Elantra with the 2.0L engine.
