How to Replace Serpentine Belt Tensioner 2002-12 Jeep Liberty
Created on: 2014-01-16
How to repair, install, fix, change or replace a broken, noisy, squeaky, worn or groaning serpentine belt tensioner on Jeep Liberty, years 04, 05, 06, 07, 09, 10, 11, 12, and 13.
-
step 1 :Remove the serpentine belt
- Pop the hood.
- Locate your serpentine belt routing diagram
- Use your 15 mm socket and ratchet to release tension from the serpentine belt tensioner.
- Remove the serpentine belt.
- Observe your serpentine belt.
- Replace your serpentine belt if you find any cracks on the smooth side, or you noticed any snapped cord poking out of the belt, fraying or excessive wear.
-
step 2 :Remove the serpentine belt tensioner
- Use your 13 mm socket and ratchet to unbolt the serpentine belt tensioner.
- You may need to employ a breaker bar to get the bolt loose.
- Remove the old serpentine belt tensioner pulley and set it aside.
-
step 3 :Install the new serpentine belt tensioner
- Mount your tensioner pulley.
- Use your 13 mm socket and ratchet to secure the new serpentine belt tensioner from 1A Auto.
-
step 4 :Install the serpentine belt
- Procure your serpentine belt diagram
- Start looping the serpentine belt around the pulleys.
- With your 15 mm socket and ratchet, release the tension from the serpentine belt to loop the serpentine belt over the last pulley.
Tools needed
-
13mm Socket
15mm Socket
Ratchet
1/2 Inch Breaker Bar
Brought to you by 1AAuto.com, your source for quality replacement parts and the best service on the Internet. Hi, I'm Don from 1A Auto. I hope this how-to video helps you out and the next time you need a part for your vehicle think of 1AAuto.com. Thanks.
In this video, we show you how to the replace a serpentine belt tensioner on this 2006 Jeep Liberty with the 3.7 liter V-6 engine and it's the same part and process on these vehicles with this engine from 2002 to 2012. The items you'll need for this is a new belt tensioner from 1AAuto.com, 13 mm and 15 mm socket and ratchet with a piece of pipe for leverage. Your belt is located right at the front of engine and the tensioner is right here. You just want to put a 15 mm socket and ratchet on that tensioner and pull back on it and that will loosen up the slack on the belt and allow to pull the belt off each of those pulleys. On your tensioner, you want to remove this 13 mm bolt right here and you can see Don uses a piece of pipe for some added leverage here to help break it free. We'll just fast forward as he removes that bolt. Once the bolt comes out, the tensioner will pull right off.
On the left is the old tensioner. On the right is new one from 1A Auto. You can see that they're identical and will mount exactly the same. You want to line up this end in with this bolt right here. Then once you have the tensioner in place, replace that 13 mm bolt. We'll just fast forward as Don tightens that up. Now when you go to put your belt back on, you're going to need this belt routing diagram that shows you exactly how the belt should look. You just want to follow this and make sure that your belt once you get it back on all the pulleys, it looks just like this. Just use this as a reference. It's hard to show it but you can see Don's going to feed the belt into place and put it onto each of those pulleys. Once you have only one pulley left to put the belt onto, get your ratchet and put that 15 mm socket and ratchet on the tensioner, pull it back, put the belt down on the last pulley and then use the tensioner still to make sure that your belt is on each of the pulleys all the way and that there's no chance of them slipping off and that everything is in place. Once you know everything is in place, just carefully remove the socket and ratchet and you are all set.
We hope this video helps you out. Brought to you by www.1AAuto.com, your source for quality replacement parts and the best service on the Internet. Please feel free to call us toll free 888-844-3393. We're the company that's here for you on the Internet and in person.
Shop Products


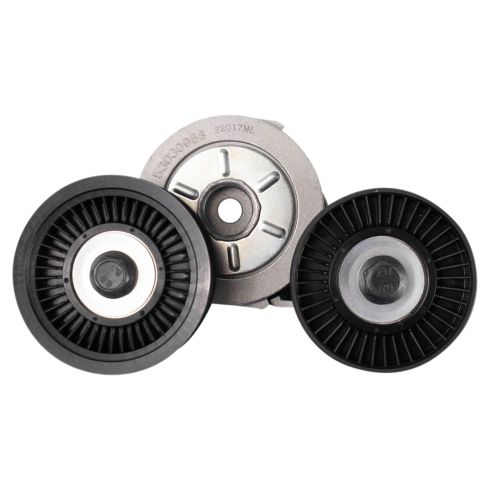
Jeep Dodge Ram Chrysler Mitsubishi Accessory Drive Belt Tensioner TRQ BPA03798
Part Details:
- Pulley
- 1.1 in
- 1.02 in
- 17 mm
- 77 mm
- 1
- Silver; Black
- 17 mm
- 3.03 in
- Smooth, Grooved
- 2.99 in
- 0.67 in
- 0.67 in
- Aluminum & Thermoplastic
- 76 mm

How to Replace Serpentine Belt Tensioner 2002-06 Chevy Suburban 1500 V8 5-3L
How to repair, install, fix, change or replace a broken, noisy, squeaky, worn or groaning serpentine belt tensioner on 02, 03, 04, 05, 06 Chevy Suburban
