
How to Replace Serpentine Drive Belt Tensioner 2005-08 Honda Pilot
Created on: 2017-08-08
This video will show how to remove and install the serpentine belt correctly, and also how to replace the serp belt drive tensioner if it's worn or broken
-
step 1 :Removing the Serpentine Belt
- Familiarize yourself with the route of the serpentine belt
- Insert the 14mm socket and breaker bar into the tensioner
- Turn the tensioner clockwise to loosen the belt
- Pull the belt off the alternator
- Release the tensioner
- Pull the belt off by hand
-
step 2 :Removing the Tensioner
- Remove the two 12mm bolts from the tensioner pulley and idler pulley
- Remove the tensioner assembly
-
step 3 :Installing the Tensioner
- Insert the tensioner into place
- Tighten the two 12mm bolt to the tensioner and idler pulley
- Torque the lower bolt to 16 foot-pounds
- Torque the center bolt to 33 foot-pounds
-
step 4 :Reinstalling the Serpentine Belt
- Loop the belt around the crank pulley
- Bring it around the A/C Pulley
- Pull the belt over the alternator
- Bring it around the idler pulley
- Pull the tensioner clockwise with the 14mm socket and breaker bar
- Bring it around the power steering pulley
- Release the tensioner
Tools needed
-
12mm Socket
Socket Extensions
Torque Wrench
16mm Socket
Ratchet
1/2 Inch Breaker Bar
To remove your drive belt, you need to place a 14mm socket with a breaker bar on the auto tensioner to relieve the tension. Take a 14mm socket and a breaker bar, put it down in here. Place it over the auto tensioner. Pull to the rear of the car to relieve the tension on the belt. It's got significant tension on it. Feed it off the top pulley. Release the tension on it so we can take the breaker bar out. Got to guide the belt off of the pulleys.
There are two bolts holding on the drive belt tensioner. One is through the idler pulley and then there is a bottom one through an ear on the tensioner. It is sort of hidden and I'm using a mirror to see it. It's kind of something you'll have to do by feel to get up in there. This bolt on the bottom is tricky to get to. You're going to have to kind of feel for it. In fact, it might be easier. I'm going to put, it's a 12 millimeter bolt, I'm going to put the socket and extension on it first and then bring the ratchet down. You can see where the extension is now. It's that far down. Sneak our ratchet down. Do the rotation of it. Use the extension and 12 millimeter shallow socket with a smaller ratchet now that's broken free. I can actually get it loose enough that I can spin it with my fingertips.
I'm going to get it just so it's like fairly loose but not all the way out because I want to loosen the central bolt of the idler pulley, which goes through the center of the drive belt tensioner. That has a lot more tension on it or torque so when I break it free, I'll leave the other bolt in there so the auto tensioner doesn't spin on me while I'm trying to remove it. I'm going to use a breaker bar and a 12 point socket, 14 millimeter to help me get onto that nut or actually it's a long bolt. There it is. I'm going to switch to a shorter ratchet just because now that it's loose I don't need as much leverage and I can unbolt it quicker. Using my fingers and wrist to turn it out. It doesn't have much resistance but I do need to use the ratchet on it. Now I'm loosening the center bolt on the auto tensioner, the drive bolt tensioner by hand so it's real loose. So that's free.
All right, now it's just caught on that lower one. This lower bolt is fairly loose. Sometimes you've got to take just the bare socket in your fingertips to help loosen it. There I got it so I'm going to reach in there with my other hand, grab the drive belt tensioner and pull my left hand out with the bolt. That's our little bolt that's in there. It's very long. Now I'm going to lift out the auto tensioner. I feed it out of the engine department. There it is. That's a drive belt tensioner assembly. Here's our old drive belt tensioner we took off the vehicle. This one is in okay shape. Bearings aren't really noisy but the tensioner pulley does have a lot of rubber bits stuck to it so we put a new belt on the vehicle and that's why we want to change the tensioner so it's nice and smooth.
We have our new drive belt tensioner from 1AAuto.com. The pulleys are brand new. There aren't any wear marks on them. This is loose because as you install it, it will get tighter. Flip them both over here. The same mounting tabs. The same style bolts. This is a little bushing that just captures the bolt. It normally would sit down in that opening just like this here. This captures the bolt and keeps it from falling out while you're trying to install it. These are the same size. On the auto tensioner you'll use a 14 millimeter socket to move it. This here is a 14 millimeter socket on the old one. On the new one it is actually a 16 millimeter. Not a big deal. It'll operate in the same manner and keep your belt nice and tight on the vehicle.
Before we install it I'm going to pull this out a little bit. Give me a little more room to play with. I'm just going to feed it into the engine department around those hoses. The easiest way. Just push this hose aside. You can just see the mounting hole for the idler pulley. I'm going to get that threaded in first but I won't tighten it all the way. I'll just do it by hand and then I'm going to thread in the bottom bolt. I'm just holding it in place with both hands. I'm using one hand to start the threads on the central bolt through the idler pulley.
With that center bolt started by hand now I'm going to reach down in there and install this smaller bolt that goes through the ear of the drive belt tensioner. You can see it's pivoting on that central bolt. You may need to adjust the position of it to find the hole for the little ear on the bottom. I think it was like right about here. I'm going to try. All right, there it is. I'm just going to thread it in by hand. Just tighten the lower bolts. I was able to get it all in finger tight. If you need to you can use your socket and ratchet. Just bring it down till it's snug because it will be torqued.
Before I do that I'm going to finish installing the idler pulley bolt, which is a 16 millimeter socket. I'm using a ratchet on it. I'll get that seated and I'll also torque that. I'm going to torque the lower 12 millimeter bolt to 16 foot pounds. Torque the center bolt through the idler pulley to 33 foot pounds. This is a 16 millimeter socket.
Feed the drive belt around the crank pulley, making sure it's seated in the grooves, over and around the A/C compressor pulley. It's easier to route it up into the alternator pulley and pull it over the idler pulley so the smooth side is on the idler pulley. Feed the rest of the belt up to the power steering pulley, then use your breaker bar with 14mm socket to unload the tensioner by pushing to the rear of the vehicle and slide the belt onto the power steering pulley.
Thanks for watching. Visit us at 1AAuto.com for quality auto parts, fast and free shipping, and the best customer service in the industry.

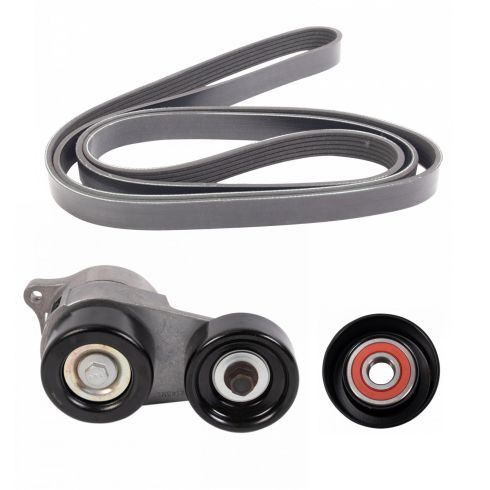
Honda Acura 3 Piece Serpentine Drive Belt Component Kit TRQ BPA05099
Part Details:
- 3 Piece
- (1) Serpentine Belt Tensioner Assembly with Idler Pulley
- (1) Serpentine Belt Idler Pulley
- (1) Serpentine Belt

How to Replace Tensioner 2000-08 Chevy Tahoe
Watch this video to learn how to install a new serpentine belt tensioner in your 2000-06 Chevy Tahoe.
