
How to Replace Side Rear View Mirror 1998-2011 Mercury Grand Marquis
Created on: 2012-05-16
Got a broken side view mirror? This how-to video will show you how to replace it!
-
step 1 :Removing the Door Panel
- Pry up the switch panel with a flat blade screwdriver.
- Pull the switch panel up and out.
- Disconnect the switch panel harnesses and set it aside.
- Pry out the caps on the door pull handle.
- Pry out the bezel behind the door handle.
- Remove the five Phillips screws that secure the door panel.
- Lift the door panel up and off.
- Disconnect the two connectors and pull the panel free.
-
step 2 :Removing the Mirror
- Remove the three screws that hold the speaker in place. Pull the speaker free.
- Pry off the triangle panel near the mirror.
- Disconnect the mirror lead.
- Remove the three 11mm nuts that secure the mirror in place.
- Pull the mirror up and off.
-
step 3 :Replacing the Mirror
- Feed the mirror harness down through the door.
- Line up the mirror and press it into place.
- Replace the three 11mm nuts.
- Connect the mirror.
- Reconnect the mirror harness to the switch panel and test mirror. Disconnect the switch panel.
- Push the triangle panel back into place.
- Reconnect the speaker and the three screws that secure it.
-
step 4 :Replacing the Door Panel
- Put the harnesses through the door panel.
- Reconnect the two harnesses to the door panel.
- Line up the door panel and push it into place.
- Replace the five screws in the door panel.
- Reconnect the harnesses on the switch panel.
- Push the switch panel down into place.
- Put the bezel behind the door handle and push into place.
- Replace the door pull handle caps.
Tools needed
-
Flat Blade Screwdriver
Phillips Head Screwdriver
Ratchet
Needle nose pliers
11mm Socket
Brought to you by 1AAuto.com. Your source for quality replacement parts and the best service on the Internet.
Hi, I'm Mike from 1A Auto. I hope this how-to video helps you out. Next time you need parts for your vehicle, think of 1AAuto.com. Thanks.
In this video, we're going to show you how to replace the driver's side mirror on this 2000 Grand Marquis. It would be the same for the Grand Marquis for the passenger's side. Also, a similar process for all the Ford Crown Victoria as well as the Mercury Marauder. There are some differences in how you remove the door panel for different years, but it's pretty much the same procedure. Tools you'll need are flat blade screwdriver, Phillips screwdriver, needle-nose pliers, and an 11mm deep socket with a ratchet.
Start with a flat blade screwdriver. Carefully pry up your switch panel here in front. Then I just pull back and forth. I'm pulling up with this hand and just shaking it back and forth. It comes up and out, and then you go in with your flat blade screwdriver, pry up here and take off your mirror switch. Then make sure you can kind of move these connectors; then there's just little tabs that lock them on. Move that one. Pry up on the other side. Pry out down here and pull out on this connector to get it started. Pull with my finger on this one. Right there. Carefully go in, and these are just little caps, pry that one out. If you go in from the bottom, if you do scratch something it's more difficult to see. Then right here, put your screwdriver in up top. You can actually see a little space where the screwdriver goes and pry this bezel out.
Now there's five Phillips screws to remove. One there, one there, and there, one right there, and then one right down here at the bottom. Now, I'm going to fast forward as I remove those five screws. They're obviously easy to remove because they're just screws, but they do try and kind of stay in there, so as you're pulling them out, or as you're turning them counter clockwise, you might have to kind of reach in with your fingernail and pull them out. Otherwise, just make sure that if you can't get them out of the panel, just make sure that when you pull the panel off, and if you drop them, you just recover them before you go to the next step.
Once you have those screws out, then just lift up on the panel and bring it out. On the back side there's two connectors. Pull back on a couple of tabs here. Disconnect that and then pull up on this tab and disconnect that, and your door panel is off. Just fast forward. Use my Phillips screwdriver, remove three screws that hold the speaker in place, remove it, unplug it, and it allows you to pull your water shield down. For your mirror there's this panel here. It's held in by a clip here. What you can do is pry it off and pull on that clip. Pull it out some so you can get your pliers in behind to pry it out, and this pulls up and off. Pull this down if you want to. Your lead then connects right back in here.
If you feel, you'll feel a tab that you push with your thumb, then pull the lead off. It's down in there like that. It's just a little tab, push down with your thumb, pull it out. You'll need an 11mm, and you'll need a longer or a deep socket and then there's three nuts right here. I'm going to fast forward here as I remove those three nuts. Just one word of warning, as you're taking the nuts off just try and keep them in the socket and pull them out just so you don't drop them down into the door. If you do drop them down into the door, it's not a big deal. You can reach down in there through the speaker hole.
Once you have the bolts out, the mirror just sticks on here a little bit. Pull it up and off and feed the connector back up and in. The mirror's off. Your new mirror from 1A Auto, it's going to have this exact same connector. It comes with a black back. Obviously, you can put it on, install it as it is, and it'll make a great functional replacement. If you wanted to paint this cover to match, you can do that. You can be as crude as just going to your local hardware store and finding a color that matches. Or if you want a better match, if you want to find an automotive parts store that has a paint department, usually using your VIN, they can help you find your color code, and they can mix up some paint to match. Put it in an air-charged spray can and you can finish it to match your car better.
Obviously, it's going to install just like the original. You'll first put your lead down in. You want to kind of feed it into the leader and then right straight down. Make sure it comes out, and it's on the inside of the window channel. Then put your mirror in place. I usually put the mounting nuts right into the socket. Put it in and start them on. I'll speed it up here again as I just start the three mounting nuts on there and then tighten them up. When you tighten them up, you want them nice and firm, but don't over tighten them. You could break the mirror. I'll put this back in place. Put that on. Pin back in. Take your harness connector and peek right in there and plug it back together.
Just a test real quick. We can plug our mirror switch back in, turn the key on, and make sure that the mirror is working. It is. Put your water shield back up in place and reinstall the speaker, make sure you reconnect the speaker first. Then use the three Phillips screws to remount it. Your door panel is designed with hooks on the bottom. You want to lift up your harnesses, and you can see that the bottom hooks clip on and you can put your trunk opener, plug that in. Put this upper plug in. Lift your door panel up. Make sure that these harnesses are coming up through. Make sure your door lock comes through. Lift the panel up a little bit and then it just slides right down on.
I'm going to speed it up here as I put the five Phillips screws back in. The long ones go through the panel, the shorter ones go through that door pull. Just another tip, if you have trouble getting one in, you might want to take the panel back off. On some of them there's clips in behind and sometimes those clips can get shifted, which makes it hard to get the screws in, but they should all pretty much go right in. Reconnect our harness leads and our mirror switch, then just work this right down in. Push it against the door and down in. This goes right in, locks in place. These go back in place.
We hope this helps you out. Brought to you by www.1AAuto.com, your source for quality replacement parts and the best service on the Internet. Please feel free to call us toll free, 888-844-3393. We're the company that's here for you on the Internet and in person.
Shop Products


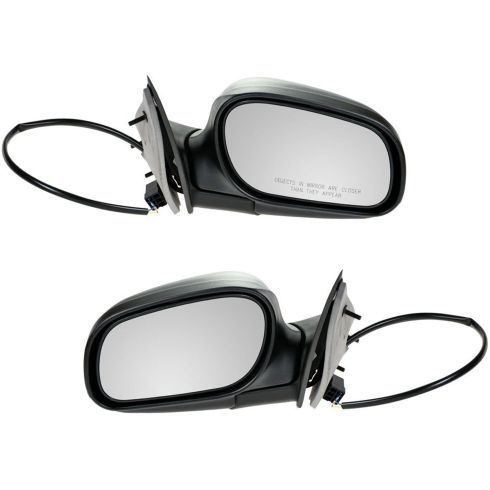
Ford Mercury Driver & Passenger Side 2 Piece Mirror Set TRQ MRA09161
Part Details:
- 2 Piece
- Paint to Match
- (1) Passenger Side Mirror
- (1) Driver Side Mirror
- Electric
- 16.93 in
- 3
- 3
- No
- Black
- No
- No
- Manual
- No
- Plastic
- No
- No
- Without Memory
- Yes
- No
- Textured
- Black
- No
- Smooth

How to Replace Mirror 2004-08 Chevy Malibu
Need to replace the side view mirror on your 04-08 Chevy Malibu? Learn how in this video!
