
How to Replace Side Rear View Mirror 2005-15 Toyota Tacoma
Created on: 2020-04-08
Check out this video to learn how to install new side mirrors from TRQ made to precisely fit your 2005-15 Toyota Tacoma
Tools needed
-
Phillips Head Screwdriver
Drill
10mm Socket
Ratchet
Trim Tool Set
Pocket Screwdriver
So, one of the first steps to get this mirror off of here is you're going to take off this piece of plastic right there. The best tool for this would be a plastic trim tool. And I'll go ahead and come in between here, just pop this right off. At this point, you can see one of the mounting nuts. You could sort of see another one, but you can't really see the third. So, we're going to end up taking off this door panel. The next thing we're going to do is grab our small pocket screwdriver. You're going to come right inside here where this door handle is, you can see a little flippy door, go ahead and open that up. It's going to expose a Phillips head screw right inside there. There it is. Set that aside. We're going to move along to the next trap door, which is right inside this door handle. Exposes another Phillips head screw, go ahead and remove that one as well. The next thing we're going to do is try to get this up. You want to come from the front. Obviously, I can't get this trim tool in there, so I have to get it started with my tool. So, I'm going to be careful. Come right like this, it pops right up. So, now, we're going to get this off of here. Just press on this tab. You should be able to kind of pull like that. It pulls up the top portion and then it kind of separates. It's a two-piece system. Continuing on with that pocket screwdriver, you're going to push in right on the center of this little clip and then take the rest out. The next thing we're gonna do is use our trim tool. Come down along the door panel. Just try to separate it like that. It's just a little push clips in there. There we are. Carefully lift it up and remove your door panel.
The next thing we're gonna do is grab this connector, separate it. I always take a peek. Those look good. You can see all three 10-millimeter mounting nuts. We're going to remove those. Of course, on the last one, make sure you hold that mirror. There we are, friends. Okay. So, obviously, the mirrors are a different color. Basically, they're the same overall shape. So, there's nothing really to worry about there. The connectors are the same. If you are worried about the paint color, go ahead and match it to the color of your vehicle. At this point, we're going to take our new mirror. Take off these little tabs right here. We're going to put the wiring right through the door first, super important. Now, just make sure you don't chisel up any of that paint with these studs. Go ahead and push it in. Hold onto it until you get those nuts started. Let's go ahead and snug these up. I always like to use a nice ratchet, that way there, I can be sure of how tight these are. The last thing you want to be doing is driving down the road with your mirror vibrating all around. So, go ahead and bottom them out until they're nice and snug. Okay. Just bottomed out, a teeny bit more, and that's it. Okay. Bottomed out. Same. There we are. The next thing we're going to do is connect our electrical connector. It goes right in. This looks great. I like to just tuck the wire in just so it can't get pinched anywhere.
The next thing we're going to do, grab this wire, go ahead and pull it through like that, and then take your door panel, slide it over the top up along the window area. Give it a couple bonks so it's down. Now, we're just going to go around the whole edge, making sure we bonk it in. Make sure it's completely seated the whole way around. If for some reason it's not, maybe one of your pins is loose. This looks great. Don't forget your little push clip here. You push it in with the center out and then you push in on the center. It's time to put in our two screws. The big old silver one goes on the bottom here. It's kind of your anchor one. Make sure it's nice and snug. Cover that hole. Do the same up here. The next thing you want to do is make sure you grab this wiring harness and have it in the unlocked position so it's fully expanded. And then at that point you would go ahead and press in the center and then press in the outside, it should lock in well. Go ahead and take it. You start with the backside and then you roll down on the front. Let's go ahead and get this cover back on there now. There it is. Now, before we go ahead and go away, let's test it to make sure it functions properly. And the process for this would be the same on the other side of the vehicle. Up, down, left, right, I love it.
Shop Products


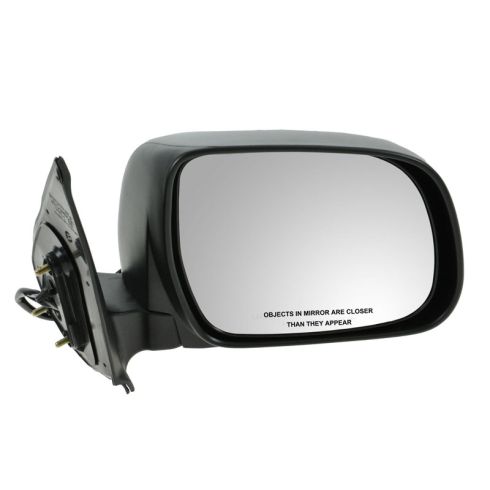
2005-11 Toyota Tacoma Passenger Side Power Paint to Match Mirror TRQ MRA05481
Part Details:
- Paint to Match
- Electric
- No
- No
- Clear
- No
- Curved
- Yes
- 3
- Black
- No
- No
- No
- No
- No
- No
- No
- No
- Manual
- No
- No
- No
- Black
- No
- 3
- Plastic
- 14.96 in
- No
- Smooth
- Smooth
- Yes

How to Replace Mirror 1997-99 Toyota 4Runner
If the side view mirror is broken, this video shows what the steps are to replace it
