
How to Replace Side View Mirrors 2012-14 Toyota Camry
Created on: 2019-03-14
How to repair, install, fix, change or replace a broken, smashed, cracked, or shattered side view mirror on 12, 13, 14 Toyota Camry
-
step 1 :Removing the Door Panel
- Pry up the master switch panel with a trim tool
- Disconnect the wiring harness with a flat blade screwdriver
- Remove the Phillips screw from the switch panel opening the door panel
- Remove the Phillips screw from the door handle
- Pry the arm rest up
- Remove the Phillips screw the arm rest opening
- Remove the sail panel behind the mirror with a trim tool
- Pry the door panel out from its clips with a trim tool
- Remove the interior door handle from the door panel
- Disconnect the courtesy light wiring harness
-
step 2 :Removing the Side View Mirror
- Disconnect the mirror wiring harness
- Hold the mirror by hand
- Remove the three 10mm bolts from the mirror
- Remove the mirror
-
step 3 :Installing the Side View Mirror
- Insert the mirror into place
- Tighten the three 10mm bolts to the mirror
- Connect the wiring harness
-
step 4 :Installing the Door Panel
- Connect the courtesy light wiring harness
- Insert the interior door handle into the door panel
- Lift the door panel into place
- Press the door panel into its clips
- Press the sail panel behind the mirror into place
- Tighten the Phillips screw to the arm rest opening
- Press the arm rest on
- Tighten the Phillips screw to the interior door handle
- Tighten the Phillips screw to the switch panel opening
- Connect the master switch panel wiring harness
- Press the master switch panel into place
Tools needed
-
Socket Extensions
Phillips Head Screwdriver
10mm Socket
Ratchet
Trim Tool Set
Hi, I'm Mike from 1A Auto. We've been selling auto parts for over 30 years.
Hey, everyone. Sue here from 1A Auto. And today we have our 2013 Camry in the shop. And I'm going to show you how to replace the driver's side outside mirror. If you need this part or any other part for your car, click the link below and head on over to 1aauto.com.
To access the side mirror, we're going to take the door panel off. We're going to take the main switch bezel off. Just going to pry up on the connectors. Disconnect the two connectors here. We've got the little one for the mirrors, and this switch right here is kind of tricky, so you've got to push in on that and lift up on the outer part of the housing, like that. And the switch comes off.
Now we have a Phillips screw right here. And we've got to take the plastic bezel right in here off with a little screwdriver. Another Phillips screw is here. And I think I have to take this handle off. You've got plastic clips: one, two, three. Well, that one's broken. And then a Phillips screwdriver. And now we should be able to grab the door panel and just pry on it wherever the plastic door pieces are. This one piece. And then you've got the door marker right there that just automatically came out. Someone's been in this door.Whoever prior owned it and they broke every clip I could find. Disconnect it. Push on that little tab.
If one of the door pieces, these little prongs come off, they're real easy to attach. Just bring it right back on there and snap it in place. Once you have the door panel off, you're going to disconnect the electrical connector right here. There's a tab. Push in on it and lift up. Then you have three mounting bolts and a 10mm socket. And with our 10mm socket, you've got to undo all three bolts. Those mirrors come with mounting bolts. These are actually plastic screw into plastic screws. We're going to hold onto that mirror and undo this last one. There's a clip right here--look at that. Bend that down and slide it out. There we have our driver's side outside mirror.
Now we have our new mirror. I'm going to bring right on the outside. Fish the wire through that opening hole. Line up the three guide pins. Apparently I can't guide it in there. There we go. And push until that clip snaps on. It's kind of tough with the actual new foam insulation. I'm just going to hold it until I tighten this one up. And the other two up. This being plastic and screw-type mounting, I strongly recommend doing this by hand. Electric drills have more power. If you go too fast too soon, you can actually crack all the housing, so this is definitely a by hand application.
Now just even out the mounting. Take your plug and reconnect it. And now put our panel back on. Make sure you put that door, marker door harness through that slot. And we're going to bring it up. I'm going to bring this through the actual door panel like that. Make sure your harness here, main switch, is out. And start lining up all the top, the window. Make sure that wire's still on the bottom. Just get a look at this. There's a real small little tight lip on this. Here we go. Push down. Once you get it over that lip on the top of the door panel, make sure this wire hasn't fallen back out. Push it right through there. That's clear, and then you can guide your pins on the side. Snap them in all the way around.
I like to make sure it's snapped all the way in before I start bolting things down. You've got three mounting screws: two long chrome and a little small black one. The black one goes on the handle, so we'll go right there first. Then you have the two silver ones. Go right here. Put our main switch back on. Make sure that outside housing that slides locks in. The mirror switch.
Before we guide that on, we'll put this one on. This is the actual arm rest. You've got these prongs back here that have to line up. There we go. I'm going to put our plastic trim back in. You've got to line up all those little body clips. And then the last thing, we have our marker light. Turn it on and hook it in.
Hi. Didn't see you there. Now our last step is to make sure that the mirror works and confirm it's all together. The key is in the on position, and it works in all positions motivated left and right. Adjust it to your liking, and you're ready to go down the road.
Thanks for watching. Visit us at 1aauto.com for quality auto parts, fast and free shipping, and the best customer service in the industry.
Shop Products


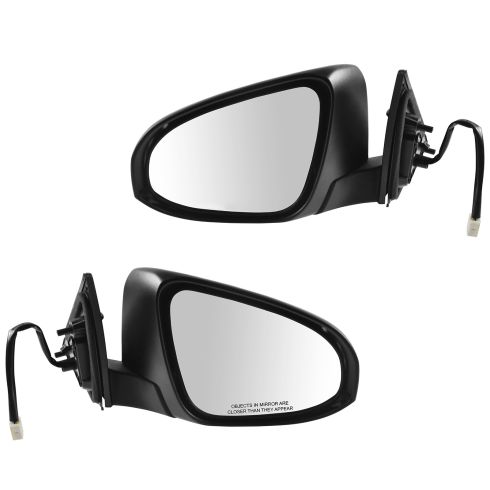
2012-14 Toyota Camry Driver & Passenger Side 2 Piece Mirror Set TRQ MRA09290
Part Details:
- Paint to Match
- 2 Piece
- (1) Passenger Side Mirror
- (1) Driver Side Mirror
- Yes
- Electric
- 6.3 in
- 5
- 3
- No
- Black
- No
- No
- Manual
- Plastic
- No
- No
- Without Memory
- Yes
- No
- Textured
- Black
- No
- Smooth

How to Replace Mirror 1997-99 Toyota 4Runner
If the side view mirror is broken, this video shows what the steps are to replace it
