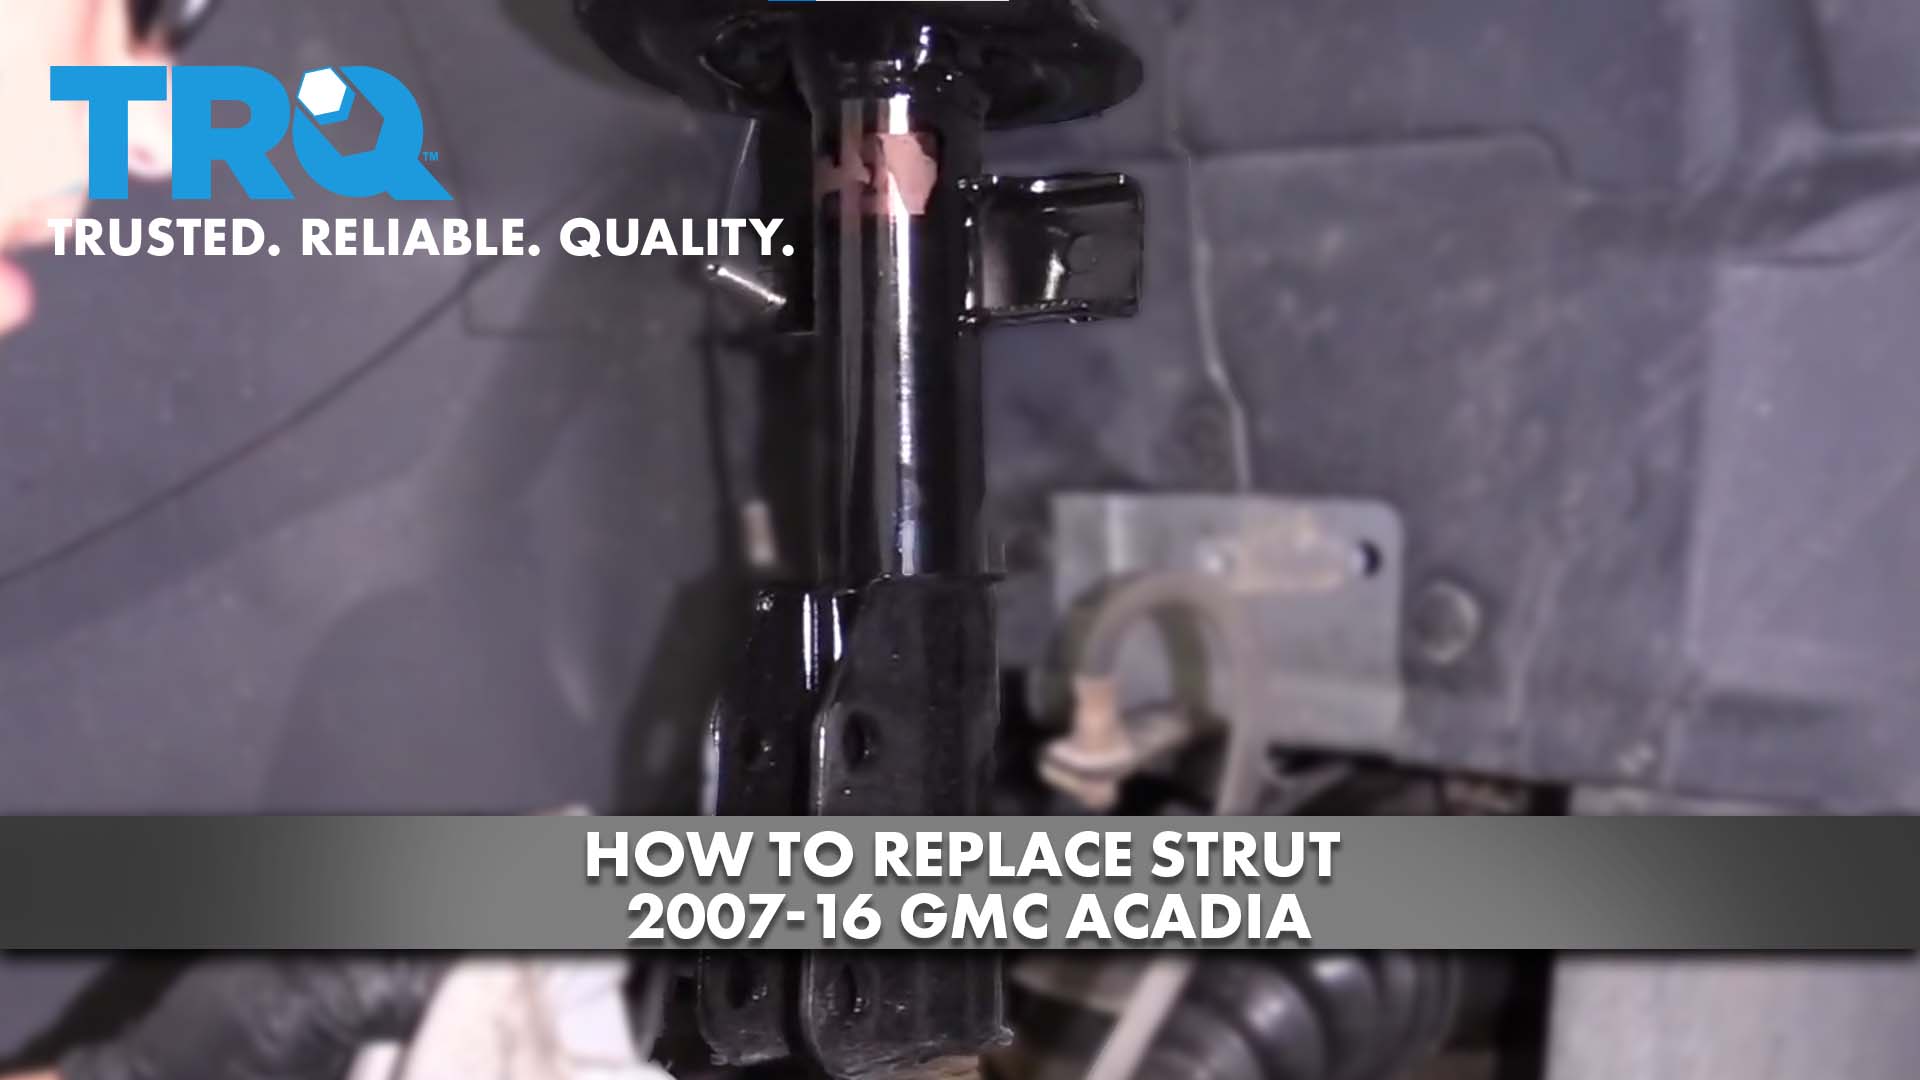
How To Replace Strut 2007-16 GMC Acadia
Created on: 2020-08-17
This video shows you how to install a new front strut assembly on your 2007-16 GMC Acadia.
Tools needed
-
24mm Socket
15mm Wrench
Torque Wrench
Hammer
Socket Extensions
Rust Penetrant
15mm Socket
18mm Wrench
Pry Bar
Jack Stands
Flat Blade Screwdriver
Socket Driver
8mm Socket
Wheel Chocks
10mm Socket
Ratchet
Floor Jack
Swivel
22mm Socket
I'm going to remove the wheel. Use a 22-millimeter socket, and then pull the wheel off. I'm just going to use a little rust penetrant. There's a little bit of rust on the stud. Take this wire off right here. There's a little retainer there. You might need a pry tool to get that off. And then there's one on the side here. Take an 18-millimeter wrench, and you can loosen up the nut, and the stud is going to spin, so you want to use an 8-millimeter socket. Put it on the stud. You can try to loosen this up with an impact, but the stud is just going to spin. And take the nut off, then you can take the stud out, just like that. Take these two nuts off. Use a 24-millimeter socket. Now, we're going to take these bolts out. Just use a hammer and give it a tap. There we go. Do the same for the other one. There we go. Right. So that I don't put too much tension on the brake hose itself, I'm going to take this bracket off. Just use a 10-millimeter socket. Take this bolt out. And you don't want to bend this hose too much, but that'll give you a little slack. Then we can slide the knuckle out. Now, I've got to take the wiper arms off. I'm going to use a straight blade screwdriver. Just get underneath the clip right here. Take that nut off. Use a 15-millimeter socket. Take that off, and just grab the arm. Just rock it back and forth, slide it off. And you're going to do the same with the other arm.
Take this fuse box cover off. Just use a straight blade screwdriver. Just push on the locks and slide them up out of the way, and then take this ground connection off. Just use a 15-millimeter wrench, loosen it up. And there's push clips along the front of the cowl. There should be a couple more on that side. Those are missing. Just use a straight blade screwdriver or a trim tool. Get underneath the clip and just slide those out. And then you're going to grab the cowl and just slide it over the stud right here, and then just try to raise up underneath. There's push pins holding it on. You can try to get underneath there with a trim tool, but normally, you can just pull it straight up, and then you can just pull it back there, and you can just raise it up out of the way. You don't necessarily have to take it out any further than that. I'm just going to put a little prop rod here. Just use a screwdriver or a trim tool. That works. And there's three nuts on the top. Just use a 15-millimeter socket. Take those off. When you get to the last one, you're going to have to support the strut underneath. All right. Now, I'm going to support from underneath. Get the last nut off and slide it down. Take these nuts off. Just keep one in your hand, then slide it in position. Then get the nuts started and then you can get the other ones started.
Now, we're just going to leave these on like this. We'll leave those loose. It's going to be easier to install it from down below, and then we'll tighten these up last. Then I'll take the knuckle and just line it up. You're going to have to pull it up a little bit and try to line the bolt up. There you go. Get the other one in. Just give it a little tap. You don't have to hammer it in all the way. And take the nuts. Get those started, and then we can tighten these down. Then we can torque these nuts to 144 foot-pounds. All right. Now, take the sway bar link and line it up. Get the nut on, and I'll use an 18-millimeter wrench to hold the stud, 18-millimeter socket. Tighten this up. Now, I'll torque this to 59 foot-pounds.
Now, the ABS wire, slide this in position right there and right there. Now, just take this brake hose bracket. Line this back up. Put this bolt on. If you felt uncomfortable taking this line off or this bracket off, you could always take the caliper off and hang the caliper on the strap assembly, and tighten this bolt down. Put the tire on. Now, I'm going to torque these lug nuts to 140 foot-pounds in a cross pattern or a star pattern to tighten the wheel down evenly. Now, I'll go around again. Just double-check. Now, we can tighten these down. Torque these nuts to 33 foot-pounds. All right. Now, I can take this cowl, and if any of these push pins came out down below, transfer them over and slide this back in position, and just line it up. And that looks good. You can take some of these push pins and then reinstall these. It should be four of them. And take that fuse box cover, put it back on. Now, I can reinstall the ground jumpstarting terminal, get that started, and just snug it up. That's good. Now, take the wiper arms and line them up. Try to put them back where they were. If you had to, you could mark them before you took them off, and put the nuts on. While holding the arm, tighten the nut down, snug it down, then put the cover on. Do the same for the other one.
Shop Products


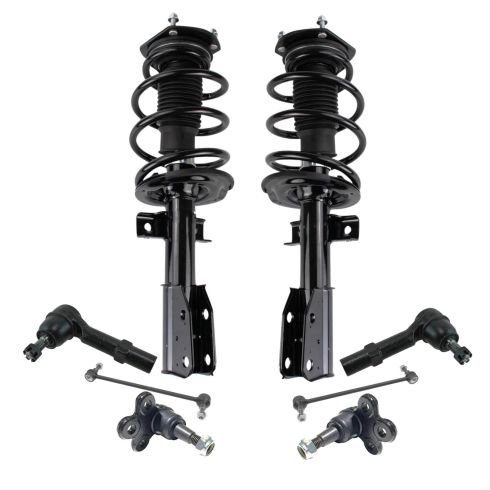
Chevrolet GMC Buick Saturn Front 8 Piece Steering & Suspension Kit TRQ PSA59640
Part Details:
- (2) Front Lower Ball Joints
- (2) Front Outer Tie Rods
- (2) Front Sway Bar Links
- (2) Front Strut & Spring Assemblies
- 8 Piece

How to Replace Strut Assembly 2000-05 Chevy Cavalier
Watch this video to learn how to replace the front strut assembly on your 00-05 Chevy Cavalier.
