
How to Replace Strut Spring Assembly 2002-05 Honda Civic
Created on: 2016-04-21
This video will show how to remove the wheel, outer tie rod, and brake caliper to access and replace the front struts on the 02-05 Honda Civic
-
We recommend an alignment after completing this repair
step 1 :Removing the Wheel
- Loosen the 19mm lug nuts with the vehicle on the ground
- Raise the vehicle with a floor jack
- Secure the vehicle on jack stands
- Remove the lug nuts
- Pull off the wheel
-
step 2 :Removing the Outer Tie Rod
- Loosen the 24mm lock nut with a 21mm wrench and hammer
- Make note of how far you turn the inner tie rod to turn it back for reinstallation
- Remove the 24mm nut from the outer tie rod end
- Remove the cotter pin with needle nose pliers
- Remove the ball joint nut
- Strike the steering knuckle with a hammer to loosen the outer tie rod
- Twist off the outer tie rod by hand
-
step 3 :Removing the Caliper
- Remove the 12mm bolt from the brake hose
- Remove the 10mm bolt from the sensor wire
- Remove the 12mm bolts from the brake caliper
- Pry the brake pads into the caliper with a flat blade screwdriver to push in the pistons
- Pull the caliper aside
- Secure the caliper up in place with wire ties
-
step 4 :Removing the Strut and Spring Assembly
- Remove the 21mm pinch nuts and 19mm bolts
- Remove the three 13mm nuts from the top of the shock
- Pull the strut out of the wheel knuckle
- Pull the strut down and out
-
step 5 :Installing the Strut and Spring Assembly
- Place the studs that are a further distance apart to the outside of the vehicle
- Insert the strut up into place
- Hand tighten the 13mm nuts to the strut
- Insert the wheel knuckle into the strut
- Insert the 21mm pinch nuts and 19mm bolts into place
- Torque the pinch bolts to 76 foot-pounds for 2001-2002
- Torque the pinch bolts to 116 foot-pounds for 2003-2005
- Tighten the 13mm nuts to 33 foot-pounds
-
step 6 :Reinstalling the Caliper
- Lower the caliper into place
- Thread 12mm bolts by hand
- Tighten bolts to 34 Newton Meters or 25 foot-pounds
- Tighten the 10mm bolt to the sensor wire
- Tighten the 12mm bolt to the brake hose
-
step 7 :Reinstalling the Outer Tie Rod
- Twist the new outer tie rod onto the inner tie rod
- Push the outer tie rod into the steering knuckle
- Fasten the castle nut onto the outer tie rod
- Tighten the castle nut to 32 foot-pounds
- Push the cotter pin through the castle nut
- Twist the cotter pin into place with needle nose pliers
- Make sure the inner tie rod is in its correct position
- Hold the tie rod with an 18mm wrench
- Tighten the 24mm lock nut
-
step 8 :Reattaching the Wheel
- Slide the wheel into place
- Start the lug nuts by hand
- Tighten the 19mm lug nuts preliminarily
- Lower the vehicle to the ground
- Tighten the lug nuts to 80 foot-pounds in a crossing or star pattern
Tools needed
-
12mm Socket
13mm Socket
Socket Extensions
Torque Wrench
Hammer
Rust Penetrant
Jack Stands
19mm Socket
21mm wrench
24mm Wrench
Flat Blade Screwdriver
10mm Socket
Ratchet
Floor Jack
Needle nose pliers
1/2 Inch Breaker Bar
Brought to you by 1AAuto.com, your source for quality replacement parts and the best service on the Internet.
Hi, I'm Mike from 1A Auto. I hope this how-to video helps you out, and next time you need parts for your vehicle, think of 1AAuto.com. Thanks.
In this video, we're going to show you front strut replacements. This is a 2003 Honda Civic. It's pretty much the same for any 2001-2005 Honda Civic. We show you on the driver's side, but the passenger's side is the same procedure.
Items you'll need include a new strut and spring assembly from 1AAuto.com, 10-21mm sockets, wrenches with ratchet and extension, breaker bar or tire iron, torque wrench, small hammer, needle nose pliers, penetrating oil, jack and jack stands. A front end alignment is recommended after this repair as well.
Remove the front wheel, held on by four 19 millimeter lug nuts. If you have a different style hub cap, you'll need to remove that, but just use a breaker bar or your tire iron and loosen the lug nuts while the tire is on the ground. Now raise and support the vehicle. Now remove the lug nuts the rest of the way, and the wheel and tire.
The outer tie rod is right here, 17mm nuts hold it in here. Remove the cotter pin. Then there's a 21mm lock nut, which we're going to use a nice 21mm wrench. As you're looking at it, you're turning it clockwise. We're just going to turn that about a quarter of a turn. If, when you turn this lock nut, you also turn the inner tire rod, just make note of it so that you can turn it back for the same amount, just so that you can get yourself in a good preliminary alignment. You will want to have your vehicle aligned after you do this repair.
Okay, if when you turn this lock nut, you also turn the inner tie rod. Just make note of it, so that you can turn it back the same amount, so that you can get yourself in a good preliminary alignment. You will want to have your vehicle aligned after you do this repair.
Remove the cotter pin. Normally, the pin should drive out easily, but it's giving us a hard time. We're going to use a little bit of penetrating oil. Let it sit for a bit. You may have to use a set of these cutting pliers. We really get half of the cotter pin off. A lot of times, if you've got it off and pretty well damaged, you can just pull the nut off and it will shear it right off as it comes off. Give the steering knuckle a few good taps with the hammer to break the tie rod free.
You want to remove this 12mm bolt and this 10mm bolt. They hold the brake hose and sensor wire. Remove the two 12mm bolts that hold the brake caliper in place, here and here. If necessary, use a flat blade screwdriver or a pry bar. Pry out on the caliper a little bit to loosen it up. Then you can take the caliper off.
Take a bungee cord and just secure your caliper back here, so that you don't stress the brake hose. Now we're going to remove the pinch bolts: 21mm nuts and 19mm bolts. 21mm socket and a breaker bar. Get the nuts started. Once the bolts start moving, then hold them, then take them off.
Now we're going to remove these three 13mm nuts. Hit them with a little penetrating oil first. If you have them, substitute in air tools. Leave one of the nuts in place loosely. Remove the two bolts. Then lift up and remove your last nut the rest of the way. Bring your stuff down and out.
The original strut from the vehicle, the new loaded strut from 1A Auto. You can see it comes with a top plate already attached. The spring is compressed and in there. You don't have to worry about compressing a spring or trying to get the bolt off the top plate. You can take out the old assembly from your vehicle, and bolt in the new assembly with a whole lot less hassle. Before you go to install just note that there's three studs, but they're not equi-distant.
There's a larger distance here. This goes toward the outside of the vehicle. Have one of your top nuts ready. Put the strut up in place and again remember that further distance is to the outside. Put one of the nuts on. Just put your other two on by hand.
Okay, you may need to twist your strut a little bit, prep in place. Make sure nothing gets caught up in there. Put one bolt through and put the other bolt through. Put the nuts on by hand. Torque these pinch bolts. There's different torque ratings for 2001, 2002. You want them at 76 foot-pounds and for 2003-2005 models it's 116 foot-pounds. I like to put the suspension up in the regular ride height, so I'm just going to jack it up. Take the weight off my support stands and torque them. With the vehicle still supported tighten these three nuts to 33 foot pounds.
Reinstall the caliper. Just remove your bungee or whatever you might have holding it. Make sure you have some grease on your pads to prevent squeaking. You may have to push your slides in a little bit to get it to go on. Tighten these to 25 foot-pounds.
Reinstall these brackets, 10mm bolt holds the sensor wire and a 12mm bolt holds the brake hose. Put them in and tighten them up. If you've got any grease or anything on your rotors, make sure you wipe them down.
Reinstall your tie rod. Put the castle nut on. Tighten the castle nut to 32-ft/lbs. Then tighten it any more you need to get the cotter pin through the hole in the tie rod. I can see the hole there. Probably need to go another 16th of a turn. Insert the cotter pin.
Use a pair of piers and bend it over. Appropriate size wrench to hold the tie rod; in this case, it's an 18mm. Then 24mm to get our lock nut on the back. Tighten it up.
Put your wheel back in place. Start your lug nuts. We'll tighten them preliminarily and then torque them when the vehicle is back down on the ground. Tighten your lug nuts 80-ft lbs and just cross in the pattern.
Thanks for tuning in. We hope this video helped you out. Next time you need parts for your car, please visit 1AAuto.com. Also check out our other helpful how-to and diagnosis videos.
Shop Products


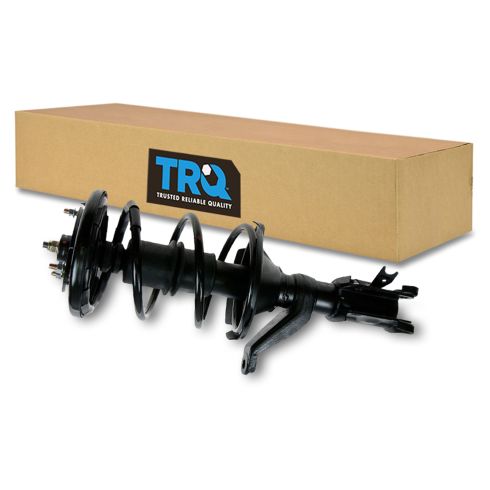
Honda Civic Front Passenger Side Strut & Spring Assembly TRQ SCA57496
Part Details:
- No specialty tools required
- Easy install - Pre-assembled, loaded struts

How to Replace Rear Shocks 2000-04 Nissan Frontier and XTerra
Check out this video and learn how to replace the rear shocks on your 00-04 Hyundai Elantra. 1A Auto shows you step by step!
