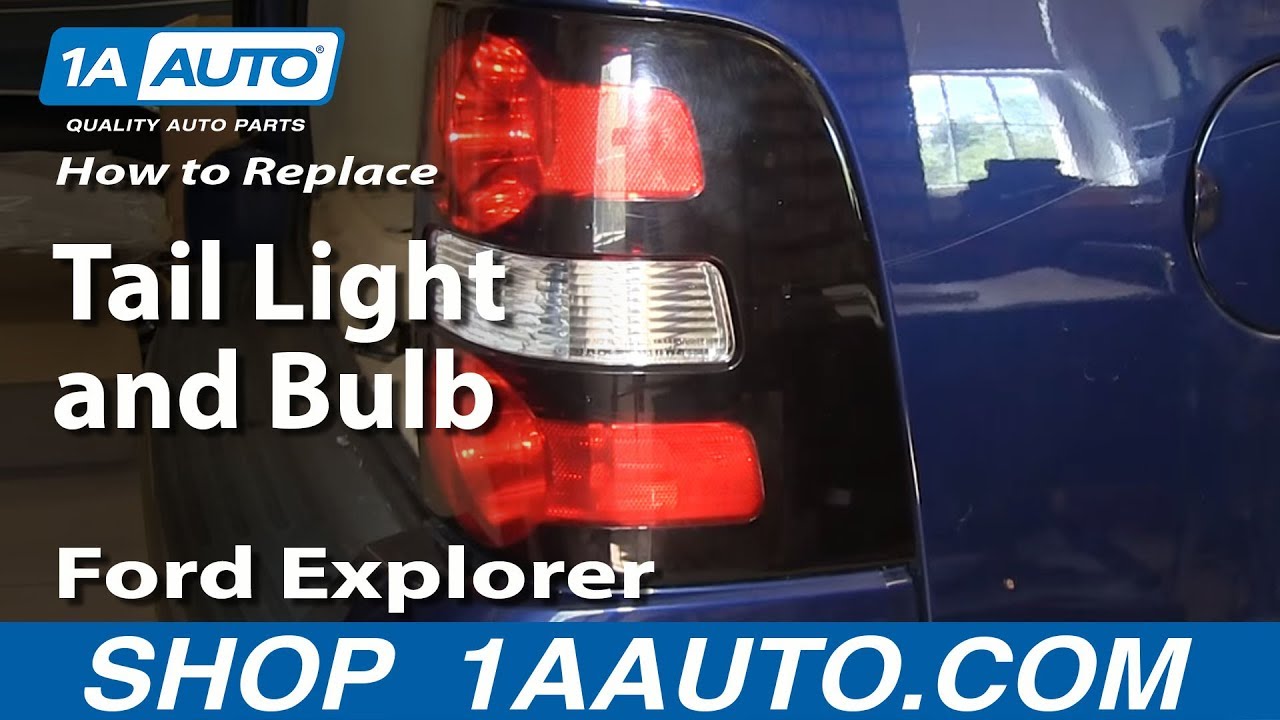
How to Replace Tail Light and Bulbs 2006-10 Ford Explorer
Created on: 2015-05-13
If the tail lights are broken or the bulbs need to be replaced, our experts in this video will show you how to do it yourself
-
step 1 :Removing the Tail Light
- Remove the two 8mm bolts from the tail light
- Pull the tail light out
- Disconnect the tail light wiring harness
-
step 2 :Servicing the Bulbs
- Twist the bulb socket counterclockwise out of the light
- Pull the bulb off of the socket
- Push on the new bulb
- Twist the bulb clockwise into the light
-
step 3 :Installing the Tail Light
- Connect the tail light wiring harness
- Insert the tail light into place
- Tighten the screws to the tail light
Tools needed
-
Socket Extensions
8mm Wrench
8mm Socket
Ratchet
Brought to you by 1AAuto.com, your source for quality replacement parts and the best service on the Internet.
Hi, I'm Mike from 1A Auto. I hope this how-to video helps you out, and next time you need parts for your vehicle, think of 1AAuto.com. Thanks.
In this video, we're going to show you how to service your taillight, both just changing the bulbs as well as replacing a complete assembly. At 1A Auto, we sell quality replacement assemblies if you back into something and break your taillight or something like that. You'll need a new taillight from 1aauto.com, as well as an 8mm wrench or socket and ratchet.
Open up your rear tailgate, and we'll show you on the passenger side but the driver side is exactly the same. There are two 8mm bolts that hold in the taillight. I'm going to use a 8mm socket, ratchet, and extension. A wrench would work as well. Remove those two bolts. With the bolts out, pull diagonally back and out at the same time. There are a couple pins that lock the light into place. Once you have the light free, if you're just looking to change the bulbs, all the sockets twist counterclockwise and come out. Then once you have them out, all the bulbs just pull straight out of the sockets and go back in. The bulbs have their part number printed on them so you can get replacements. If you need the unplug the harnesses from the sockets, there are just tabs on each socket. We press down on the tab and disconnect the socket from the harness.
Reinstall, either reconnect the harnesses or if your light doesn't come with the bulbs in place, put your old bulbs back in place. You just put them in and twist them in clockwise until they lock into place. You'll always hear a clicking sound when they connect. Then there are two pins that you look back in there, line them up into the body, and then give them a tap in. Set them and then put your two 8mm bolts back in and tighten them up nice in firm. Do not over tighten them.
Thanks for tuning in. We hope this video helped you out. Next time you need parts for your car, please visit 1AAuto.com. Also check out our other helpful how-to and diagnosis videos.
Shop Products


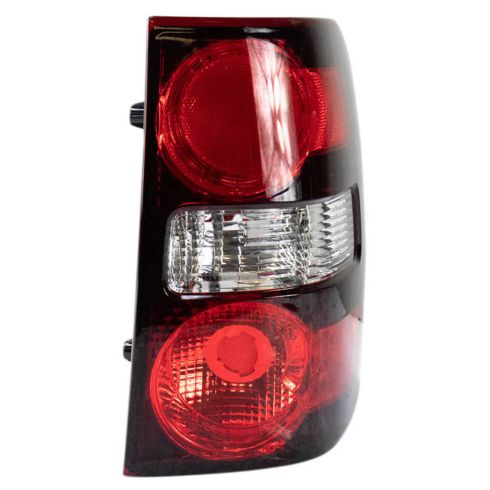
2006-10 Ford Explorer Passenger Side Tail Light Eagle Eyes FR458-U100R
Part Details:
- Features and Benefits

How to Replace Third Brake Light 2002-09 Chevy Trailblazer
Watch this 1A Auto instructional video to find out how to replace the third brake light on your 02-09 Chevy Trailblazer.
