
How to Replace Tail Lights 1995-96 Toyota Camry
Created on: 2012-04-25
Watch this video to learn how to replace and service the tail light and bulbs on your 95-96 Toyota Camry.
-
step 1 :Removing the Taillight Assembly
- Remove the three plugs on the inside of the trunk.
- Remove the two 8mm bolts.
- Disconnect the harness.
- Pull the taillight straight out.
- If any clips came with the light pry it off and put it back into place in the car.
-
step 2 :Replacing the Taillight Assembly
- Run the harness through.
- Line up the taillight pins and press it into place.
- Replace the two 8mm bolts.
- Reconnect the harness.
- Push the three plugs back into place.
Tools needed
-
8mm Socket
Ratchet
Needle nose pliers
Brought to you by 1AAuto.com, your source for quality replacement parts and the best service on the Internet.
Hi, I'm Mike from 1A Auto. I hope this how-to video helps you out, and next time you need parts for your vehicle, think of 1AAuto.com. Thanks.
In this video, we show you tail light replacement on this 1996 Toyota Camry. Pretty easy procedure. Tools you'll need are a pair of needle-nose pliers as well as an 8-mm wrench or socket and ratchet. You do need to remove the tail light if you're just looking to change a bulb, so this is helpful if you are just looking to change a bulb as well.
Well, open up your trunk, and right back here, there is three plugs. You can pull the insulation back, kind of reach in behind using a pair of needle-nose pliers and pull the pins out. There's two small bolts, here and here. The 8-mm wrench, once you loosen the nuts, the nuts come right off.
Right here is your connector for the lights. You push on a little tab and pull the connector out, and then, you can pull your light out and then push it to the outside of the car. I'm just reaching in, and I'm forcing the harness through. There's your light out. On my old light, this clip actually kind of came with the light, and I want to take it off. I'm going to use my needle-nose pliers again. Going to put them between the clip and the light and pry it off. That goes right back here. My new light from 1A Auto. You can see nice bright and shiny. Obviously, if you have a broken tail light, this is going to fix the problem. We'll take the harness, make sure we feed it through, and we'll set it in. There's a little piece right here. Just kind of pull it down and out of the way like that. That allows you to push the tail light back in and get those pins in place. Then, you can just kind of, after you get the pins in place, push this tab back up to where it goes as you put the light in.
Make sure you push it over and your studs are through and thread on all the nuts. Kind of put them together. Going to fast forward it here as I just thread those two 8-mm nuts back on and then tighten them up with my wrench, and you want to tighten them firm but not too tight. You don't want to risk cracking the new tail light. Reconnect the harness. Put the trim back in place. There's your new light from 1A Auto installed.
We hope this helps you out. Brought to you by www.1AAuto.com, your source for quality replacement parts and the best service on the Internet. Please feel free to call us toll free 888-844-3393. We're the company that's here for you on the Internet and in person.
Shop Products


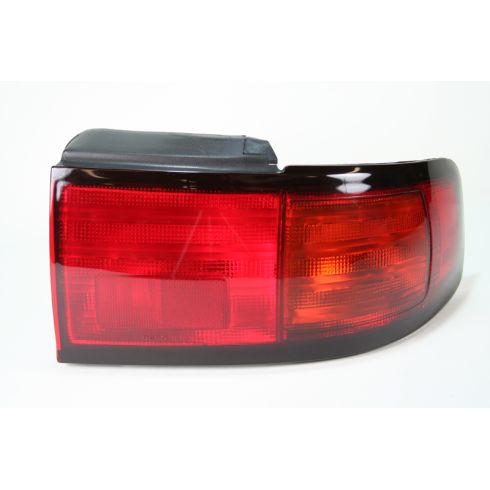
1995-96 Toyota Camry Passenger Side Tail Light DEPO 312-1906R-AC
Part Details:
- Features and Benefits

How to Replace Tail Light 2001-05 Honda Civic
How to install, repair, fix, change or replace a broken, damaged, burned out, cracked, faded, cloudy or chipped tail light / brake light on 01, 02, 03, 04, 05 Honda Civic
