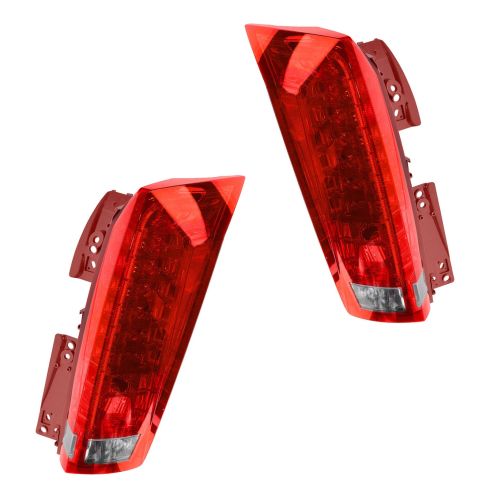
How to Replace Tail Lights 2010-16 Cadillac SRX
Created on: 2018-08-27
How to install, repair, fix, change or replace a broken, damaged, burned out, cracked, faded, cloudy or chipped tail light / brake lighton 13 Cadillac SRX
-
step 1 :Removing the Tail Light
- Pry up the trim button from the tail light trim and remove it
- Remove the trim from the tail light
- Remove the Phillips screws from the tail light
- Pry out the tail light
- Press the connector and remove the wiring harnesses
-
step 2 :Servicing the Bulbs
- Twist the bulb socket counterclockwise out of the light
- Pull the bulb off of the socket
- Push on the new bulb
- Twist the bulb clockwise into the light
- Reverse light bulb is HPC16w
- Bulb is a w21w
-
step 3 :Installing the Tail Light
- Insert the tail light into place
- Tighten the Phillips screws to the tail light
- Tighten the Phillips screws to the tail light
- Press the trim to the tail light
- Press the trim clip to the trim
Hi, I’m Mike from 1A Auto. We’ve been selling auto parts for over 30 years!
I'm going to open the lift gate, just grab underneath here, push the button, and it will automatically open. We're going to pull this trim piece off right here. We’re going to need to remove this clip. We’re going to use a trim piece tool to remove it. A little spot on the top get underneath here, pry up, and once it's out a little then that comes out completely. And we can grab this trim, bring it straight forward, and it pops right off, some clips in there.
We're going to take these Phillips head screws out: there's two right there, just use a Phillips head screwdriver pull those out. We're going to grab the tail light and grab underneath here the side. Pull it straight back. It might fight you a little bit. These little pieces go into these little slots.
To disconnect the wires, you’re going to push this connector right here down on the lock and pull it out. A little lock right here, push that down, and pull that one out. Then the bottom one the wiring harness is held in by this clip, pull that off, and then right here push this connector down. There’s a lock right at the top. Slide that out.
All right, we're going to remove this reverse light bulb. Just grab it, twist it to the left, and pull it out. This bulb is an HPC 16W. We'll remove this bulb, turn it to the left, and pull it out. You can grab the bulb from the socket and firmly pull it straight out. This bulb is a W21W.
To reinstall, we'll line it up with the slot, lock it in, and we'll reinstall it in the taillight assembly. We're going to line this bigger slot up with this slot right here and then turn it to the right. To install the bulb you're going to line the tabs up right here with the holes, the slot in the assembly, push it all the way down, and turn it to the right, lock it in.
Now we're going to connect the connectors. Take this connector and line it up, push it in, lock it in, and then this retainer that holds the wire, slide that on just like that. Take this green connector, line it up, lock it in, and then this connector will go way up here and lock it in make sure it's in there good.
We're going to line these tabs up with the holes in the body. Get those lined up good, and then firmly push the taillight on. Now we'll install our Phillips head screws with our Phillips head screwdriver. Get that one started and go down here. Start this one and we can snug it down. Not too tight it is in plastic so just snug.
All right we're going to align these little clips up with these holes on this trim piece and then push it on and lock it in. Get it underneath the weatherstripping right there and then we have this little clip, position that and then push it down. Then we'll close the lift gate.
Thanks for watching. Visit us at 1AAuto.com for quality auto parts, fast and free shipping, and the best customer service in the industry.

2010-16 Cadillac SRX Driver & Passenger Side 2 Piece Tail Light Set DIY Solutions LHT07915
Part Details:
- 2 Piece
- (1) Passenger Side Tail Light
- (1) Driver Side Tail Light

How to Replace Inner Tail Light 2011-16 Chevy Cruze
For one reason or another, you may find yourself needing to replace more than just a bulb. Broken or hazy tail lights reduce your visibility to other drivers. TRQ direct fit tail light assemblies are an affordable option that’s easy to do yourself! How to replace the inner tail light housing on your 2011-16 Chevy Cruze.

