How to Replace Throttle Position Sensor 1994-2002 Dodge Ram 1500
Created on: 2019-09-14
Watch this video to learn how to replace the throttle position sensor on your 96-02 Dodge Ram 1500. 1A Auto shows you how to do it yourself and save money!
-
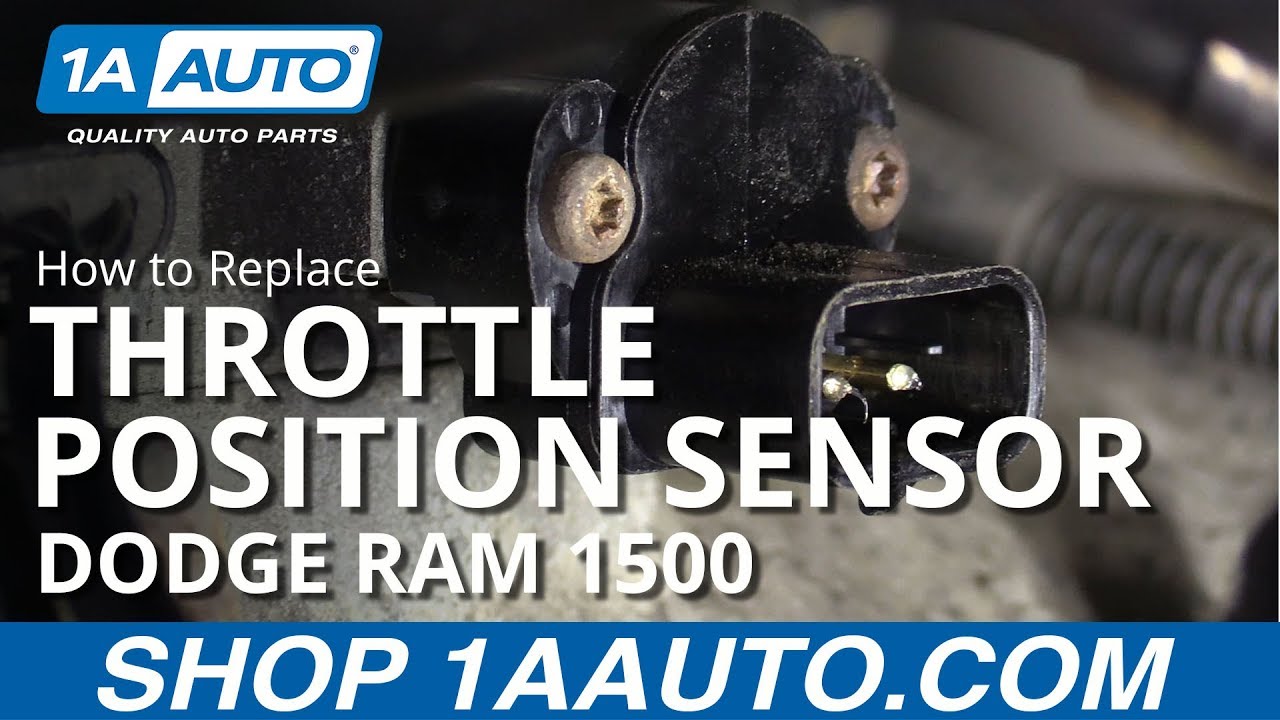
step 1 :Removing the Throttle Position Sensor
- Remove the throttle position sensor electrical connector
- Remove the two T25 screws
- Remove the throttle position sensor
-
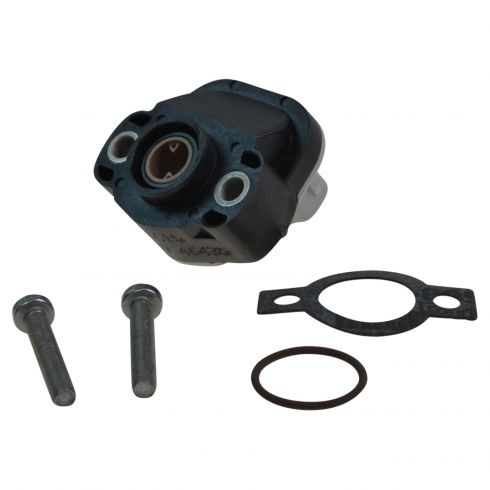
step 2 :Installing the Throttle Position Sensor
- Install the throttle position sensor
- Install the two T25 screws
- Connect the electrical connector
Tools needed
-
Socket Extensions
Ratchet
T25 Torx Socket
Hey friends. It's Len here at 1A Auto. Today we're going to be working on our 1996 Dodge Ram 1500. This is the 5.9 and I'm going to be showing you something very simple, how to replace the throttle position sensor. It's going to be super easy. I can do it and you can do it too. If you need this or any other part, you can always check us out at 1AAuto.com. Thanks.
Okay friends, so we're under the hood. We've got our light so we can see what's going on. This right here is where your throttle position sensor is. It's right underneath your air filter housing box where it connects down to the throttle body. As you can see, there's a hose that goes down to the breather up to this box. If you wanted to, you can remove it. It's going to make it much easier to see what we're dealing with for hardware. Pull it off of there. Set that aside.
Now we can see. We have our wiring and then we've got the sensor. We'll take off the wiring first. There's a little clip you do right here. You just pull down on that, you grab this, give it a little wiggle. We always take a peek at our electrical connectors, make sure they look good. If you see any funny colors or dirt or debris, you want to make sure you clean it out. This one looks like it's in great condition, so we're going to reuse it. We'll set it aside.
Now we're going to take out the mounting screws. These are Torx bits or Torx heads, I should say. So you're going to need a special tool, something like this. It looks like a star. It's kind of pretty, right? This one right here is a T25. They come in different sizes, this one's a 25. Let's go right in here like this. Turn your screws to the left. We're going to fully remove it and then we're going to do the same to the other one.
Alright, so we almost got the second one out here. There we go. So that's what the bolt looks like. It's the same thing as the other one. They're both the same. Grab our sensor, slide it right out. That's it right there.
Okay, so we've got our new sensor, going to bring it right over here. I'm going to start with it facing rearward or tilted to the rear. I'm going to bring it right in, line it up just like that. Take one of our bolts. You can start with whichever hole you'd like. Grab my other bolt, start that one in. Before I go ahead and tighten down either of them, I'll make sure they're both started. That's very important because if you tighten it down and you don't have them both started, you might have to shift the unit a little bit to get the holes to line up, in which case you'll have to loosen it back up and it's just a whole extra step for something that's as simple as, you know, just taking the time to start both bolts in. I'm going to bring these so they're bottomed out and then we'll snug them up with a ratchet.
Alright, both of these are almost all the way in, so we're just going to continue with the ratchet here and snug them right up. Essentially, once this bottoms out, which it just did, I'm only going to use thumb pressure just like I have this right now, just give it a teeny bit more, but that's it. You don't need to go super tight and really try to refit down. There's no point in that. All you're going to do is potentially crack your plastic for your sensor and you're going to cause issues down the road. You hear any cracking, then obviously you went too far, in which case you'd want to replace the sensor again. This thing tight here hopefully. A Longer extension might've been nice. Come on, baby. There we go.
Okay, this is bottomed out. Let's give it a teeny bit more. Give it a nice little shake. We know that that's definitely installed completely. Take our wiring, we already checked it. Slide it right in. That feels great. Give it a nice little tug. Make sure it doesn't come all the way out. So now we'll just reconnect our hose. That just goes right to the back of this box right here. It should connect on there. Push it up as far as you can so it's bottomed out with the box. Make sure you didn't pull it off of the breather. That looks great. That's good to go. Easy peasy.
Thanks for watching. Visit 1AAuto.com, your place for DIY auto repairs for great parts, great service, and more content.
Shop Products


How to Replace Throttle Position Sensor 1996-2003 Chevy Tahoe
Replace the throttle position sensor yourself, with the help of 1A Auto in this instructional video
