How to Replace Tie Rod 1996-2001 Nissan Altima
Created on: 2014-01-13
How to repair, install, fix, change or replace a broken, busted, bad, or damaged tie rodon Nissan Altima, years 96, 97, 98, 99, 00, and 01.
-
step 1 :Diagnose
- Raise and secure your vehicle.
- Grab your wheel on both sides and wiggle the wheel.
- If the spindle and wheel are moving, but not the tie rod, the tie rod needs to be replaced.
-
step 2 :Remove the wheel
- Remove the lug nuts.
- If you don’t have air tools, lower the vehicle, loosen the lug nuts and raise and secure the vehicle once again.
- Remove the lug nuts.
- Take the wheel off and set it aside, preferably under a jack point on the car for added insurance should your jack stand fail.
-
step 3 :Remove the tie rod
- Use a measuring tape to measure your tie rod to help you make a rough alignment when you install the new tie rod.
- Remove the cotter pin in the castle nut.
- Use a 19 mm wrench, loosen the nut between the inner and outer tie rods.
- Remove the 18 mm castle nut with a socket and ratchet.
- Use a hammer to loosen up the outer tie rod.
- Remove the outer tie rod by unscrewing it from the inner tie rod.
-
step 4 :install the new outer tie rod
- Install the grease fitting onto the outer tie rod
- Twist your new outer tie rod in place.
- Insert the end of the outer tie rod into the spindle.
- Match the tie rod up to your prior measurements using your measuring tape.
- Tighten up the castle nut with your 18 mm socket and ratchet and install the cotter pin.
- Tighten up the 19 mm nut with your wrench.
- Use a grease gun to fill the grease cap.
-
step 5 :Replace the wheel
- Put the wheel on and put the lug nuts on and hand tighten them.
- Lower the vehicle and torque the lug nuts in a star pattern to 100 ft lbs.
Tools needed
-
20mm Socket
21mm Socket
Measuring Tape
Torque Wrench
Jack Stands
19mm Wrench
18mm Socket
7mm Socket
Ratchet
Floor Jack
Needle nose pliers
Grease Gun
Brought to you by 1AAuto.com, your source for quality replacement parts and the best service on the Internet. Hi, I'm Don from 1A Auto. I hope this how-to video helps you out and the next time you need a part for your vehicle think of 1AAuto.com. Thanks. In this video, we show you how to the replace an outer tie rod on this 2000 Nissan Altima and it's the same part and process on these vehicles from '96 to 2001 and we show you on the passenger's side but it's the same procedure on the driver's side.
The items you'll need for this is a new outer tie rod from 1AAuto.com, a 7 mm, 18 mm, 20 mm and 21 mm sockets and ratchet, 19mm wrench, tape measure, pliers, grease gun, torque wrench and jack and jack stands. Before we show this procedure, Don's going to show you how you can diagnose whether or not you need to replace your outer tie rod. Here we're going to show you how to diagnose a worn out outer tie rod. This vehicle actually has one. What you're going to want to do is get your car up on a jack and jack stands and once it's safely supported, you're going to grab your wheel on both sides and do quick back and forth and you can hear there is just a little bit of a thud here and there's some looseness so you can feel that the tires moving back and forth but everything is connected to is not.
Now we're going to show you a close up. We're going to keep going back and forth here and you can see just ever so slightly that the spindle and wheel assembly is moving but the tie rod is not. You can even put your hand on it and you can feel that there's a click. This needs to be replaced. The first thing you're going to need to do is remove your wheel cover and those are 21 mm and then your lug nuts are going to be 20mm lug nuts and just go ahead and remove all of those. If you don't have air powered tools than you're going to need to loosen the lug nuts up while the vehicle is on the ground, raise the vehicle and remove the lug nuts the rest of the way. Once those are removed, you can pull your wheel right off. Now using a tape measure, you want to measure from that boot on your inner tie rod to a specific point on your outer tie rod and remember that length.
Then using a 19 mm wrench, loosen up the nut in between the inner and outer tie rods. Then use pliers to remove this cotter pin, just bend it and pull it out. Then remove this 18 mm castle nut. Next you just want to hit with a hammer on the knuckle here to loosen up the outer tie rod. Then you just lift it up and out. Then you just want to twist the outer tie rod until it comes off the inner tie rod. On the left is the old outer tie rod. On the right is the new one from 1A Auto. You can see that they're identical, same length, same shape and they'll mount and work exactly the same. Now twist in the grease fitting and just tighten it up, it's 7 mm. Twist your new outer tie rod into place. Then lift it up and put it down into the knuckle and replace that castle nut.
Then you want to tighten it but make sure that the whole lines up so you can get your cotter pin through and then push your cotter pin and use pliers to make the ends of it go in opposite directions to hold it into place. Use your 19 mm wrench to tighten up that nut. Then use your tape measure to measure and make sure that it's the right length. You can see that ours is. If it wasn't then you would want to loosen that back up and twist it back further. Once you have it all set, use your grease gun on the grease fitting to just fill it up. We'll fast forward as Don just replaces the wheel and the lug nuts and you want to tighten them preliminarily and then lower the vehicle and tighten them the rest of the way and then you want to torque the bolts in a crossing pattern to 100 foot pounds. Just replace your wheel cover. Then you're all set.
We hope this video helps you out. Brought to you by www.1AAuto.com, your source for quality replacement parts and the best service on the Internet. Please feel free to call us toll free 888-844-3393. We're the company that's here for you on the Internet and in person.
Shop Products


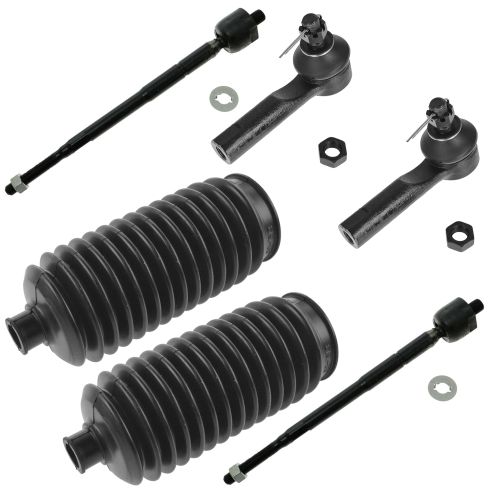
1998-01 Nissan Altima Front Driver & Passenger Side Inner & Outer 6 Piece Steering Kit TRQ PSA55398
Part Details:
- 6 Piece
- (2) Front Steering Rack & Pinion Bellows
- (2) Front Outer Tie Rods
- (2) Front Inner Tie Rods

How to Replace Front Inner Tie Rod 2000-06 GMC Yukon
Watch this video to learn how to install new TRQ inner tie rods on your 2000-06 GMC Yukon.
